Working with Views
Table of contents:
- About Views
- Create a View
- Customize a View
- Share a View to your members
- Lock a View
- Publish a View
- Export data in a View
About Views
Views determine which data in a Grid is displayed and how. They also enable users to control access to content. Views represent a way to display all or a subset of data in a customized format for different use cases. For example, different Views can be created for translators, LQA, or external contractors within one Grid.
Create, customize, manage Collaborative Views can only be done by Admin users or users whose Custom Roles are granted Manage projects privileges. Learn more in this article: Permission overview.
Create a View
By default, when a new Grid is created, a Default View is also generated which shows you all the data in the Grid. This View cannot be deleted, but you can control access to it.
To create a new View:
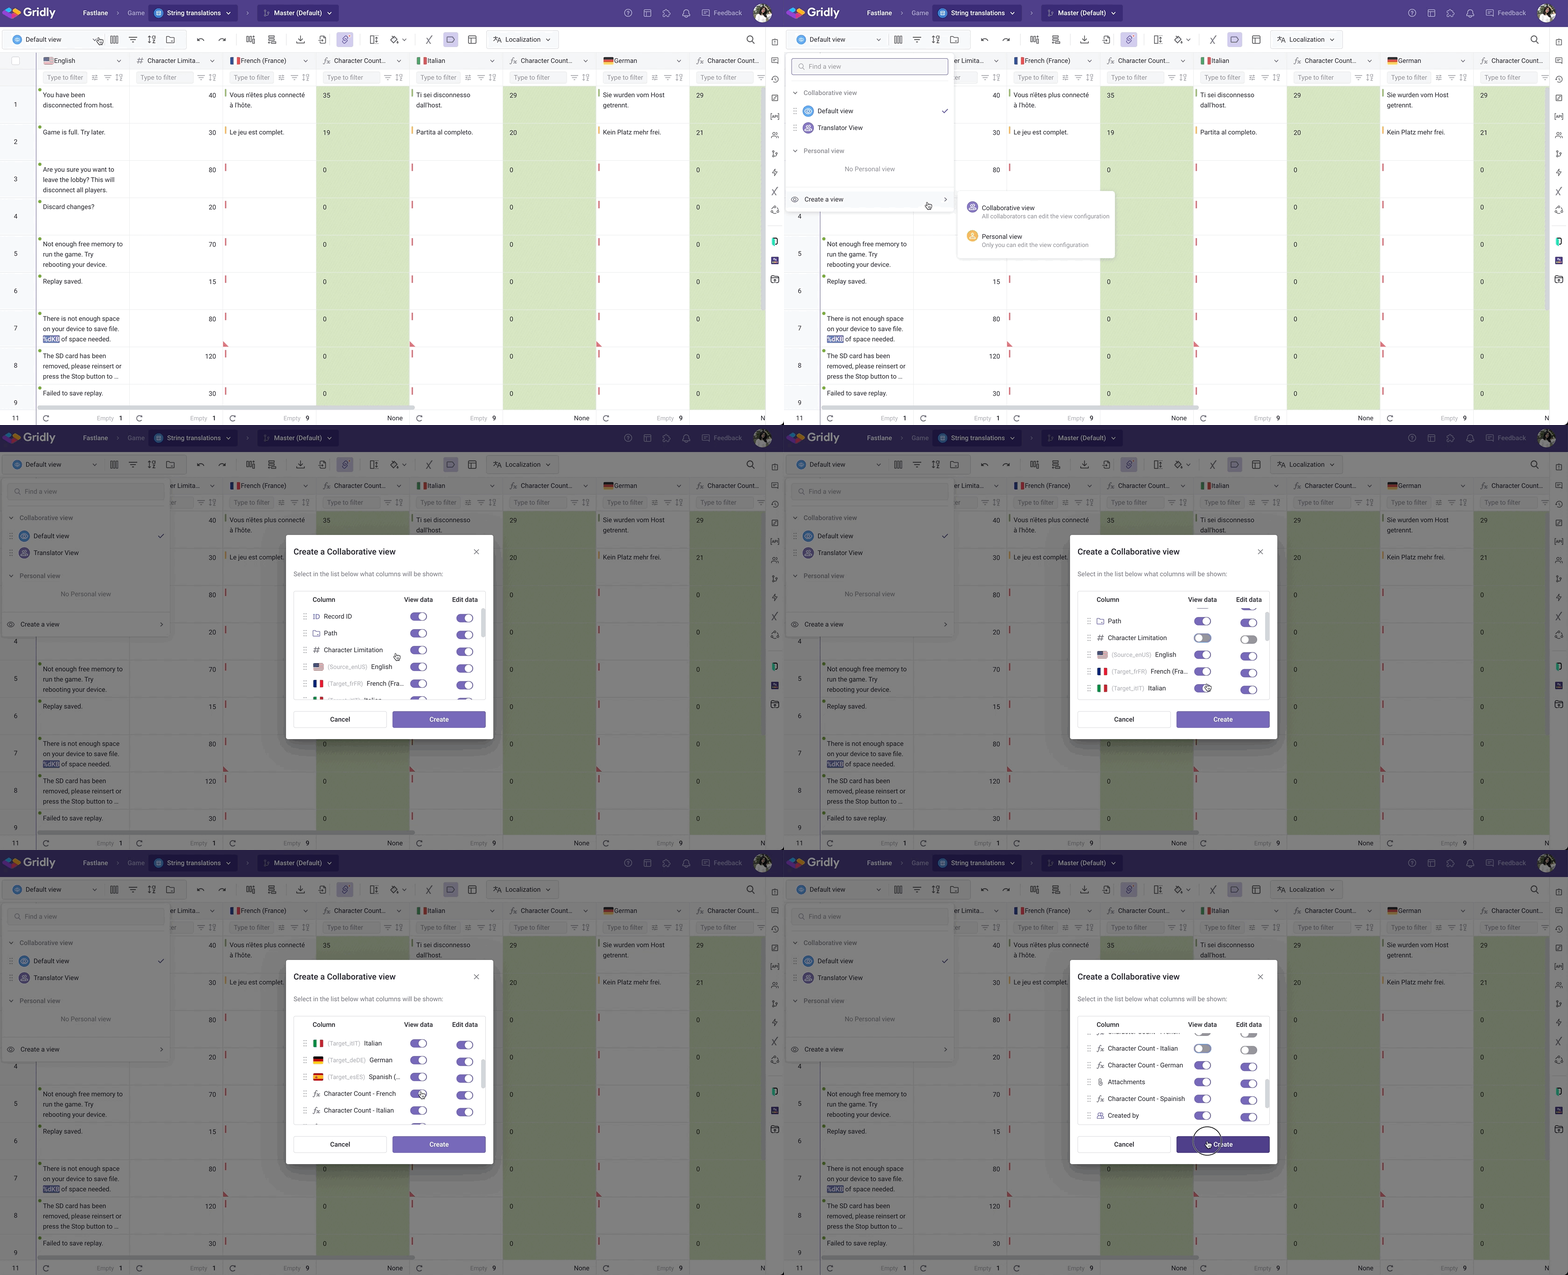
- Open the Grid and click on the View name in the top-left corner.
- Click Create a view.
- Select the type of View to add:
- Collaborative View: Your team members can see the View, and those with permissions can edit the View.
- Personal View: Only you can open and edit the View.
- Select which columns you want to show in your Views. Click the toggle to select whether to:
- View data: show/hide a column.
- Edit data: be able to edit cell content in a column.
- Click Create.

Customize a View
Now you've created a View, you can customize it to your needs using these functions located next to the View name:

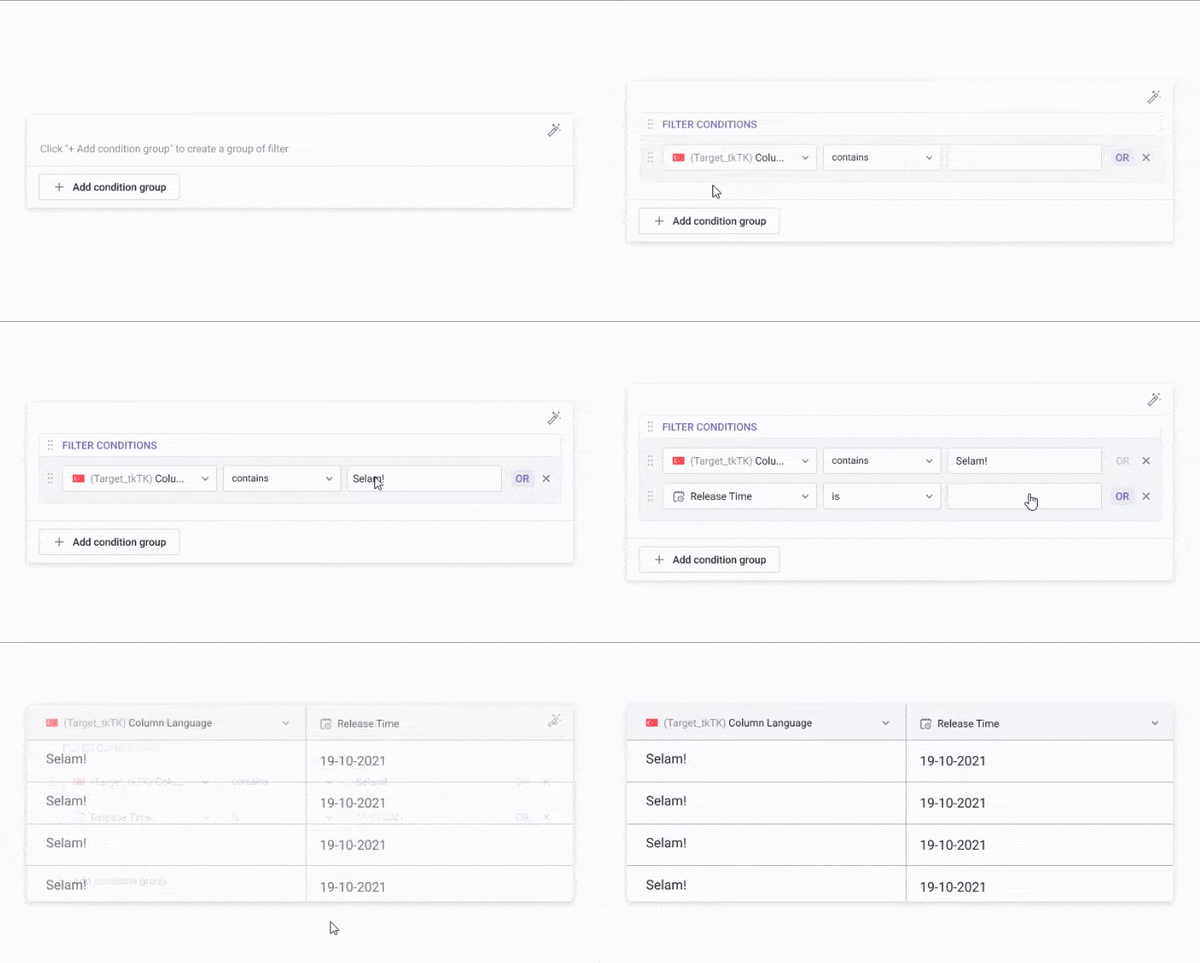
Filter out records with conditions using View filters
- Click
 to open the View filter.
 - Click + Add condition group.
- Add the conditions.

Learn how to use View filters here: View filters.
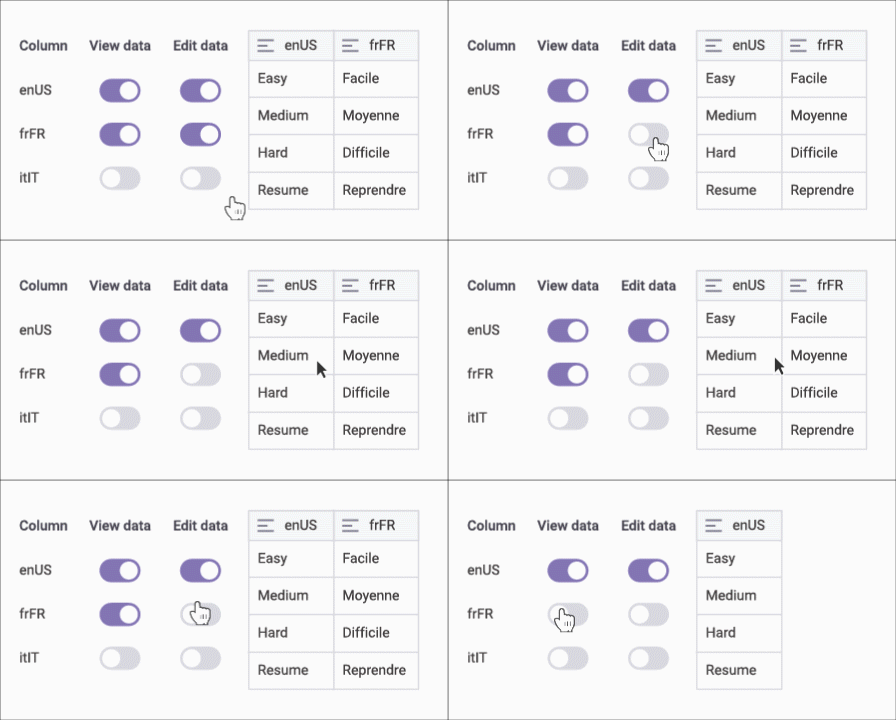
Prevent other members from editing content in columns
You can lock a column to make some fields uneditable.
- Click
 to open Manage columns.
 - Find the column you want to lock.
- Toggle off Edit data to prevent anyone from editing its data.

Learn how to Organize columns here: Organizing columns.
Sort data
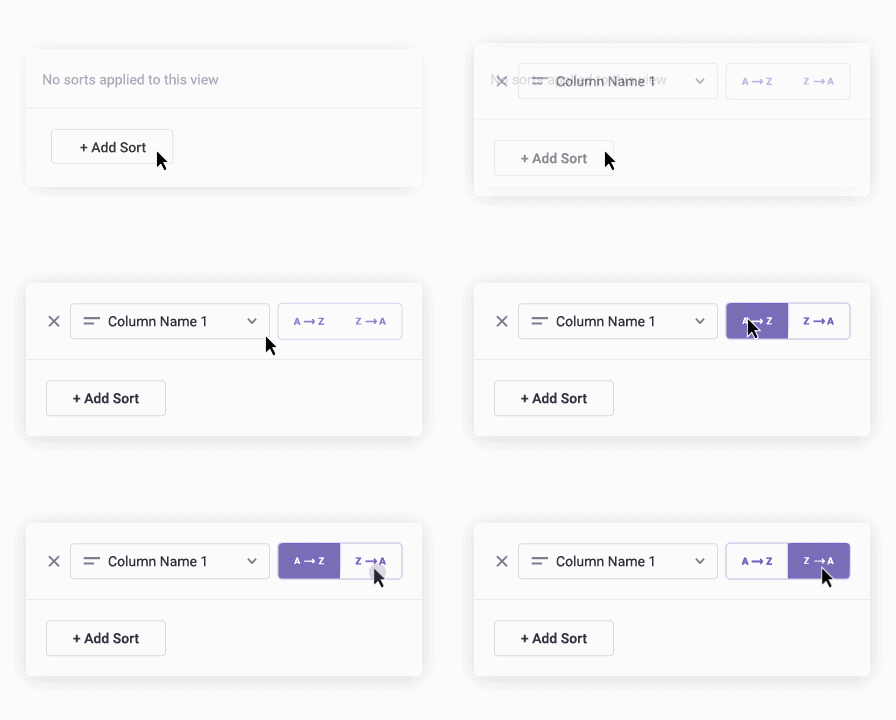
You can Sort your record by one or multiple columns from A→Z or vice versa using Sort.
- Click
 to open Sort.
 - Click + Add Sort.
- Select a column from the drop-down list.
- Select your sorting method.

Share a View to your members
Only Owners, Admins, and custom Company roles with Manage CMS projects privilege can share Views. Learn more in this article: Permission overview.
- Click
 on the right-hand side toolbar to open Share view.
- You'll see a list of users with whom the view has been shared. There are two ways to share a view with users:
- Share to specific users: Select the user(s) from the user section in the dropdown list.
- Share to groups: A group consists of a list of users. This is useful when you want to reuse the list of similar users for permission management. Select the group(s) from the group section in the dropdown list. Learn more in this article: Groups.
- Once done, click Share.

Update View name and description
- Open the list of Views by clicking on the name of the current View.
- Click on the
 icon next to the View you want to lock and select Edit view info.
 - Edit View name and description.
- Click Save.

Lock a View
Locking a View makes it editable only to selected members.
- Open the list of Views by clicking on the name of the current View.
- Click on the
 icon next to the View you want to lock and select Edit view info.
 - Under Lock this view section, select an option:
- Unlocked: Everyone with access to the View can edit it.
- Locked: Only selected members can edit. The View becomes read-only for everyone else. Select the members with editing privilege by clicking on the dropdown menu. Selected members can also edit the View via using their personal API keys.
- Click Save.
You can use company API keys to edit locked Views.

Publish a View
Publishing a View creates a read-only version of it which can be accessed using a shareable link. You can also embed it into webpages.
- Click
 on the right-hand side toolbar to open Share view.
 - Select the Publish View tab and click Create Shareable Link.

- Gridly will generate the shareable link and the embed HTML code for your View.

- To allow those with access to see Grid history, toggle on the Include Grid history in this view switch.
- To unpublish the View, click Disable Shareable Link.
- To get a new shareable link, click Generate new link. The previous link will become invalid.
You can export the data included in a View.
- Click
 on the toolbar to export data, or
  to export data if the View contains translation columns and Dependencies.
 - Confirm the options and click Export.
Check the detailed tutorial for Localization Export here: Localization Export and Import in Grid.
Once a record is deleted in a View, it is deleted completely from the Grid. This record will not be available in other Views of that Grid. This is true also for columns — deleting them in a View means deleting them entirely from a Grid.
If you want to create private views that can only be seen by you, you might be interested in this article: Personal Views.
