When creating an Automation with the “Asana Task Creation” action, it creates a task in Asana whenever the Automation runs successfully. Along with the Jira integration, now you can use Gridly with Asana to streamline how you update tasks.
If you are not familiar with creating an Automation, please view the following article: Creating an Automation.
Setup
After creating the Automation, you need to configure the trigger and action. In this example, we’ll create an Automation that creates a task in Asana whenever a ticket is created in Gridly.
Add “Ticket created” trigger
Click Add Trigger, then select “Ticket created” from the dropdown list.
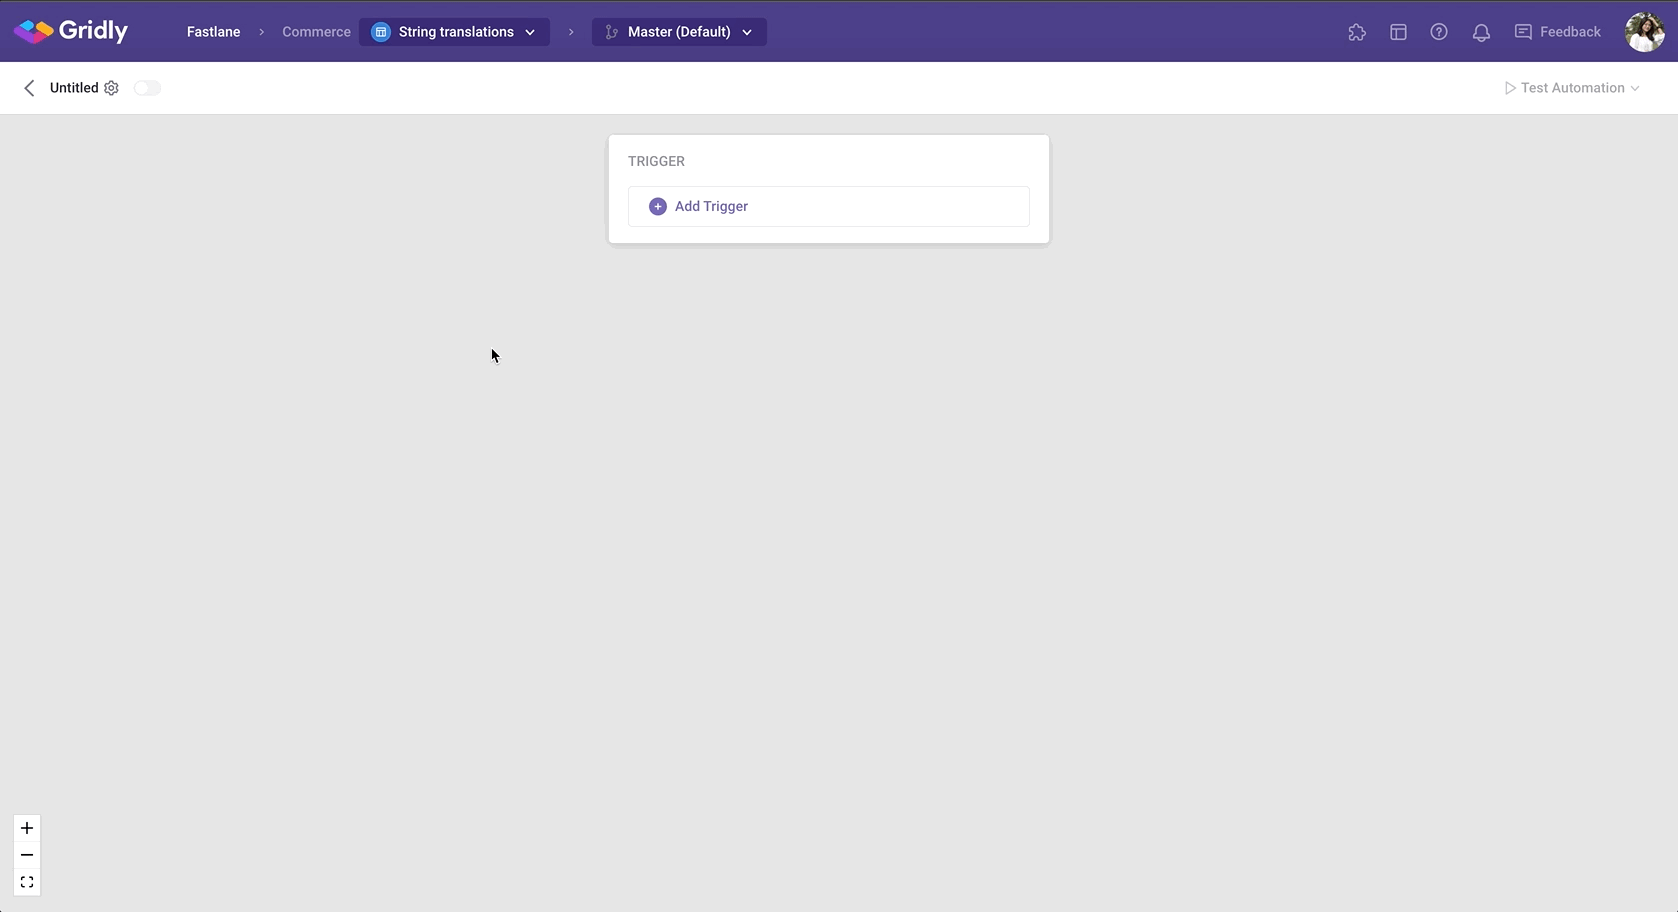
Add “Asana Task Creation” action
- Click Add Step and select Asana Task Creation in the list of actions.
-
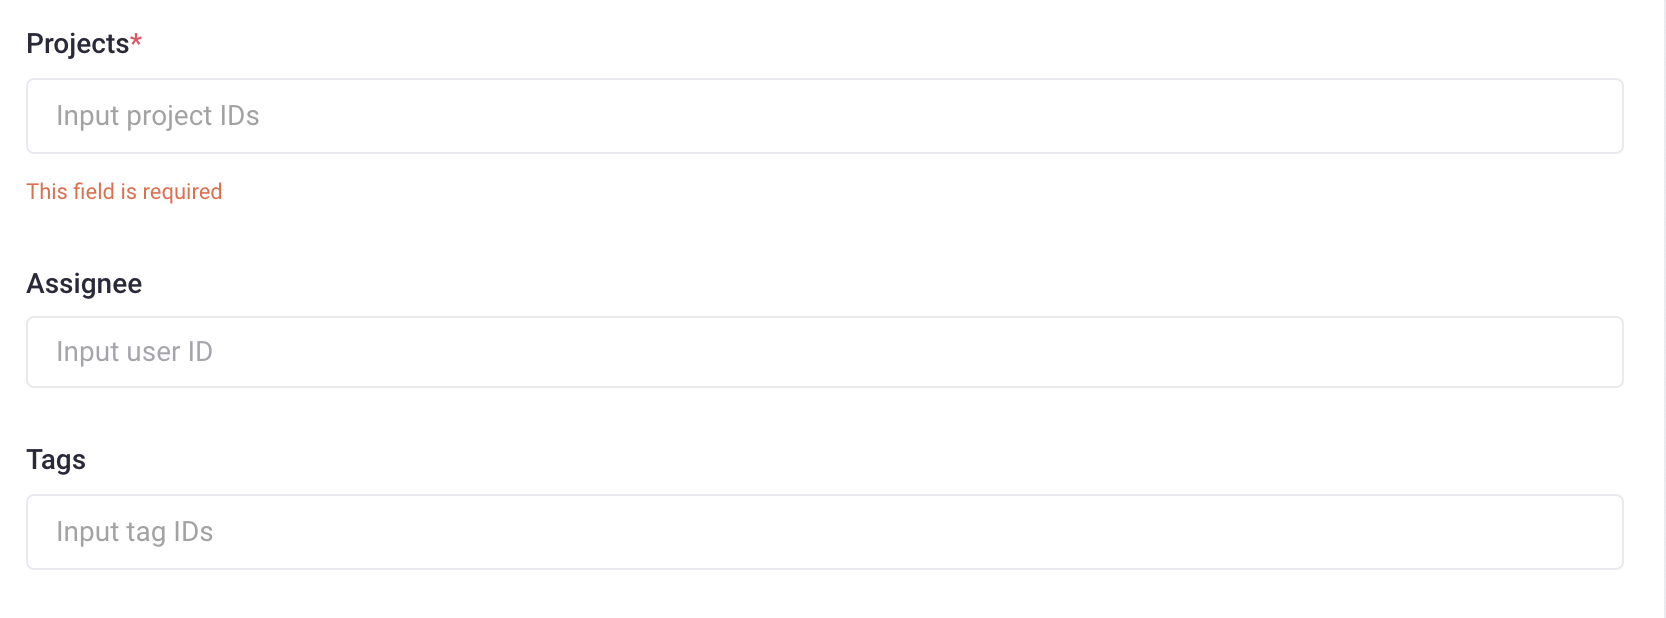
Input the following fields using your information in Asana:
-
Personal access token. Follow the documentation here to find yours and paste it into this field.

- Projects: Your project ID is the combination of numbers in your project's URL (it should look like: https://app.asana.com/0/projectID/list ).
- Assignee (optional): Assignee ID is the combination of numbers in a member profile’s URL (it should look like: https://app.asana.com/0/profile/profileID). Add Assignee ID when you want all the tickets from Gridly will be assigned to this member.
-
Tags (optional): Tag ID is the combination of numbers in a tag’s URL (it should look like: https://app.asana.com/0/tagID/list).
-
Personal access token. Follow the documentation here to find yours and paste it into this field.
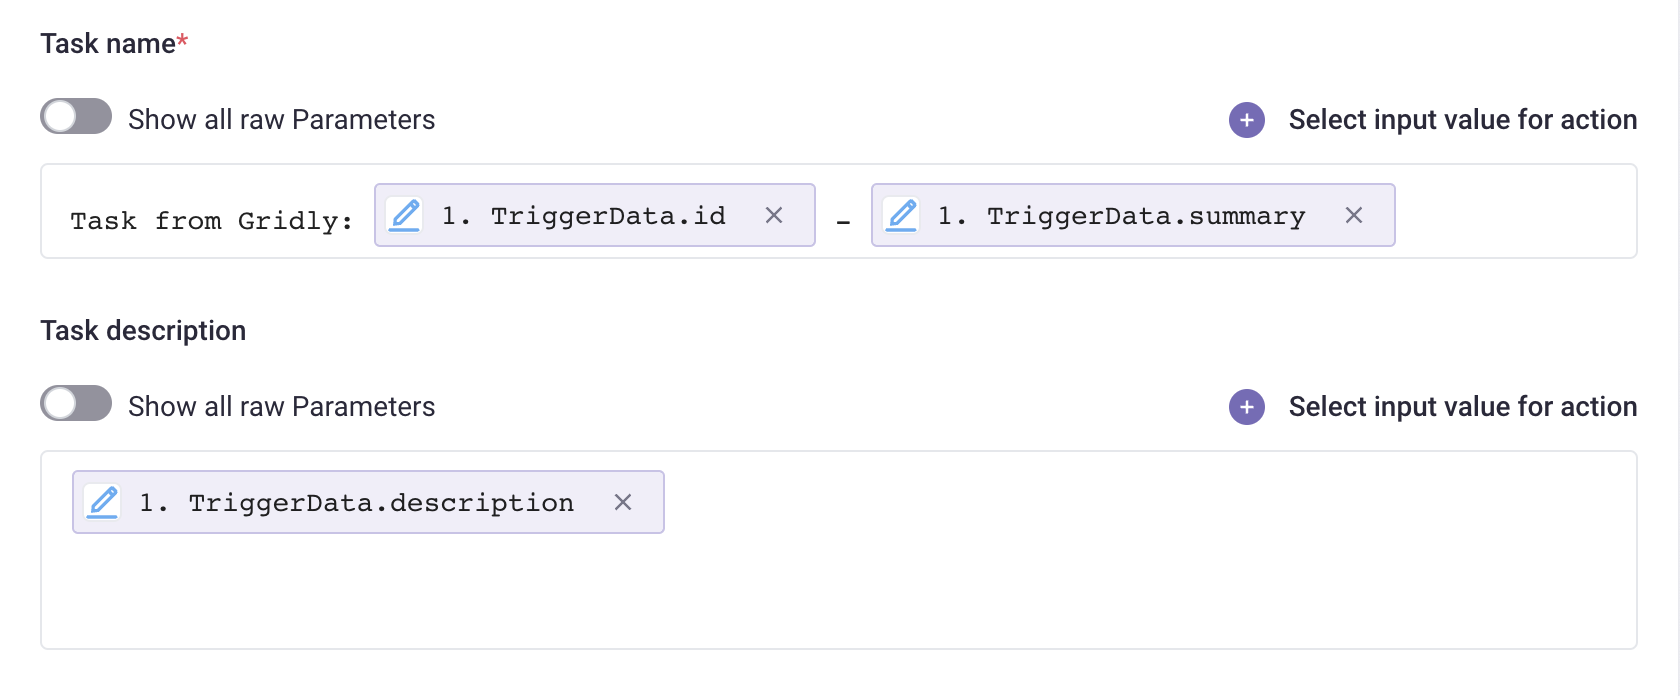
- Customize the details for the new Asana task you’ll be creating. The fields you can customize include:
- Task name, Task description: click Select input value for action next to the field name and customize how you want to name and describe your Tasks in Asana with the data from Gridly.
In this example, we’ll put the Asana Task name as “Task from Gridly: Task ID - Task Name” using Ticket ID and Ticket Summary from Gridly. For Task description, we’ll use the Ticket Description:
Test Automation
- Switch the toggle on to turn on the Automation
- Click Test Automation. If your Automation is not turned on, Gridly will require that you turn on the Automation in the resulting pop-up message. Click on the toggle to turn on and select Test again.
- (Optional) Change the name of your Automation by clicking
on the top-right corner.
To view all articles related to Automations, click here.