The "Send a Slack message" automation action sends a message to your Slack channels when specific events occur in your Grid. Use this to keep stakeholders informed about project changes without manual updates.
If you are not familiar with creating an Automation, please view the following article: Creating an Automation.
Not the Automation action you need? Check out the full list of all Automation actions in Gridly.
Setup
After creating the Automation, you need to configure the trigger and action. In this example, we’ll create an Automation that sends a message to a Slack channel when a string in the source language column is edited.
Add trigger
- Click Add Trigger, then select Record updated from the dropdown list.
- In Watching columns field, select the column you want to trigger this automation. We'll select the Source language column (Source_enUS) for this example.

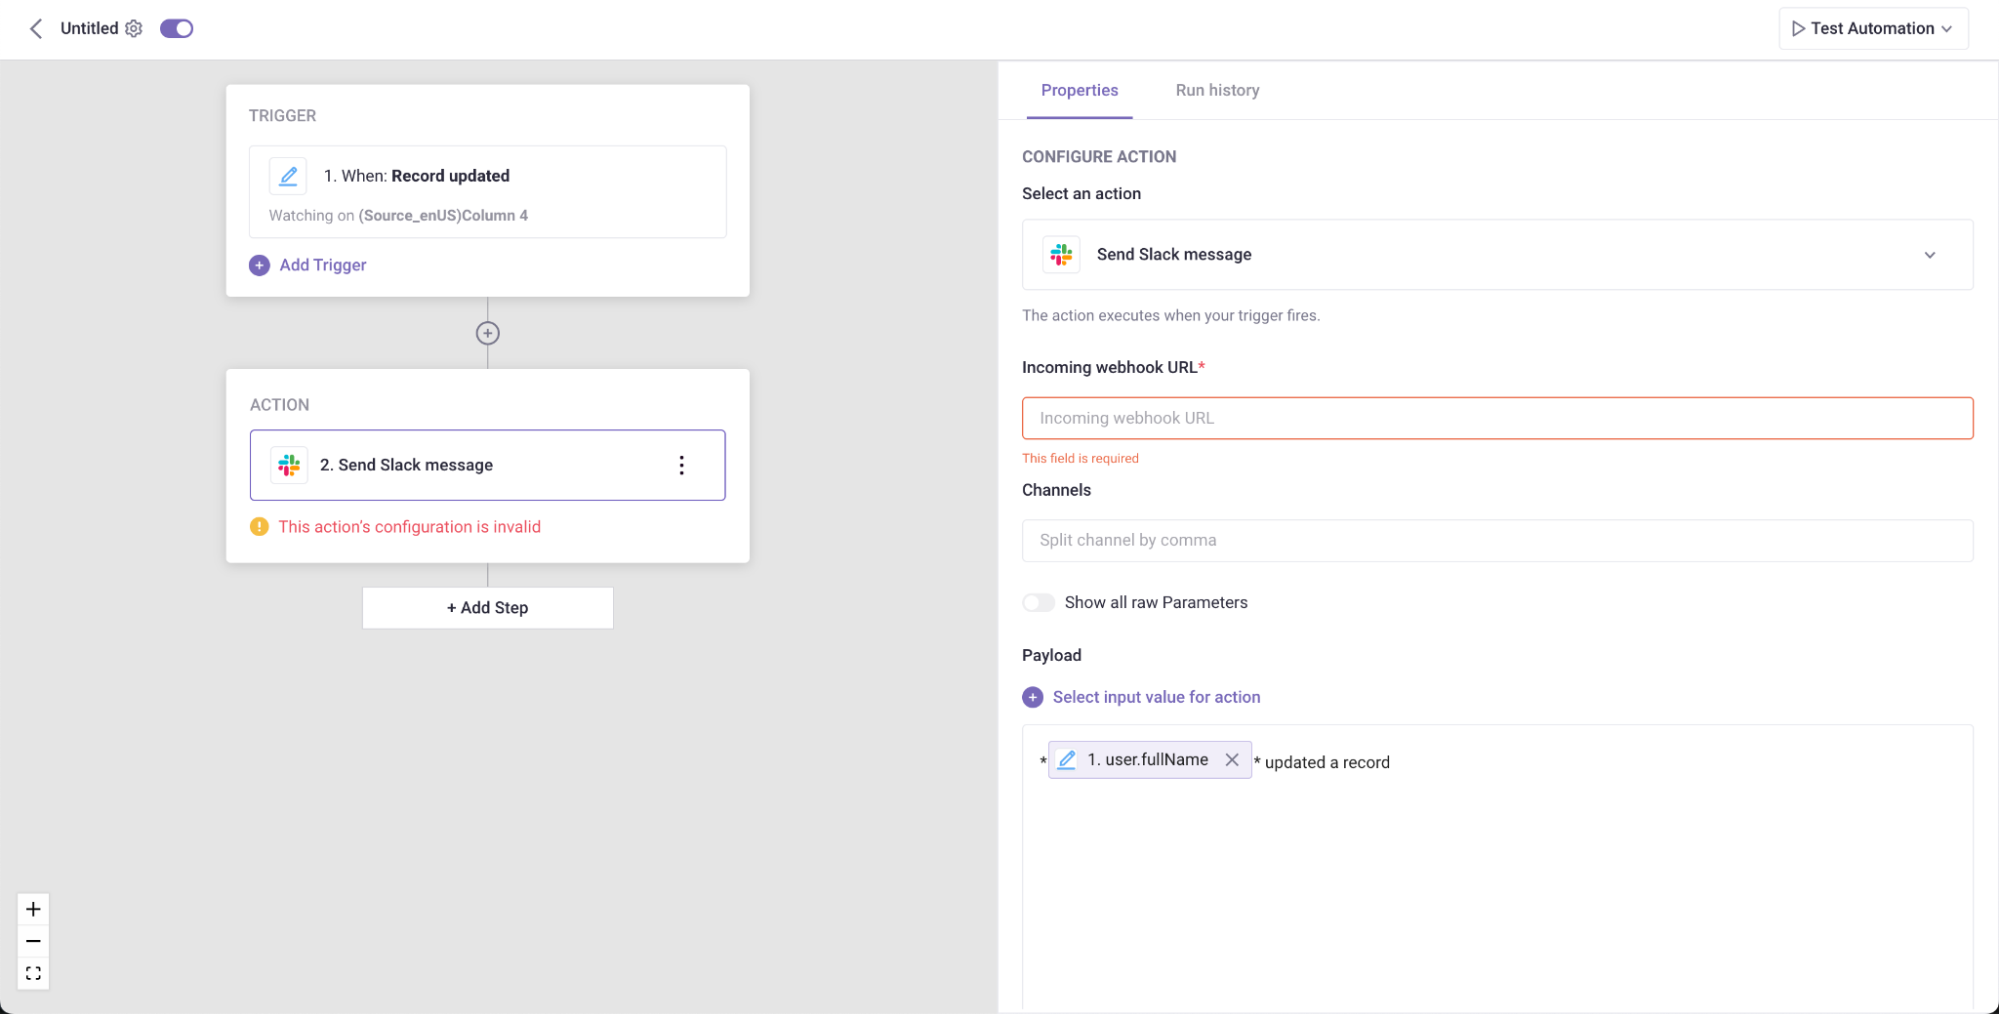
Add Send Slack message action
- Click Add Step and select Send Slack message from the list of actions.
- Input your Incoming webhook URL:
- Input Channels (optional): For Slack Incoming Webhooks users, enter channel names separated by commas to send messages to multiple public channels.
-
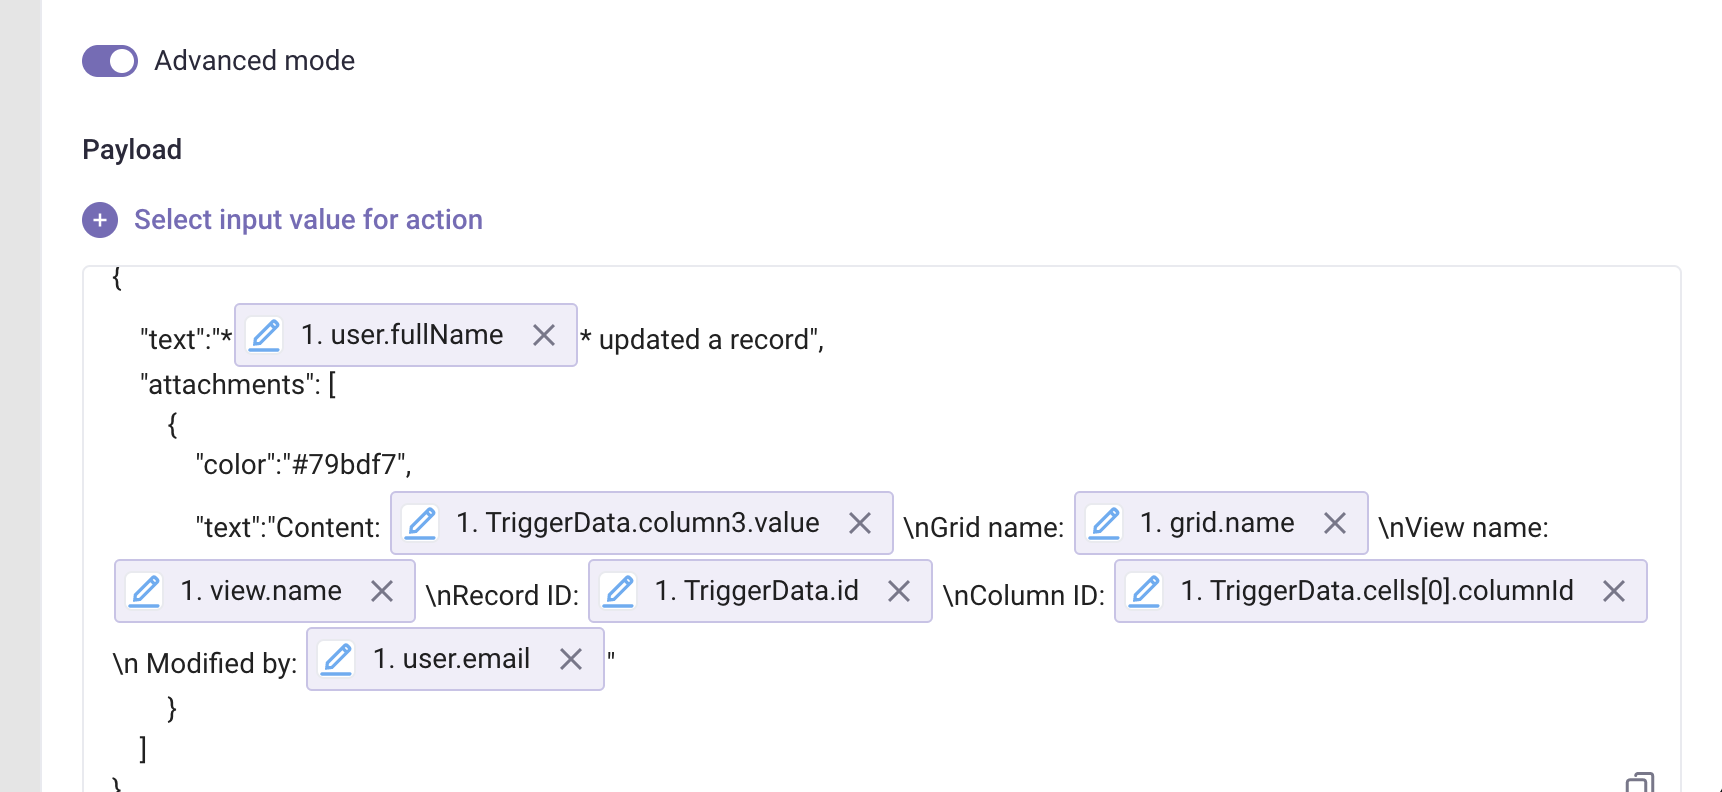
Customize Payload: The payload controls how your message appears in Slack. To customize it:
- Toggle Advanced mode to enable custom formatting.
- Use Slack's Block Kit Builder to design advanced message layouts.
Example payload:
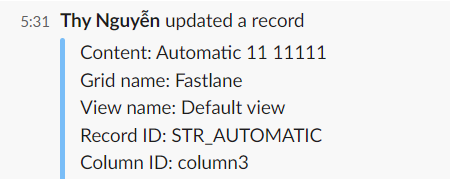
Automated Slack message from example payload:
Test your Automation
- Turn on the Automation using the switch next to Automation name.
- Click Test Automation. If your Automation is not turned on, Gridly will require you to turn it on in a pop-up message.