When creating an Automation with the “Jira Ticket Creation” action, it creates a ticket in Jira Cloud whenever the Automation runs successfully. Jira integration helps streamline cooperation with stakeholders.
If you are not familiar with creating an Automation, please view the following article: Creating an Automation.
Setup
After creating the Automation, you need to configure the trigger and action. In this example, we’ll create an Automation that creates a ticket in Jira Cloud whenever a ticket is created in Gridly.
Add “Ticket created” trigger
- Click Add Trigger, then select “Ticket created” from the dropdown list.
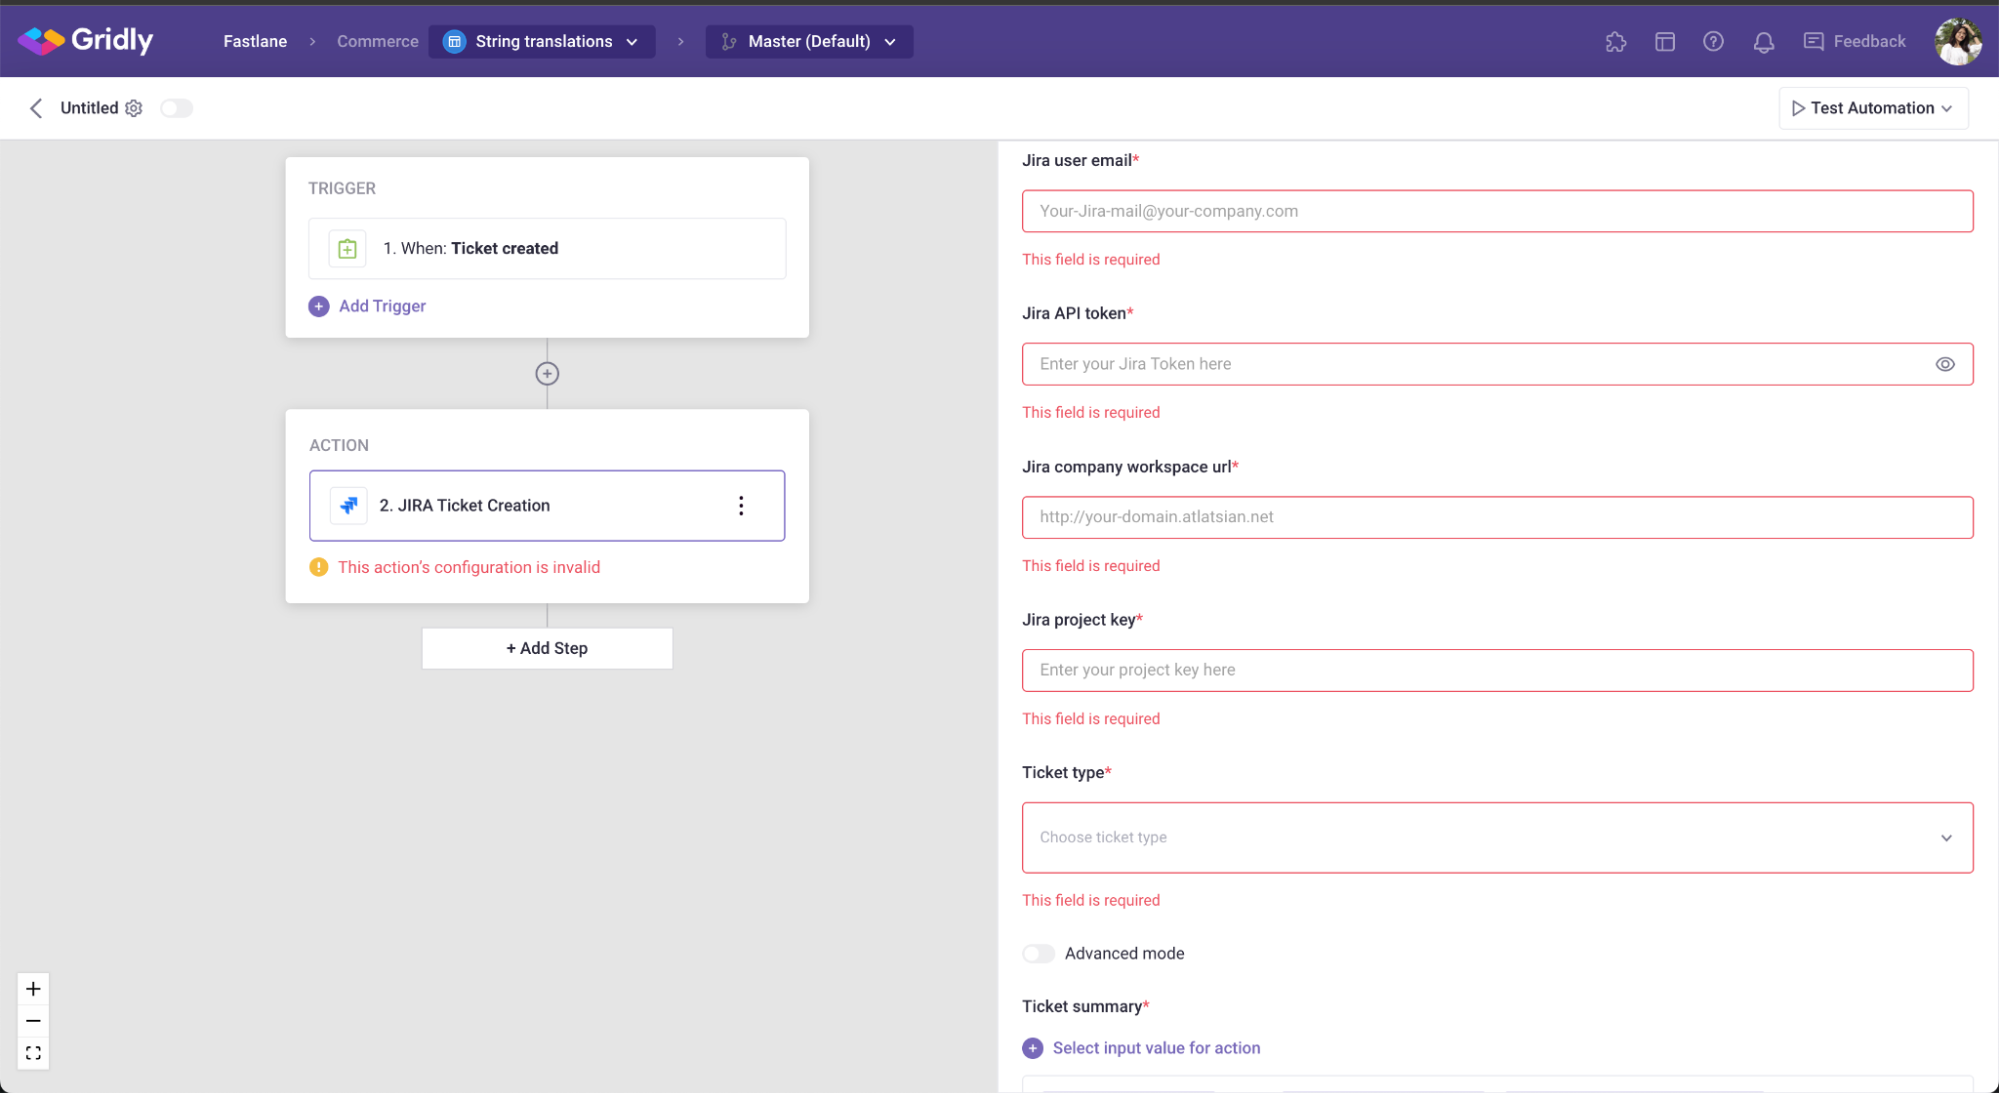
Add “JIRA Ticket Creation” action
- Click Add Step and select Jira Ticket Creation in the list of actions.
- Input the following fields using your information in Jira:
- Jira user email: your Jira email address.
- Jira API token: Log in to https://id.atlassian.com/manage-profile/security/api-tokens and get the API token here.
- Jira company workspace URL: Open Jira in your web browser and copy the address from your browser's address bar.
- Jira project key: The Project Key is the prefix of the issue number. In the example of JRA-123, the "JRA" portion of the issue number is the Project Key.
- Select the type of the ticket from Gridly that will be sent to Jira: There are 3 ticket types available: Task, User Story, Bug.
- Customize the details for the new Jira issue you’ll be creating. The fields you can customize include:
- Ticket Summary
- Ticket Description
Test Automation
- Switch the toggle on to turn on the Automation
- Click Test Automation. If your Automation is not turned on, Gridly will require that you turn on the Automation in the resulting pop-up message. Click on the toggle to turn on and select Test again.
- (Optional) Change the name of your Automation by clicking
on the top-right corner.
To view all articles related to Automations, click here.