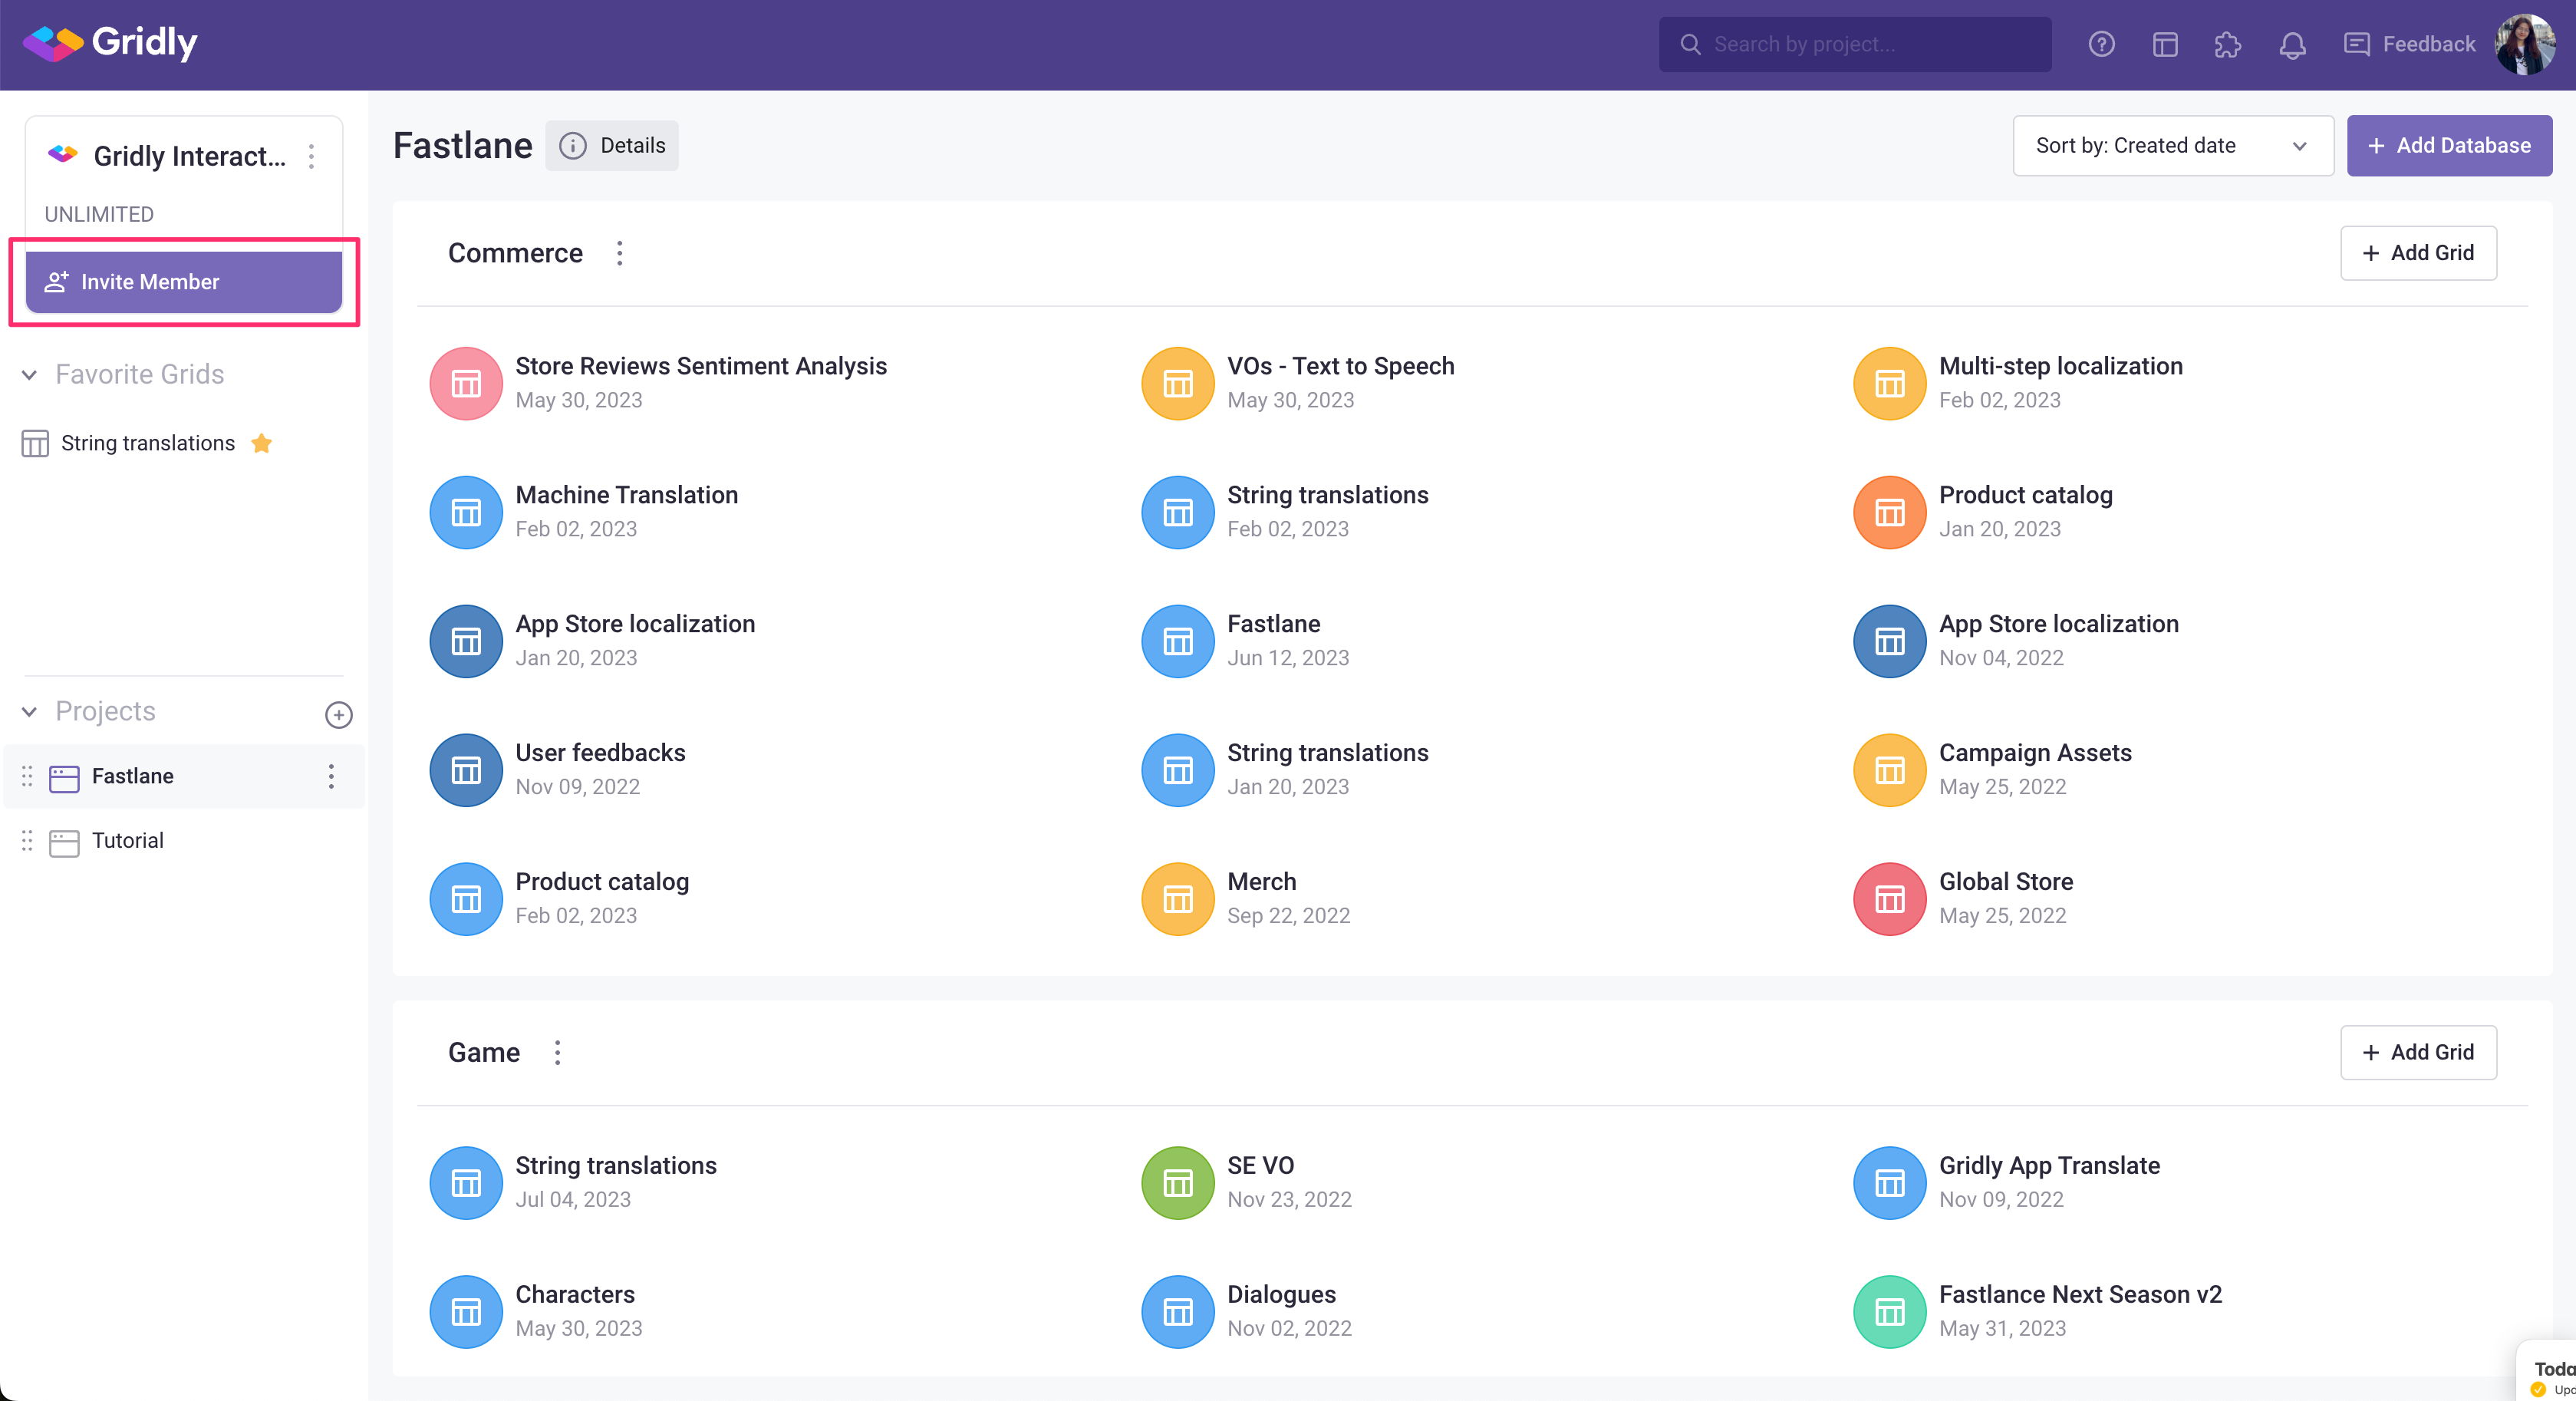
Invite members
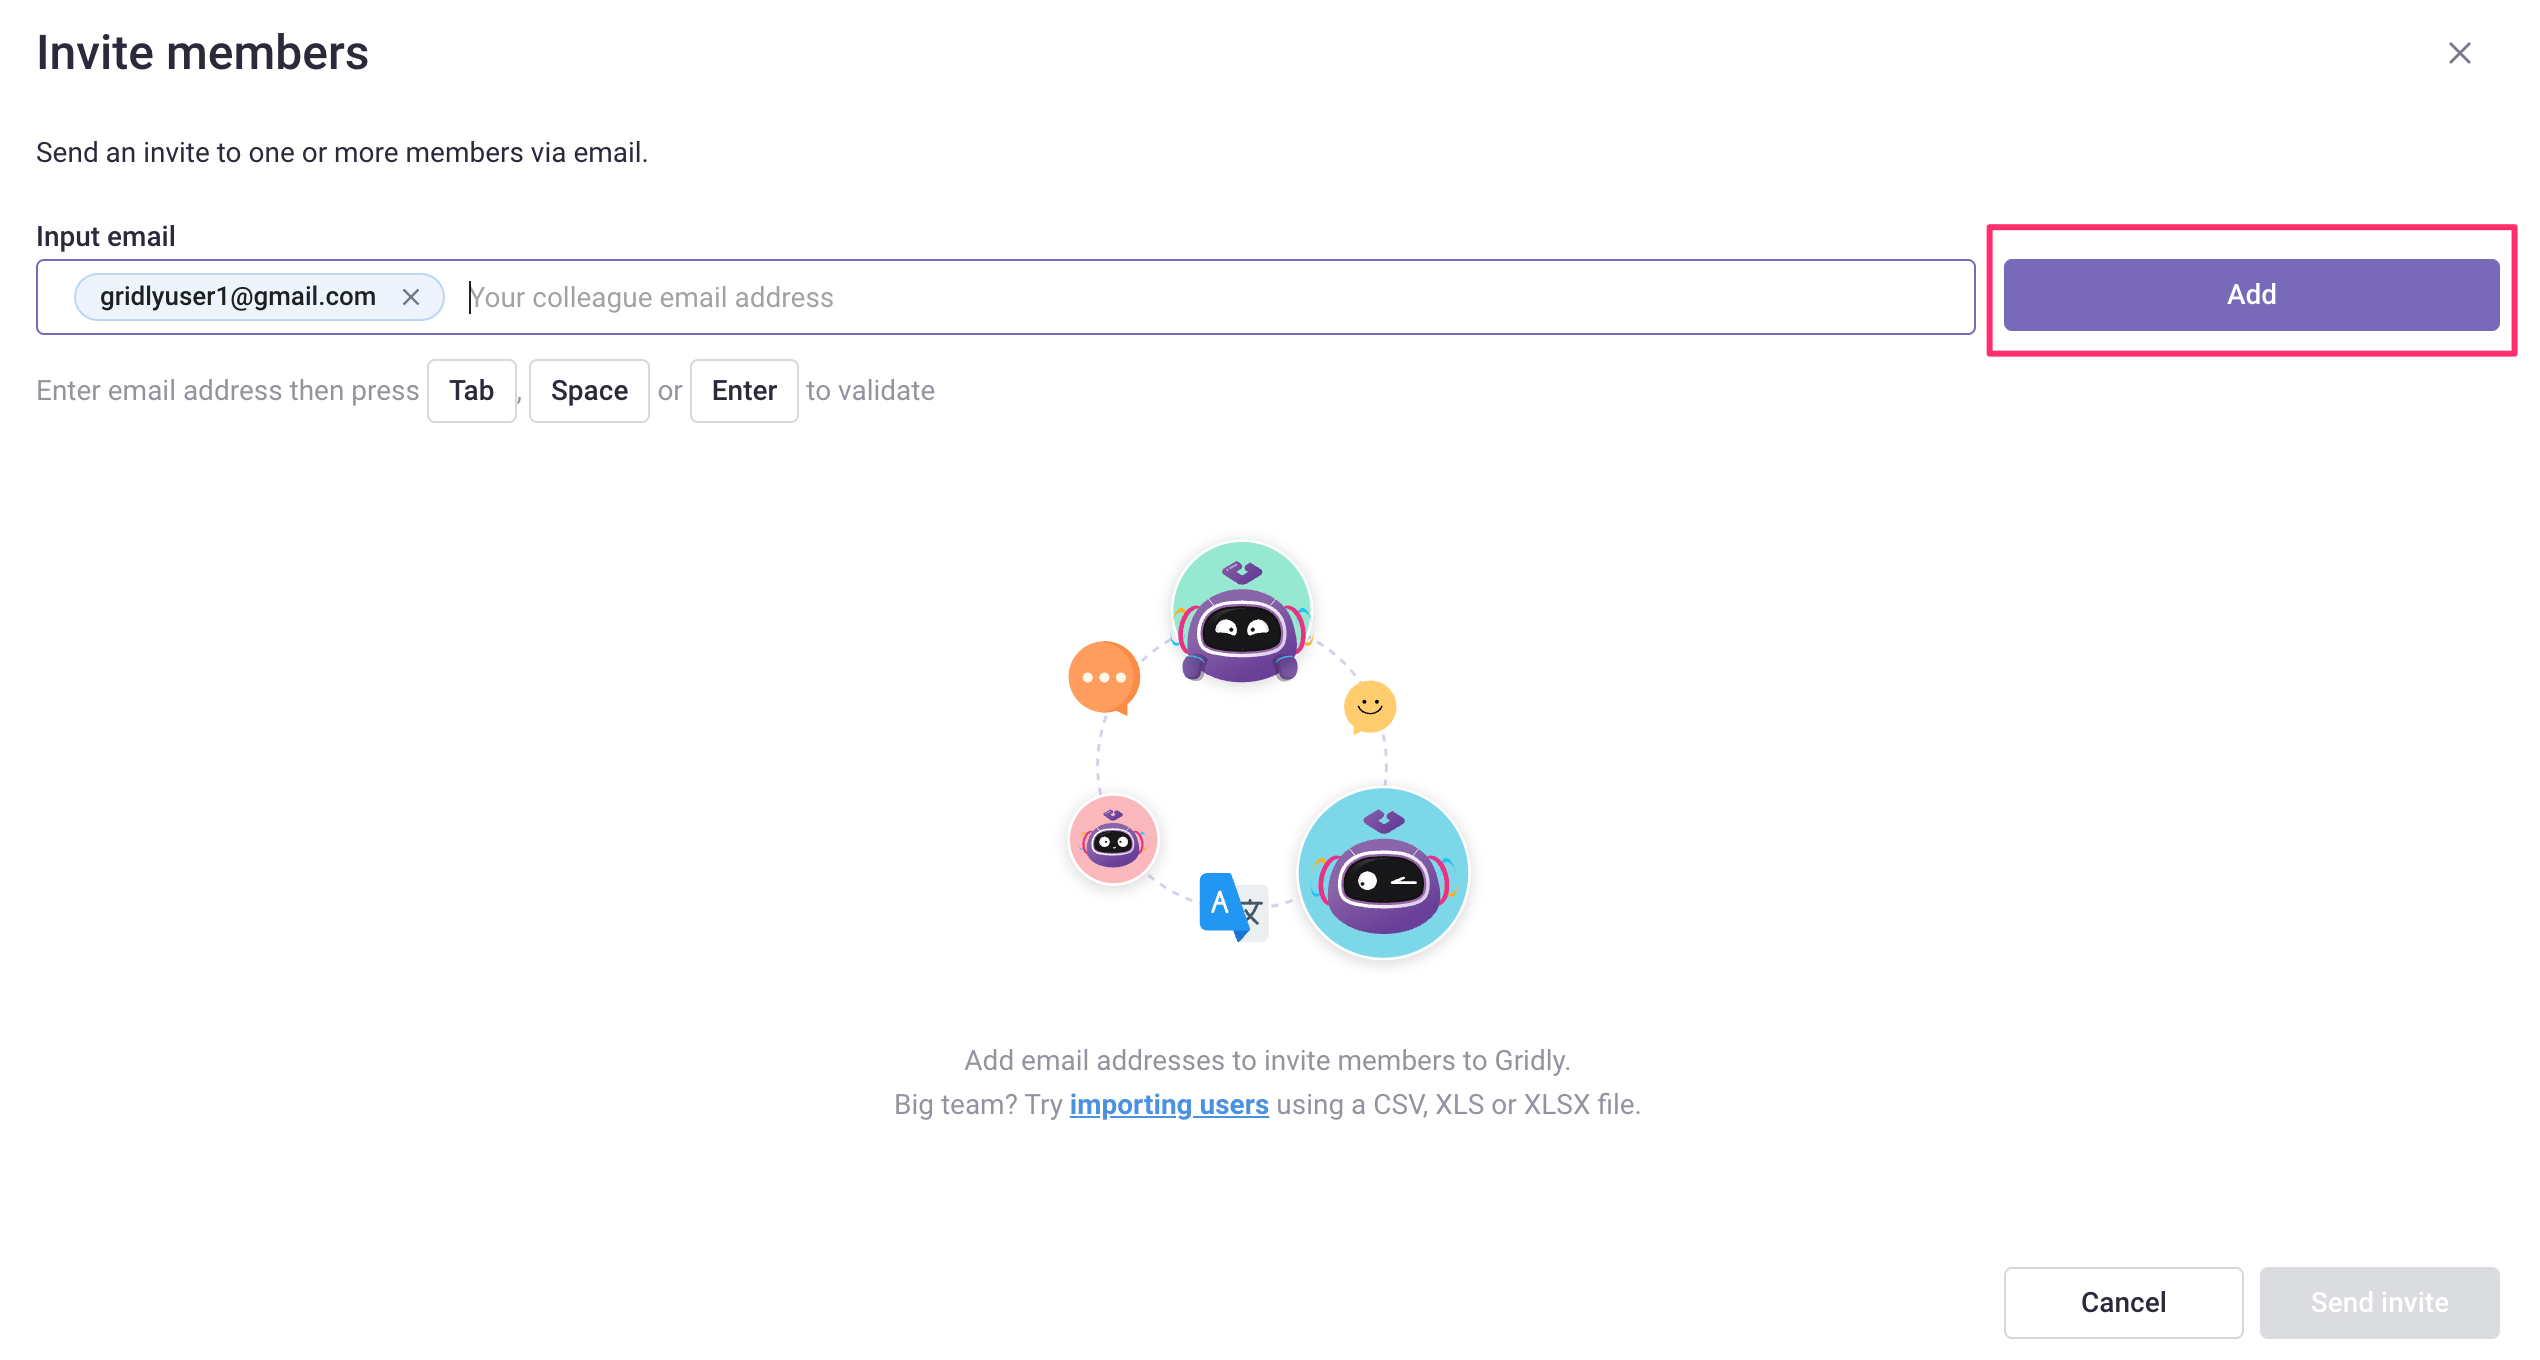
- Click the Invite Member button.
- Enter the email address, then press Tab, Space, or Enter to validate.
- Once done, click Add.
For detailed information on how to set up administrative roles and permissions, check here: Inviting members and setting up the permissions
Member settings
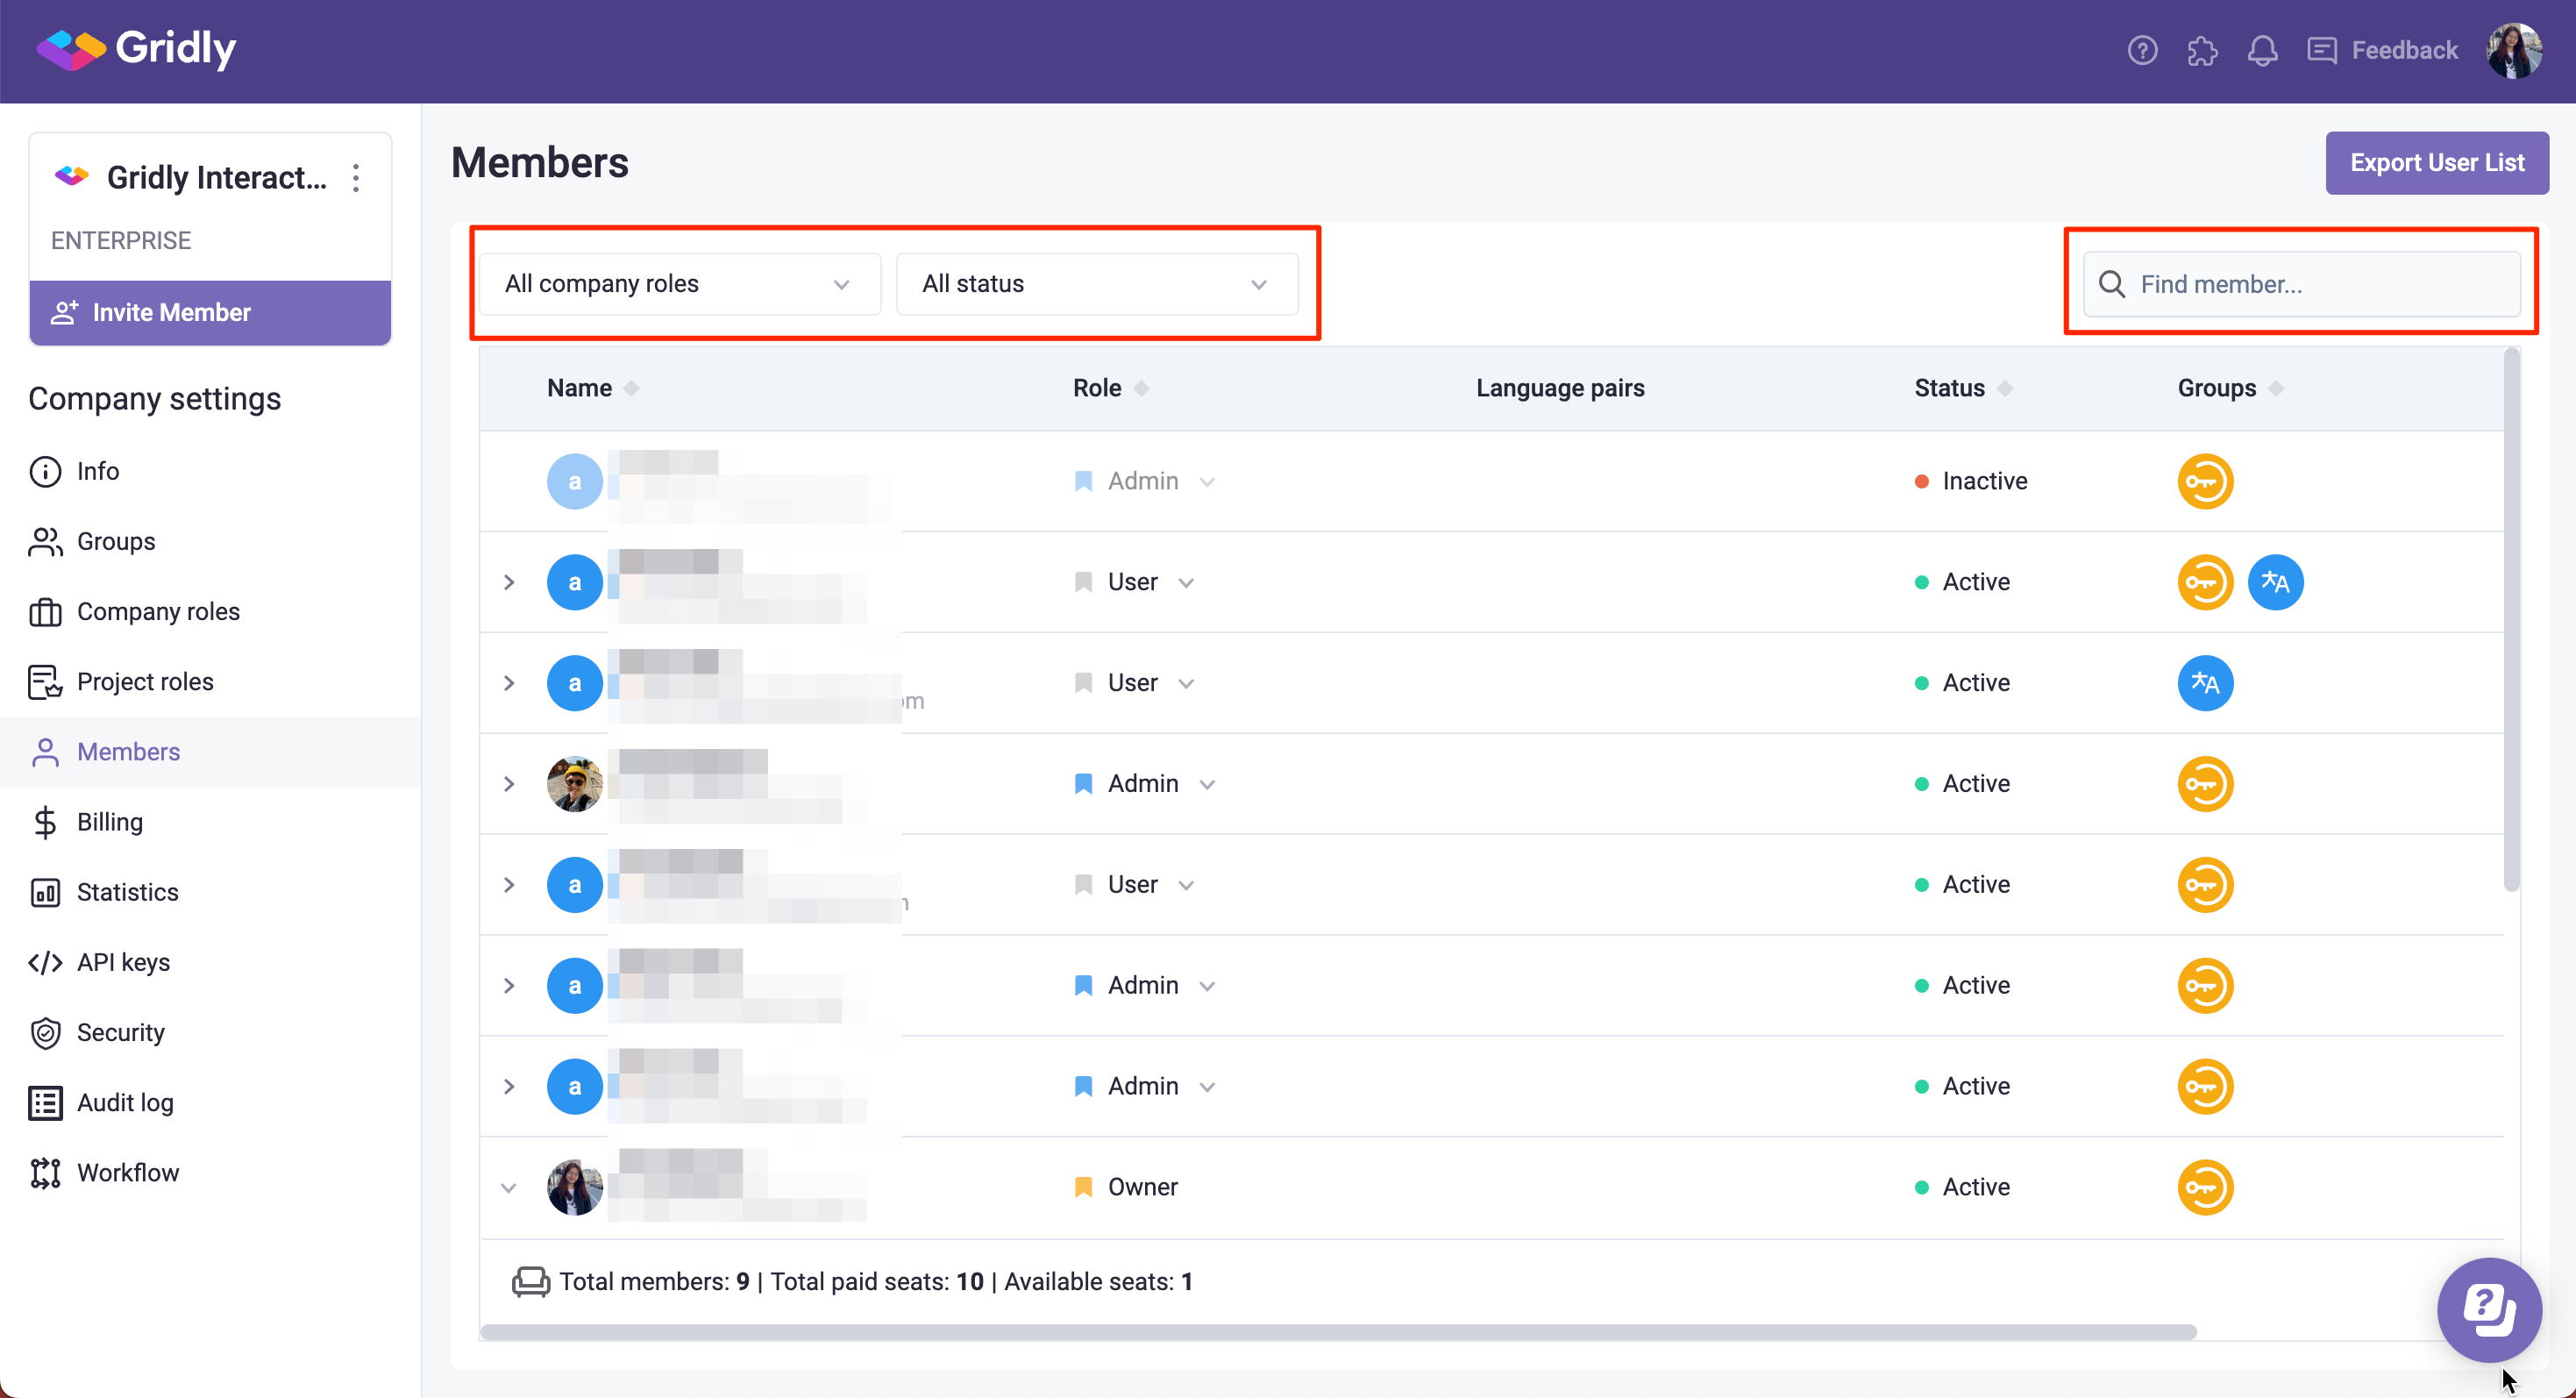
To access the Members page, go to https://app.gridly.com/settings/members or select Members from the left-hand side menu on Gridly hompage.

The Members page displays your members' information and includes:
-
User name and email
- Company role: define a user's rights, including whether a user can invite other members, see billing information, etc.
- Language pairs: When a user is assigned a specific language pair, the user can only view and edit that language pair in the project.
- Groups: If assigned to a group the user can access the specified projects/databases and shared views assigned to that group.
- Active status: whether a user's status is active, inactive (deactivated), pending invite, pending approval.
Use the filters at the top of the page to filter members by Role and/or Status. Click on the search bar at the top right of the page to quickly find a member.
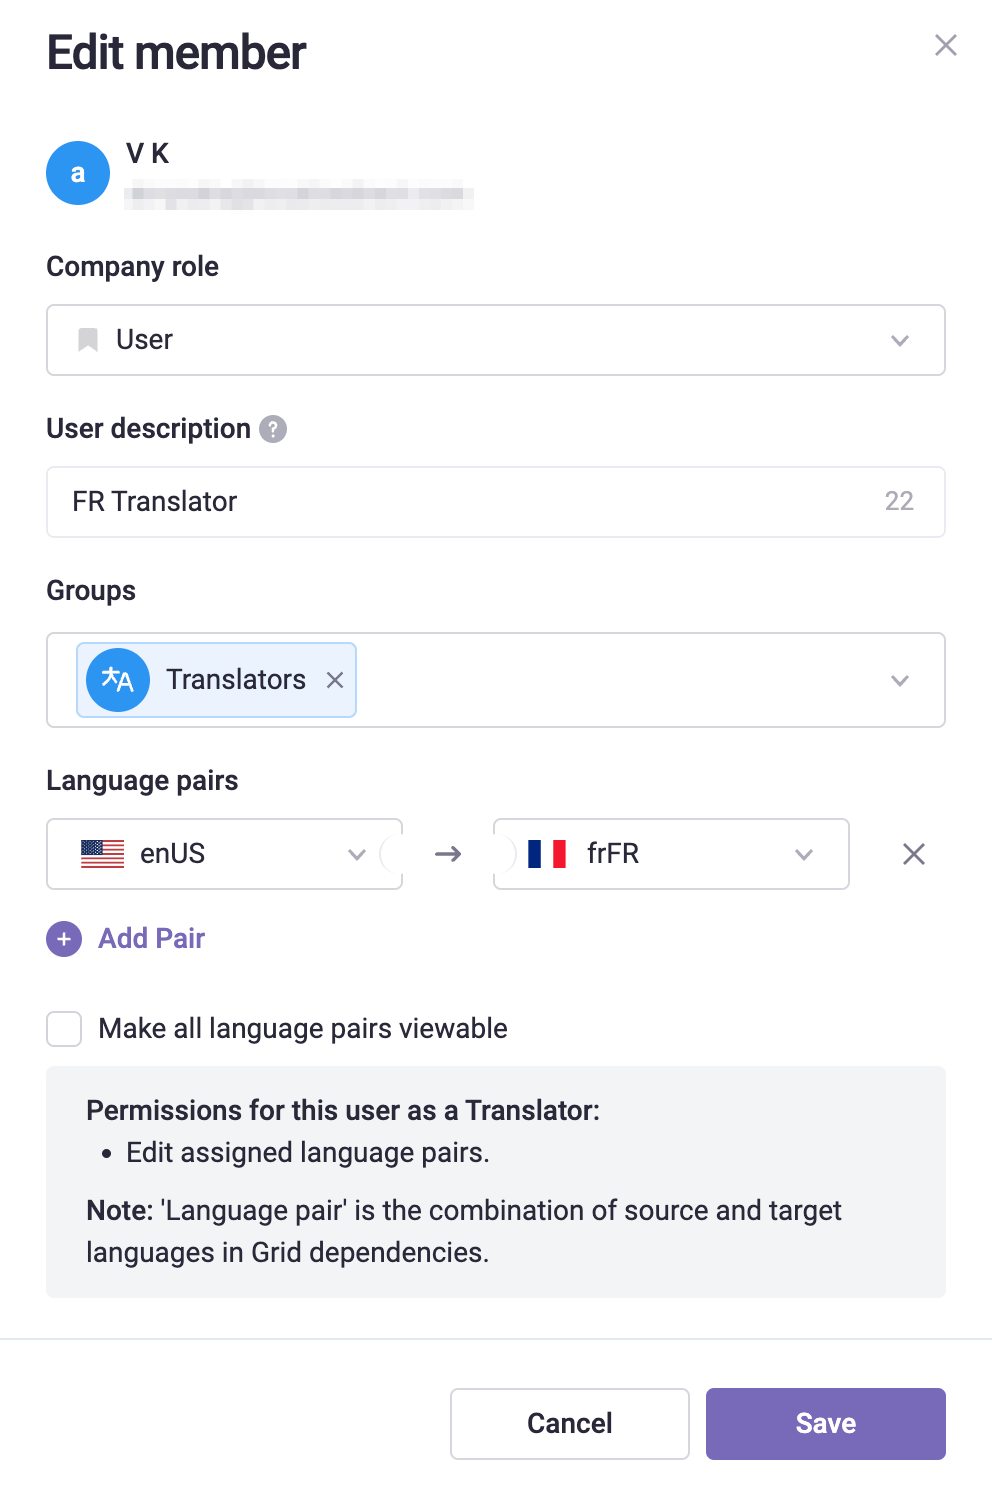
Edit Member information
Change company role, groups, language pairs
- Click
 next to a name and select Edit.
- Make changes to the Company role, Groups, Language pairs as desired. Click Save to confirm changes.
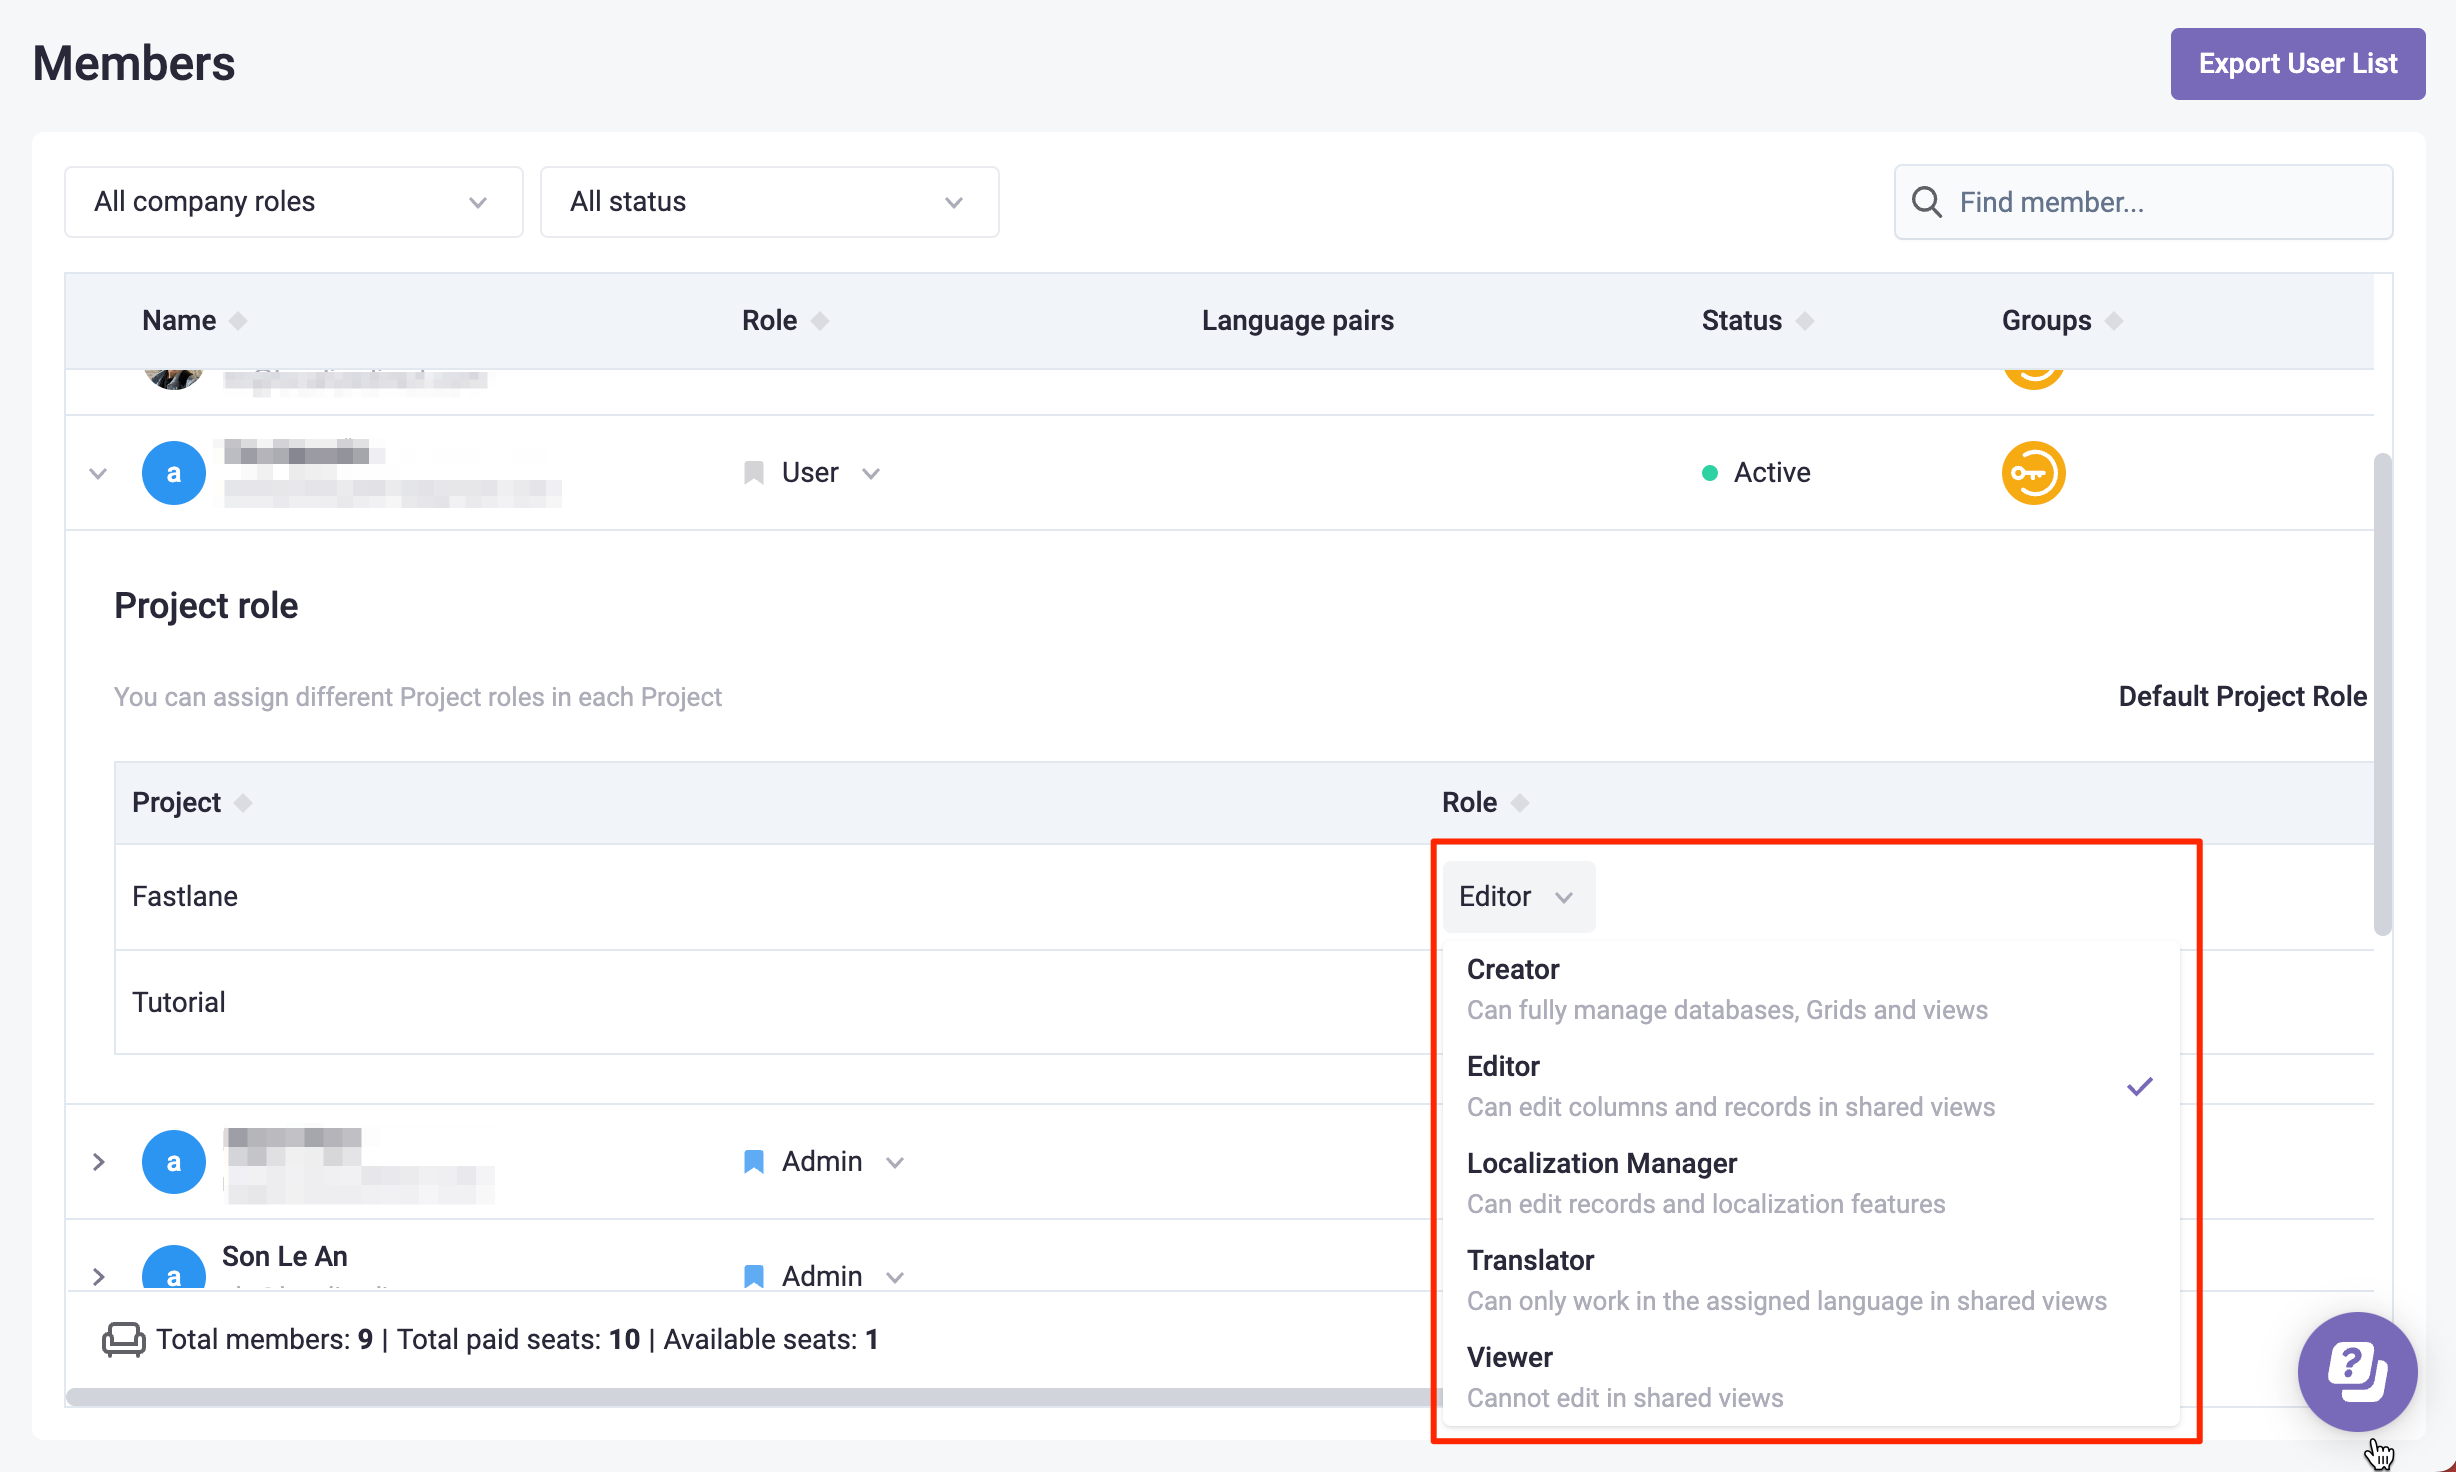
Change project role
Edit a member’s project role for each project they have access to (based on the Groups they are a member of):
- Click
 to expand a member's information. Click on the
  to view the projects that the members can access and their project roles.
- Assign a role in each projects for your member.
Deactivate a member
To deactivate a member, click ![]() next to a deactivated name and select Deactivate member, then click Deactivate to confirm changes. If a member is deactivated:
next to a deactivated name and select Deactivate member, then click Deactivate to confirm changes. If a member is deactivated:
- Their data will still be accessible in the company settings.
- They will no longer be able to access this company in Gridly.
- Their API key will be deactivated

Delete a member
You must deactivate before deleting a member. Deleting a member is an action that cannot be undone.
To delete a member, click ![]() next to a name and select Delete member. Click Delete to confirm deletion.
next to a name and select Delete member. Click Delete to confirm deletion.

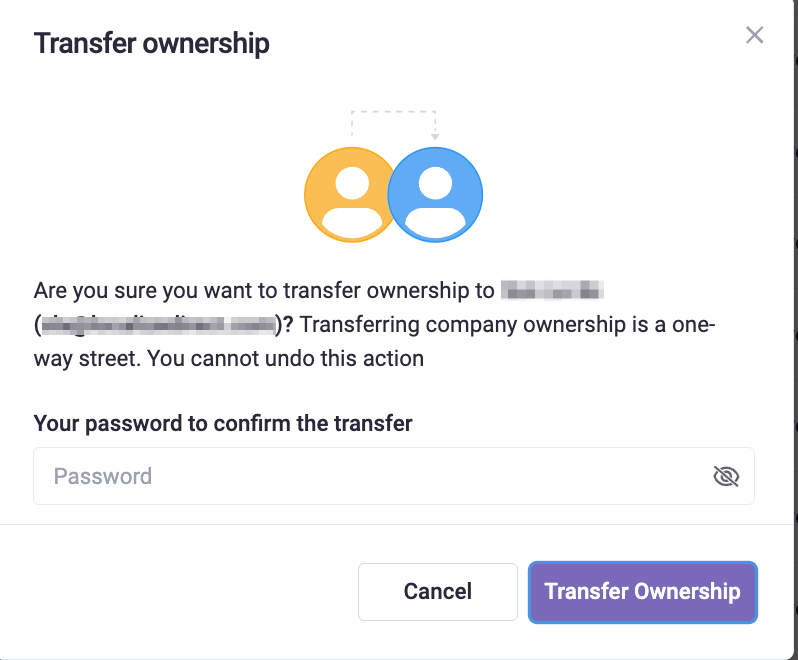
Transfer ownership
You cannot undo this action.
Assigning a member to be the company's Owner can only be done by the current Owner. To transfer ownership:
- Access the Members tab under Company settings.
- Click
 at the right side of the member name and select Transfer ownership.
- Enter your user password to confirm changes.