
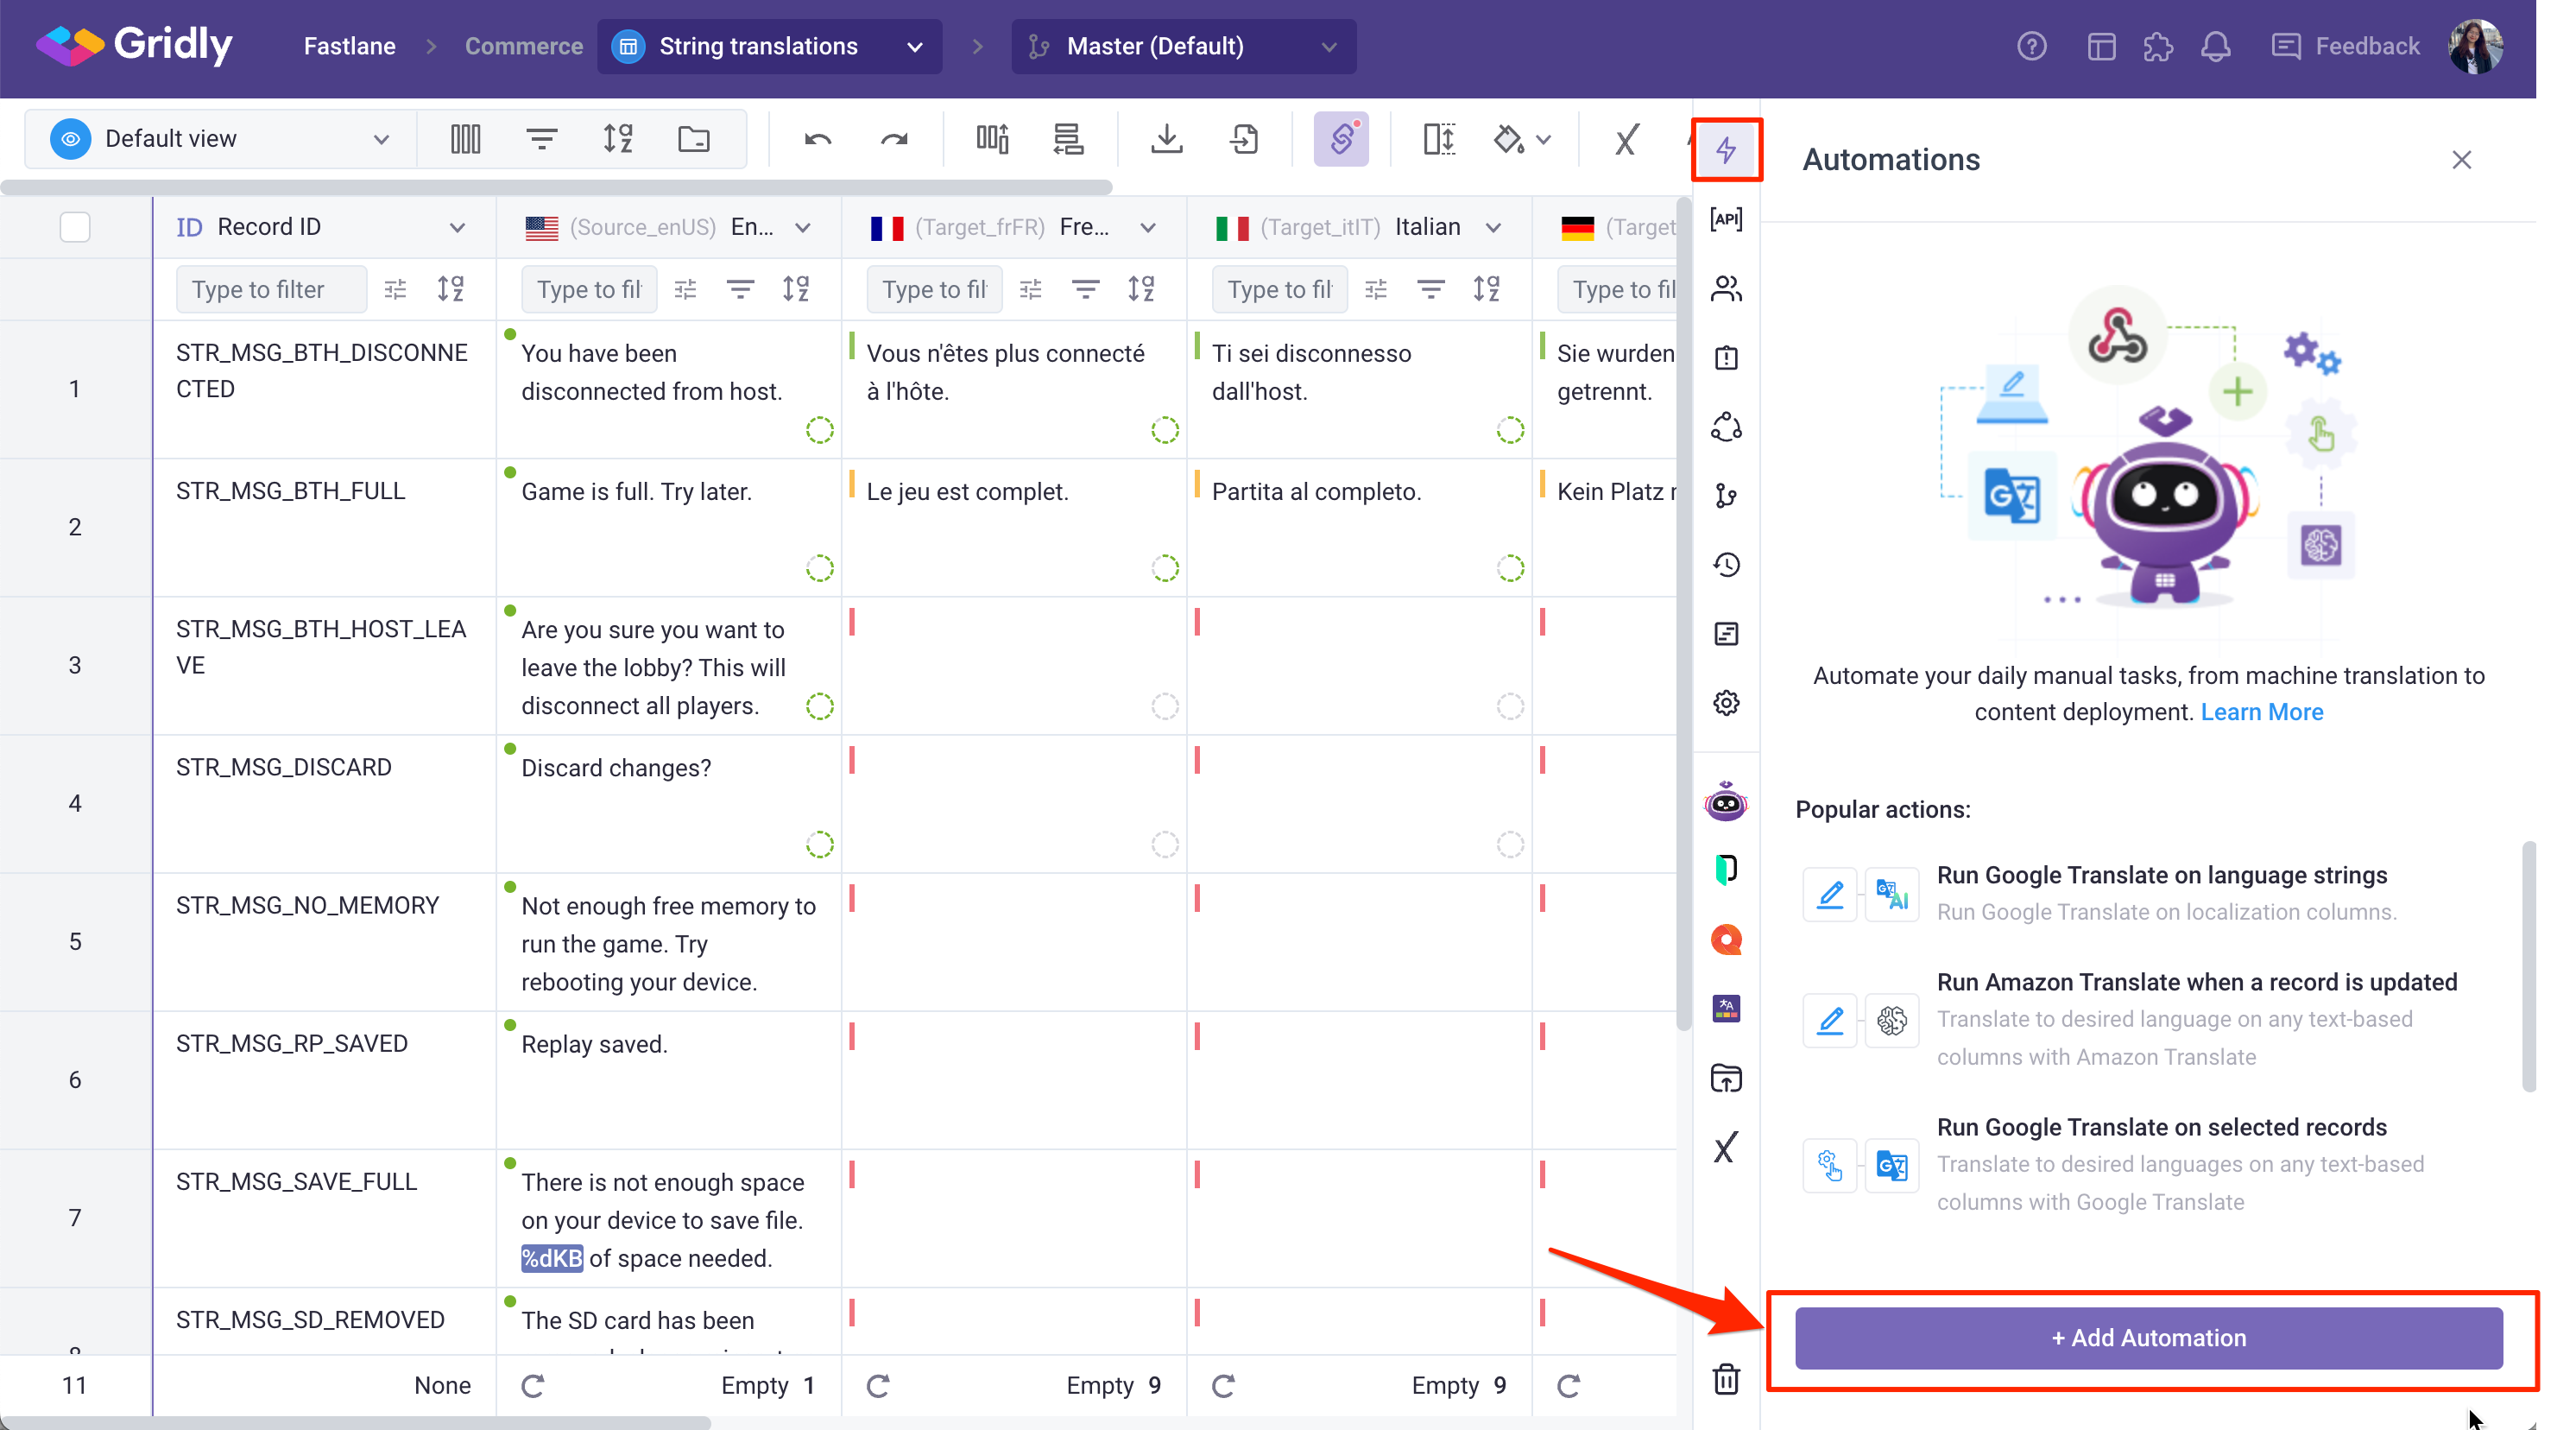
Push content from Gridly to your translators working in XTM and retrieve translations back in an automated way using the Send web request automation action.
Setup
- Open a Grid, on the right-side bar, click
 to open Automation tabs,
 - Click + Add Automation
After creating the automation, you need to configure the trigger and action.
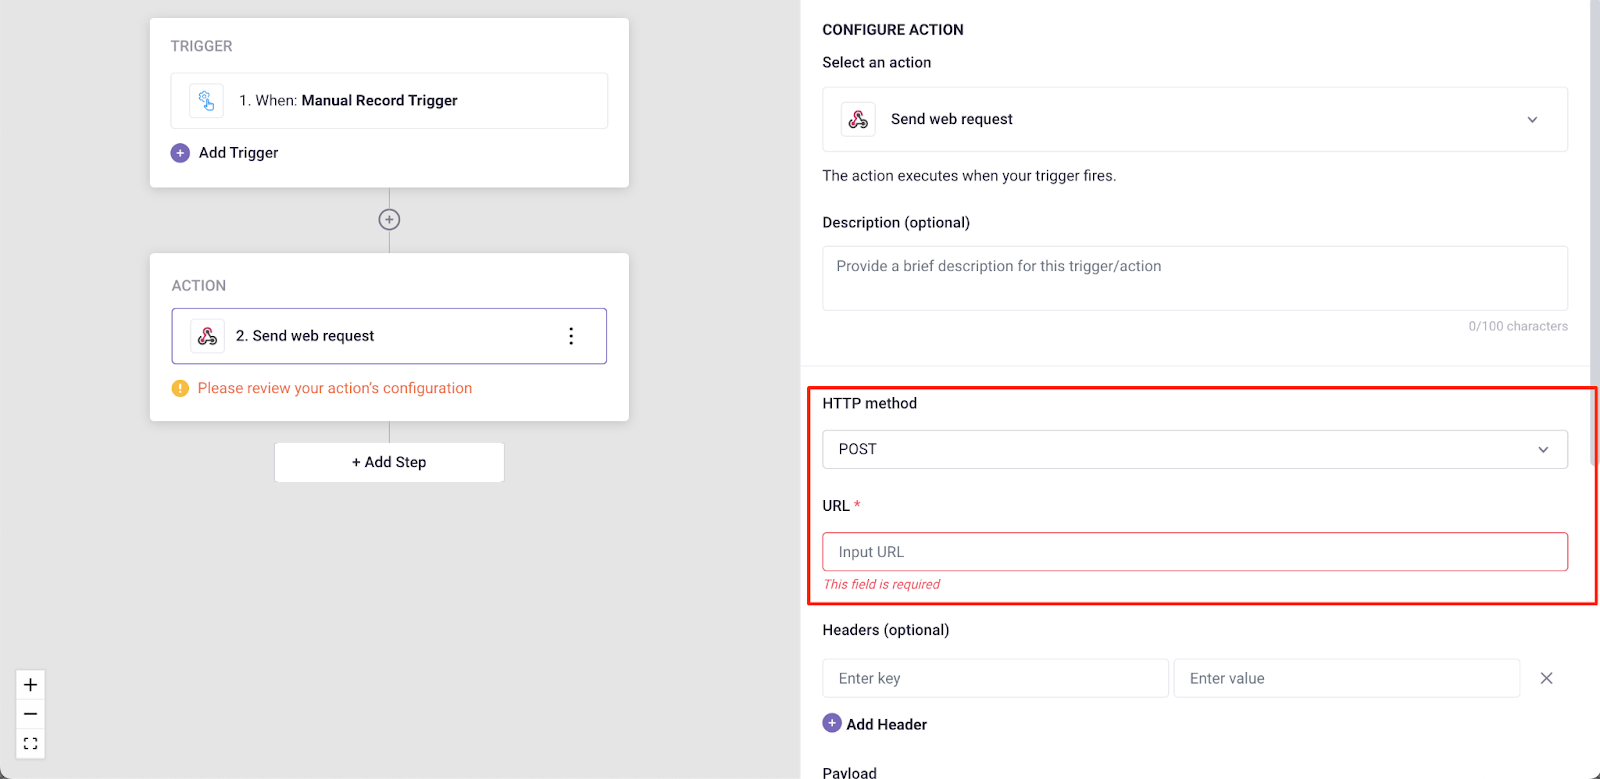
Add Trigger
In the Automation designer, click Add Trigger, then select Trigger button clicked from one of the available triggers.
Add “Send web request” action
- Click Add Step and select Send web request in the list of actions.
- HTTP Method: select POST.
- URL: input this URL https://xtm-api.integration.gridly.com/send_to_xtm.
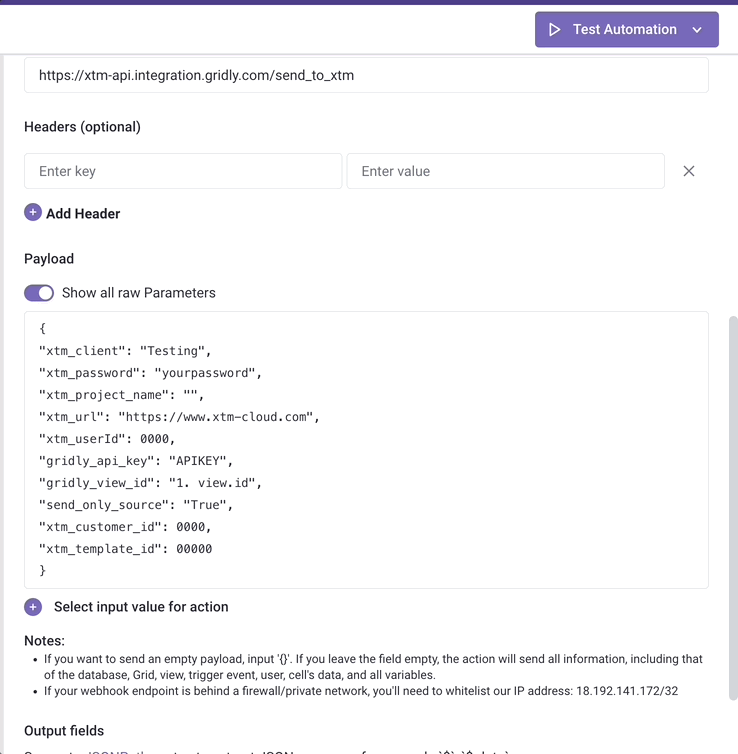
- Payload: copy & paste the following, then customize it to include your information. Remember to click the toggle to Show all raw parameters
{
"xtm_client": "Your XTM company",
"xtm_password": "Your XTM password",
"xtm_project_name": "",
"xtm_url": "https://www.xtm-cloud.com",
"xtm_userId": 0000,
"gridly_api_key": "APIKEY",
"gridly_view_id": "",
"send_only_source": "True",
"xtm_customer_id": 0000,
"xtm_template_id": 00000,
"continous_loc": "True"
}- xtm_client: Replace
Your XTM company→ your actual XTM company name - xtm_password: Replace
Your XTM company→ your actual password to login to your XTM account - xtm_project_name: Add the Grid name by clicking between the quotation marks ("") , then selecting from the pop-up list: grid → name
- xtm_url: Replace
https://www.xtm-cloud.com→ to the base url of your xtm instance. If you use xtm cloud, keep it as current. - xtm_userId: the id of your XTM user. You can find it in XTM: open Users → User list tab, under your account details, hover over the
 and you'll find your ID.
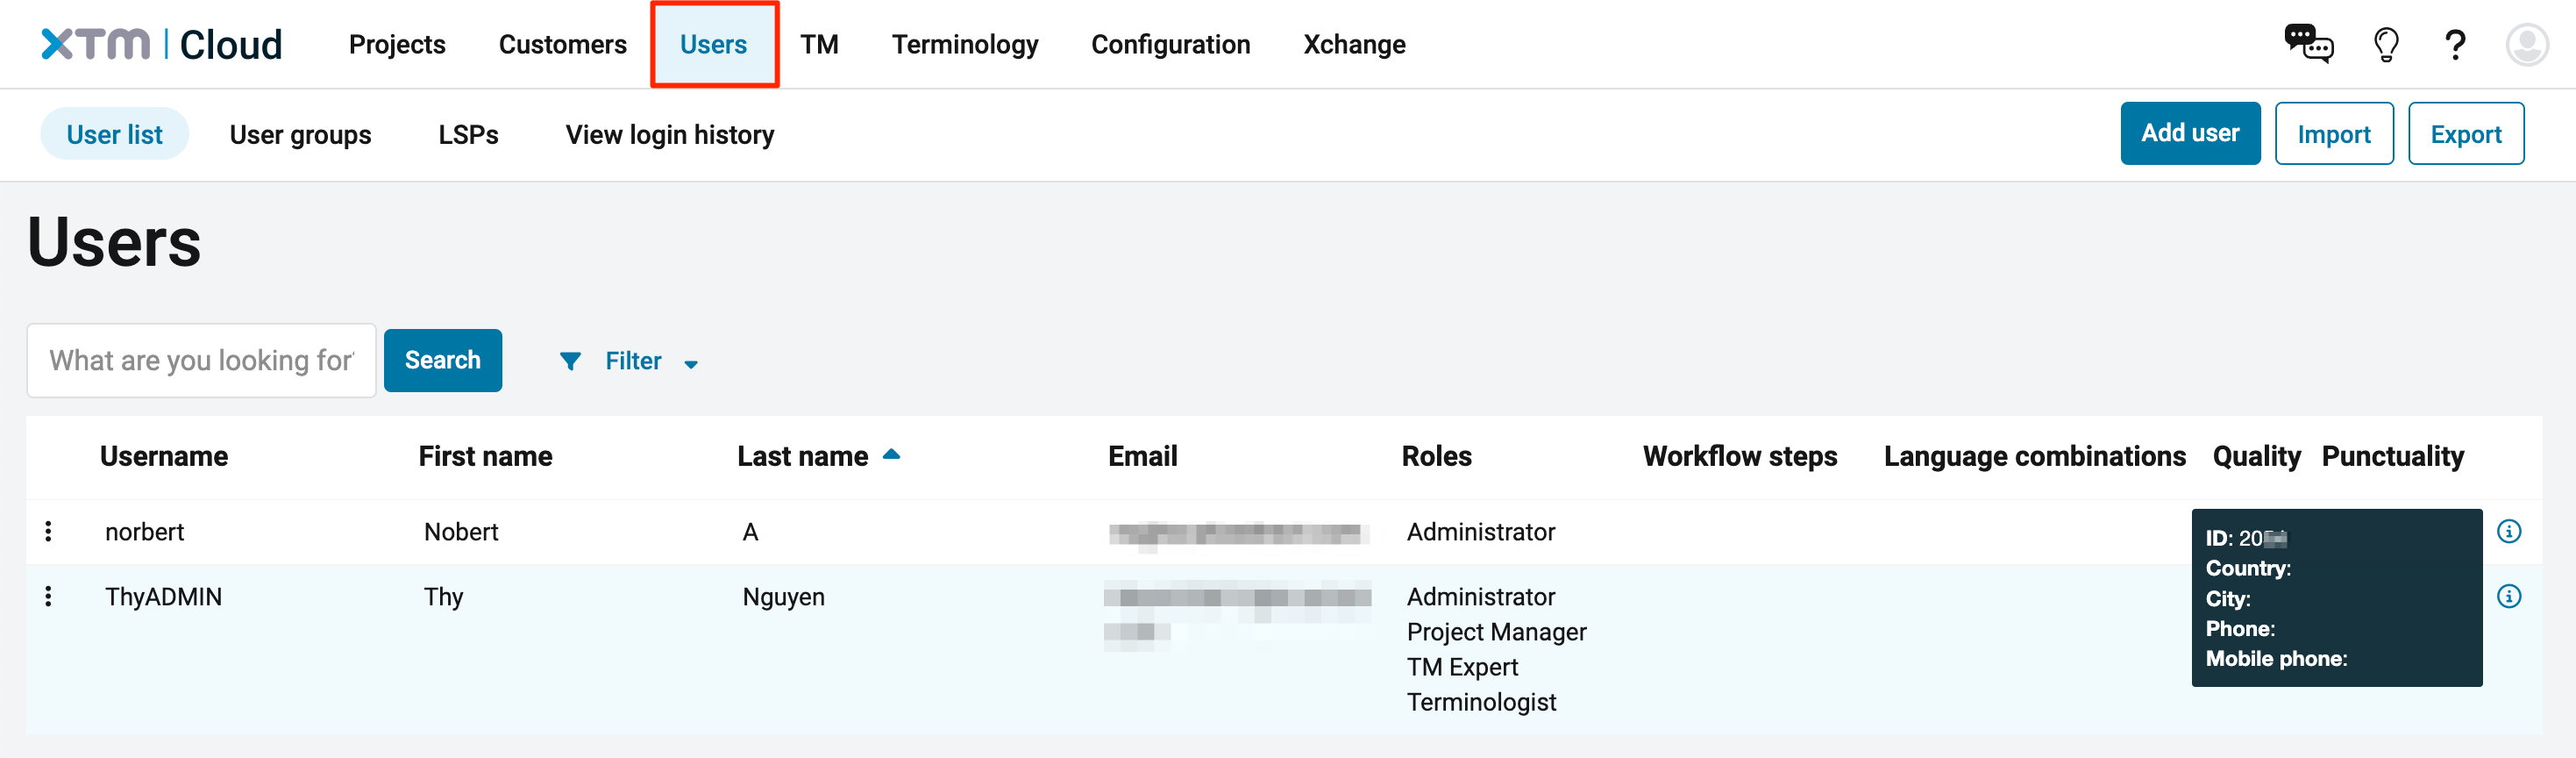
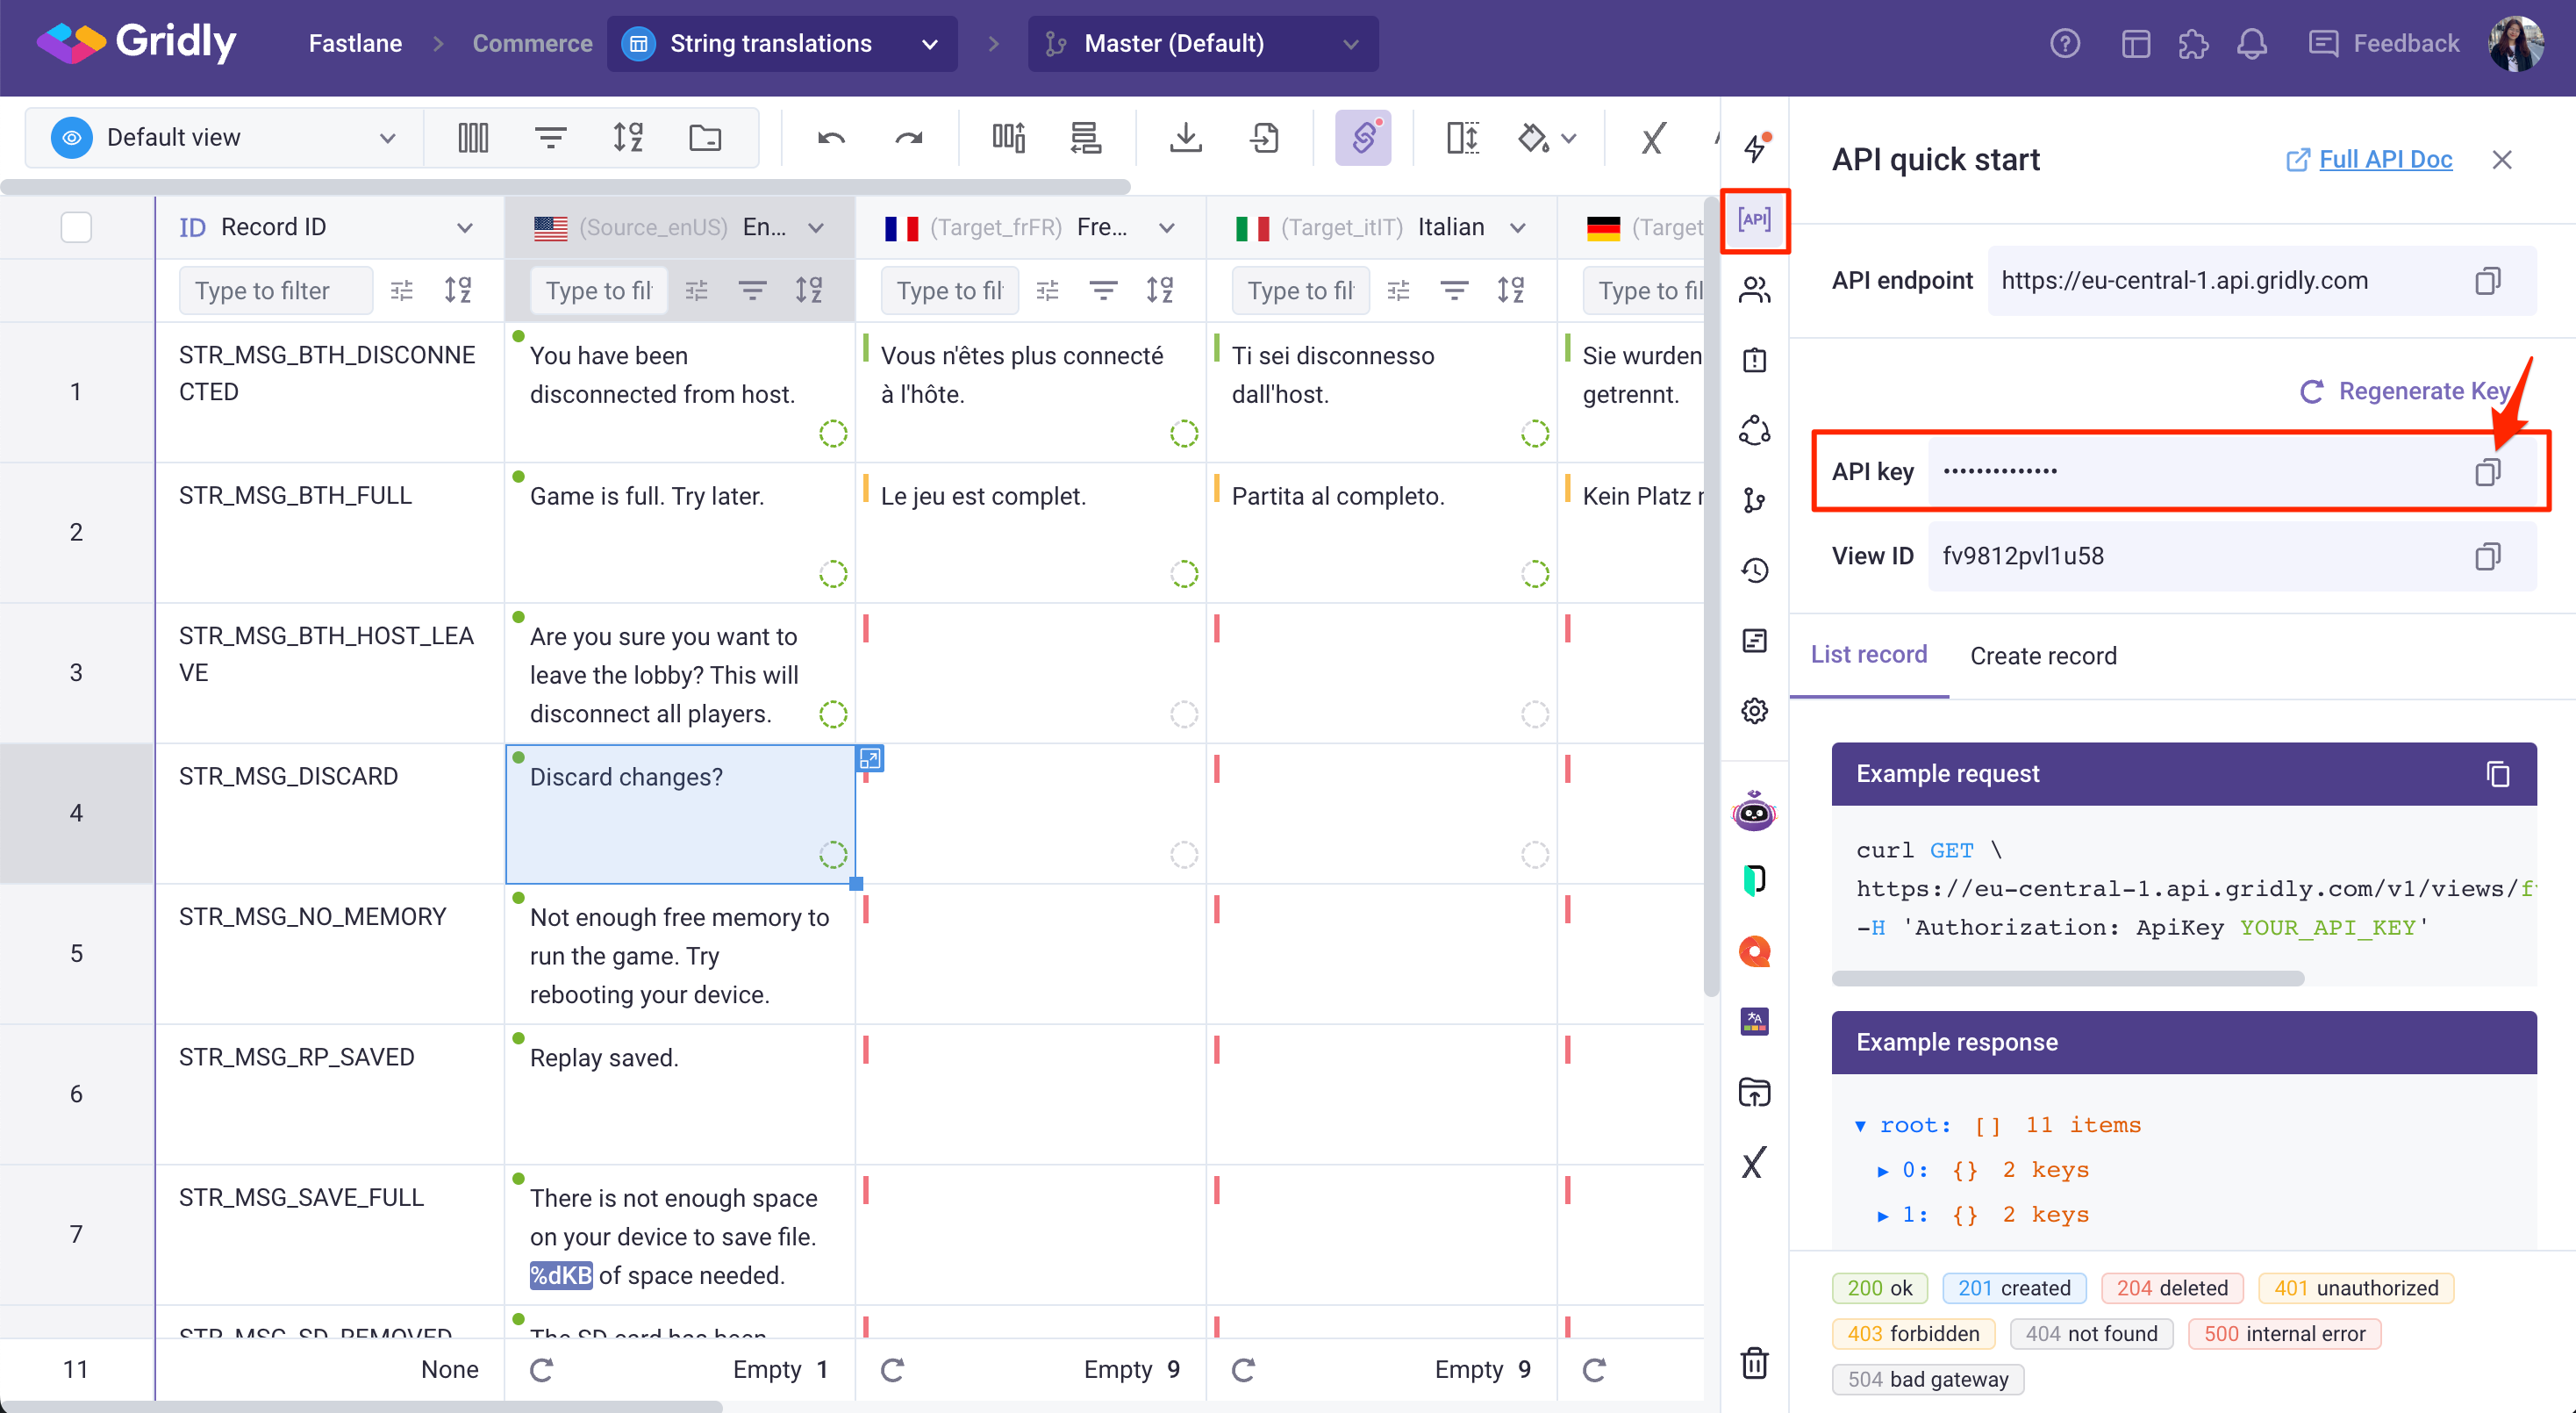
- gridly_api_key: your API key in Gridly. You can use either your personal API key (found in the API tab in the Grid) or company API key.
- gridly_view_id: Add the view ID by clicking between the quotation marks ("") , then selecting from the pop-up list: view → id
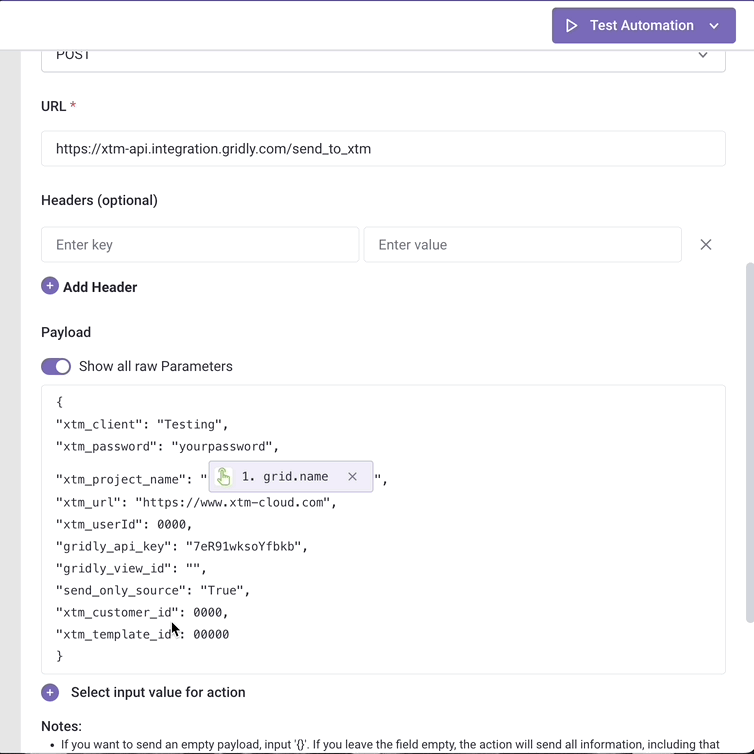
- send_only_source: keep as True, if you send translations, setting as false will negatively affect your segments in XTM.
- xtm_customer_id: the ID of your customer in XTM, find this in XTM: Open Customers → Customer list tab, under your Customer details, hover over the
 to find the ID.
- xtm_template_id: the ID of the project template you use in XTM, find this in XTM: Open Projects → Templates tab, , hover over the
 to find the ID.
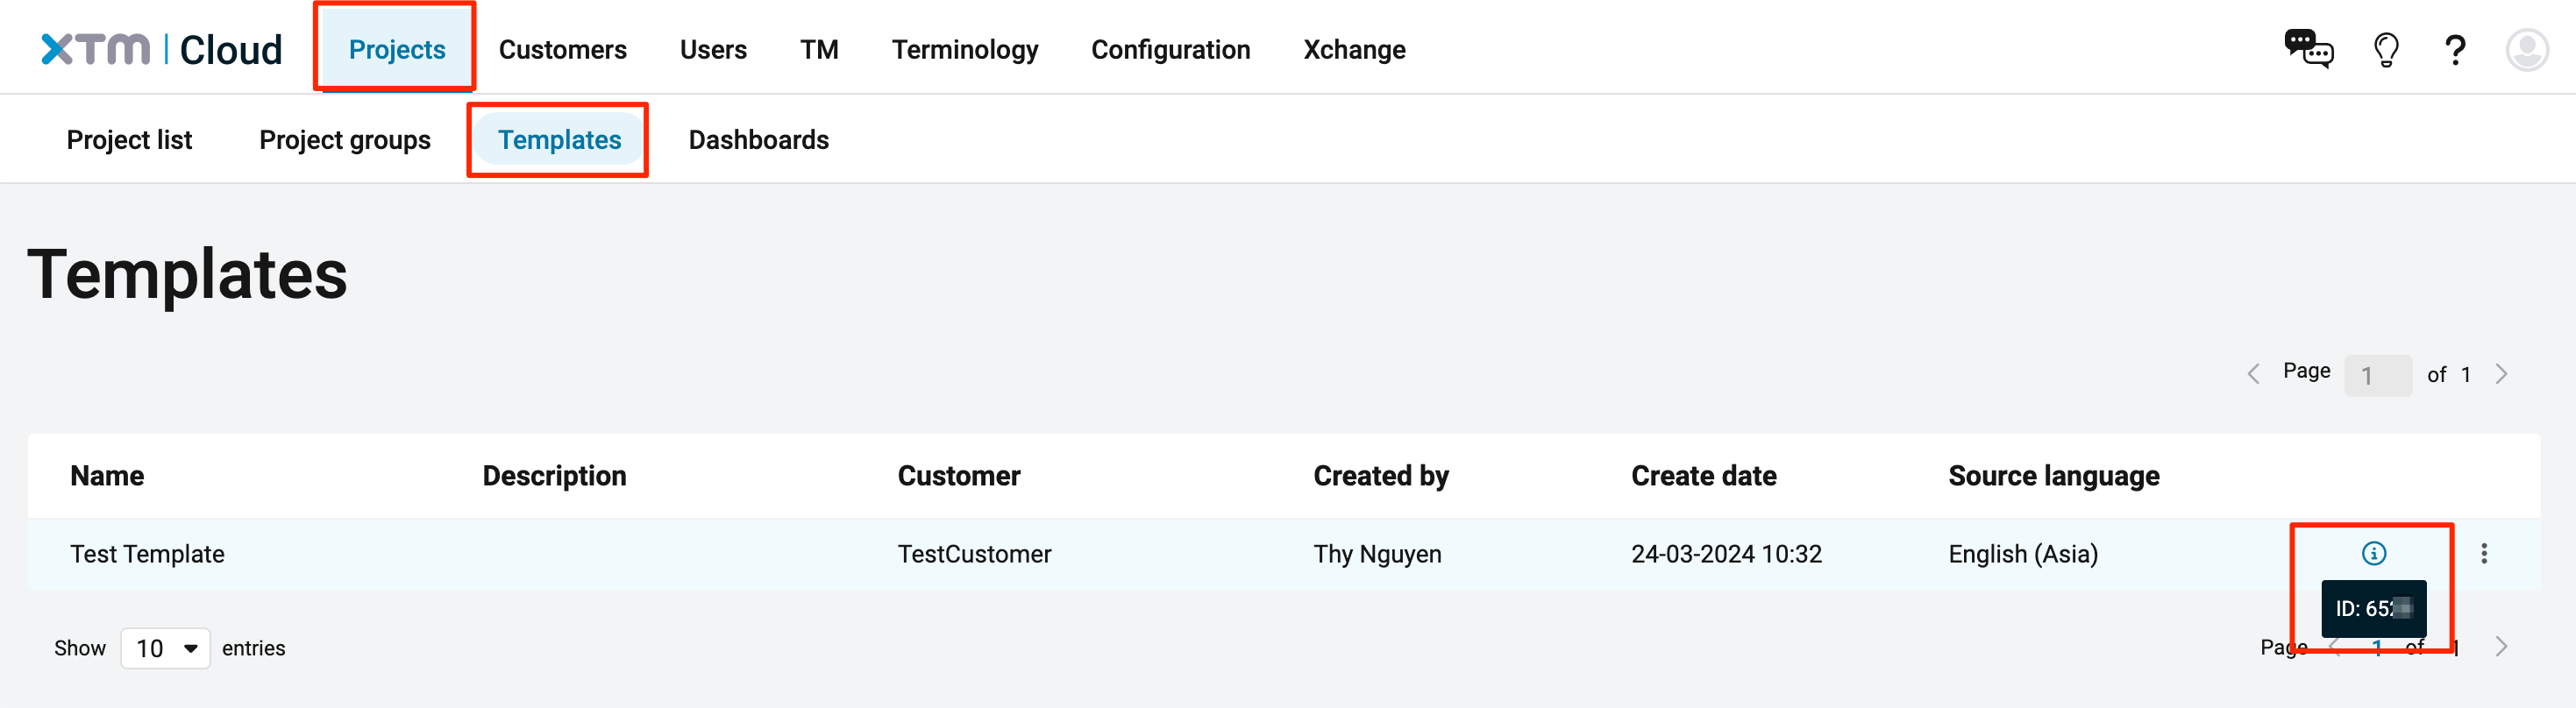
- continous_loc: keep as True.
Test Automation
- Switch the toggle on to turn on the automation
- Click Test Automation. If your automation is not turned on, Gridly will require that you turn on the automation in the resulting pop-up message. Click on the toggle to turn on and select Test again.
Push content from Gridly to XTM
After setting up the Automation, go back to the Grid and click Execute to push source and target strings from Gridly to XTM.
When pushing content to XTM, the automation will try to create a project in XTM:
- If there is no project with the same name as the Grid name: it will try to create a new project using the template you gave and name of your Grid
- If you've already set up a project with the same name: it will push the content to that existing project.
Make sure your Grid is a Translation Grid - single step, which means that there's only 1 source language column and Dependencies are set between language pairs.
If you add a new target language and set the dependency, it will also add that language dynamically to your project in XTM.
Pull content from XTM to Gridly
When a translation job is done in XTM, it will pull the translations and import back to Gridly automatically.
Ensure there are no errors that could prevent exporting the project in XTM, as our server won't be able to get the translations from XTM.