This feature is available in both the CMS and TMS modules.
With Gridly, you can easily import multiple file formats, including XLSX (Excel workbook) files. For other import options, please view these articles:
CMS module
Add an Excel file
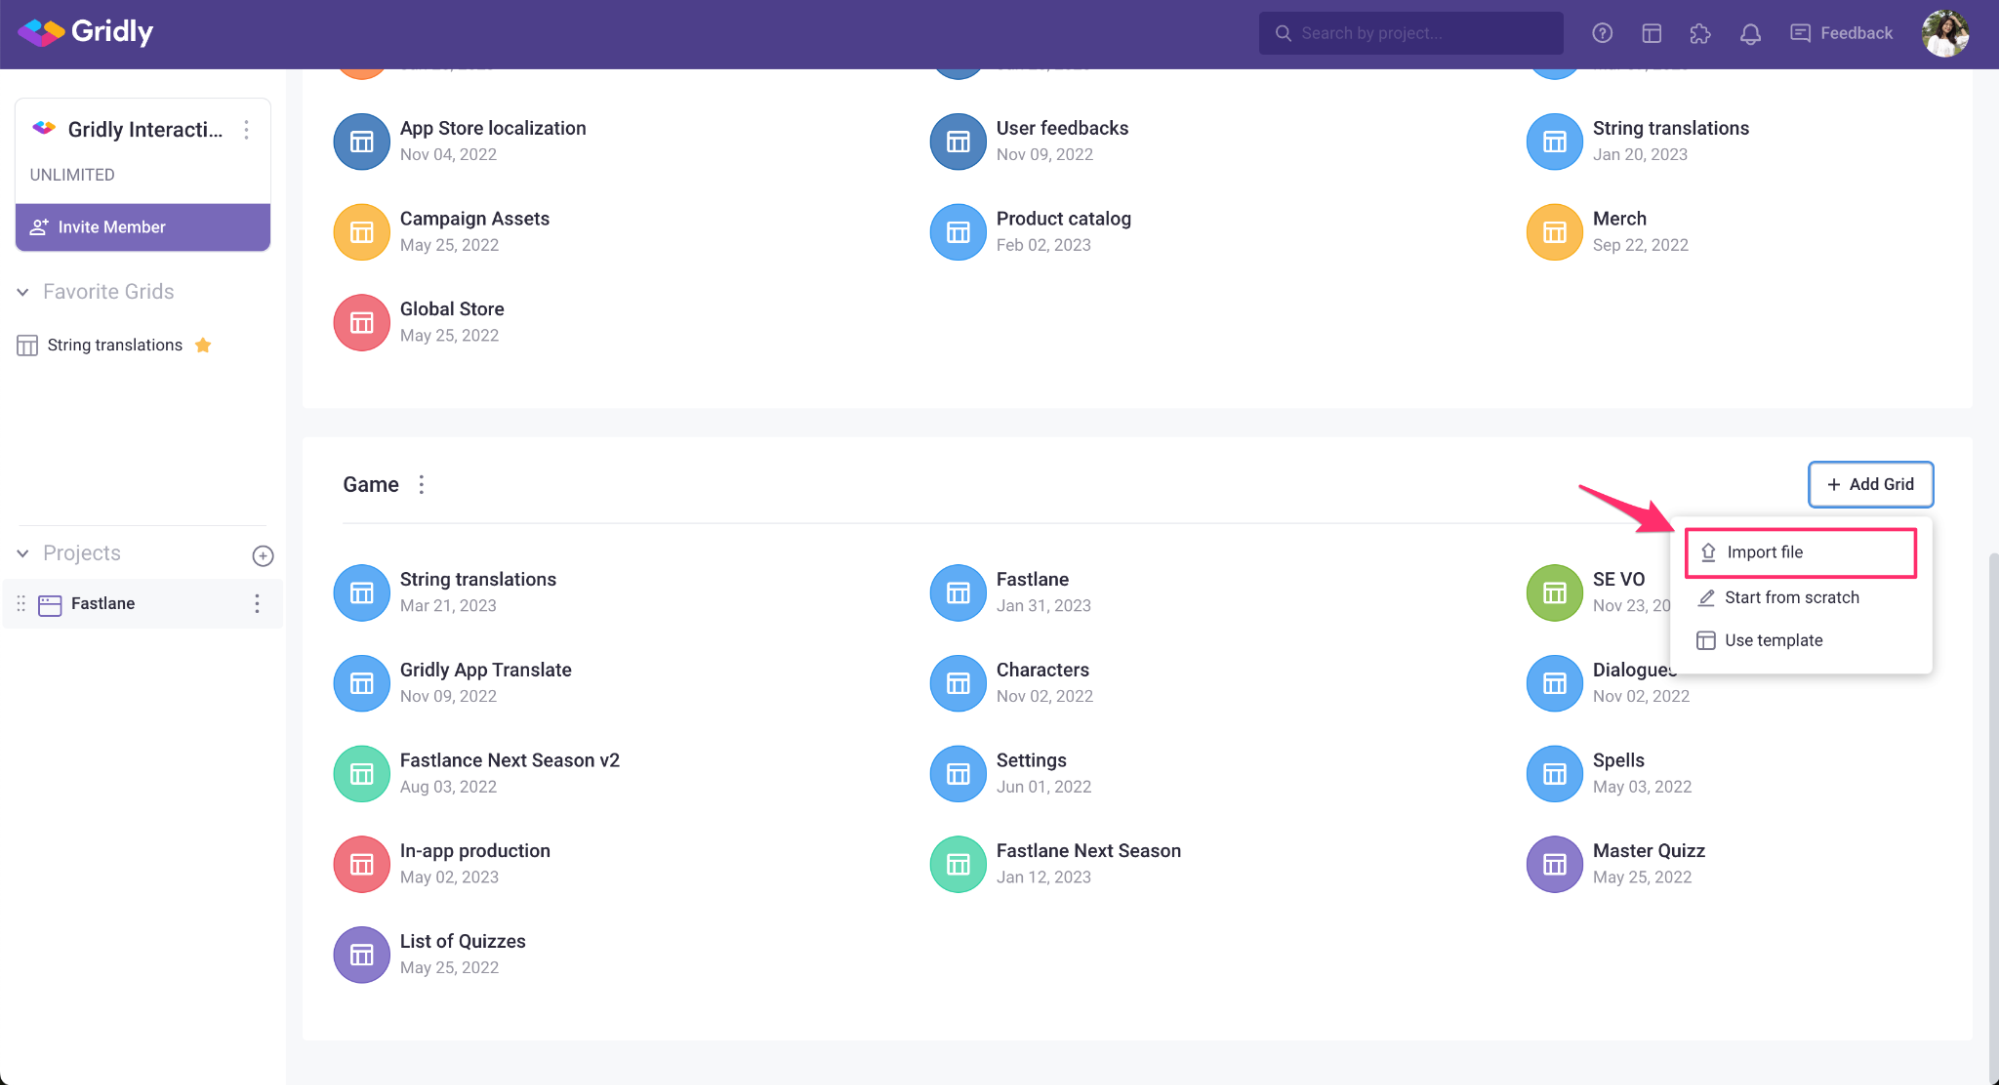
- On the project page, click + Add Grid.
- Select Import file from the dropdown menu.
- Open the Excel (XLSX) file you want to import.
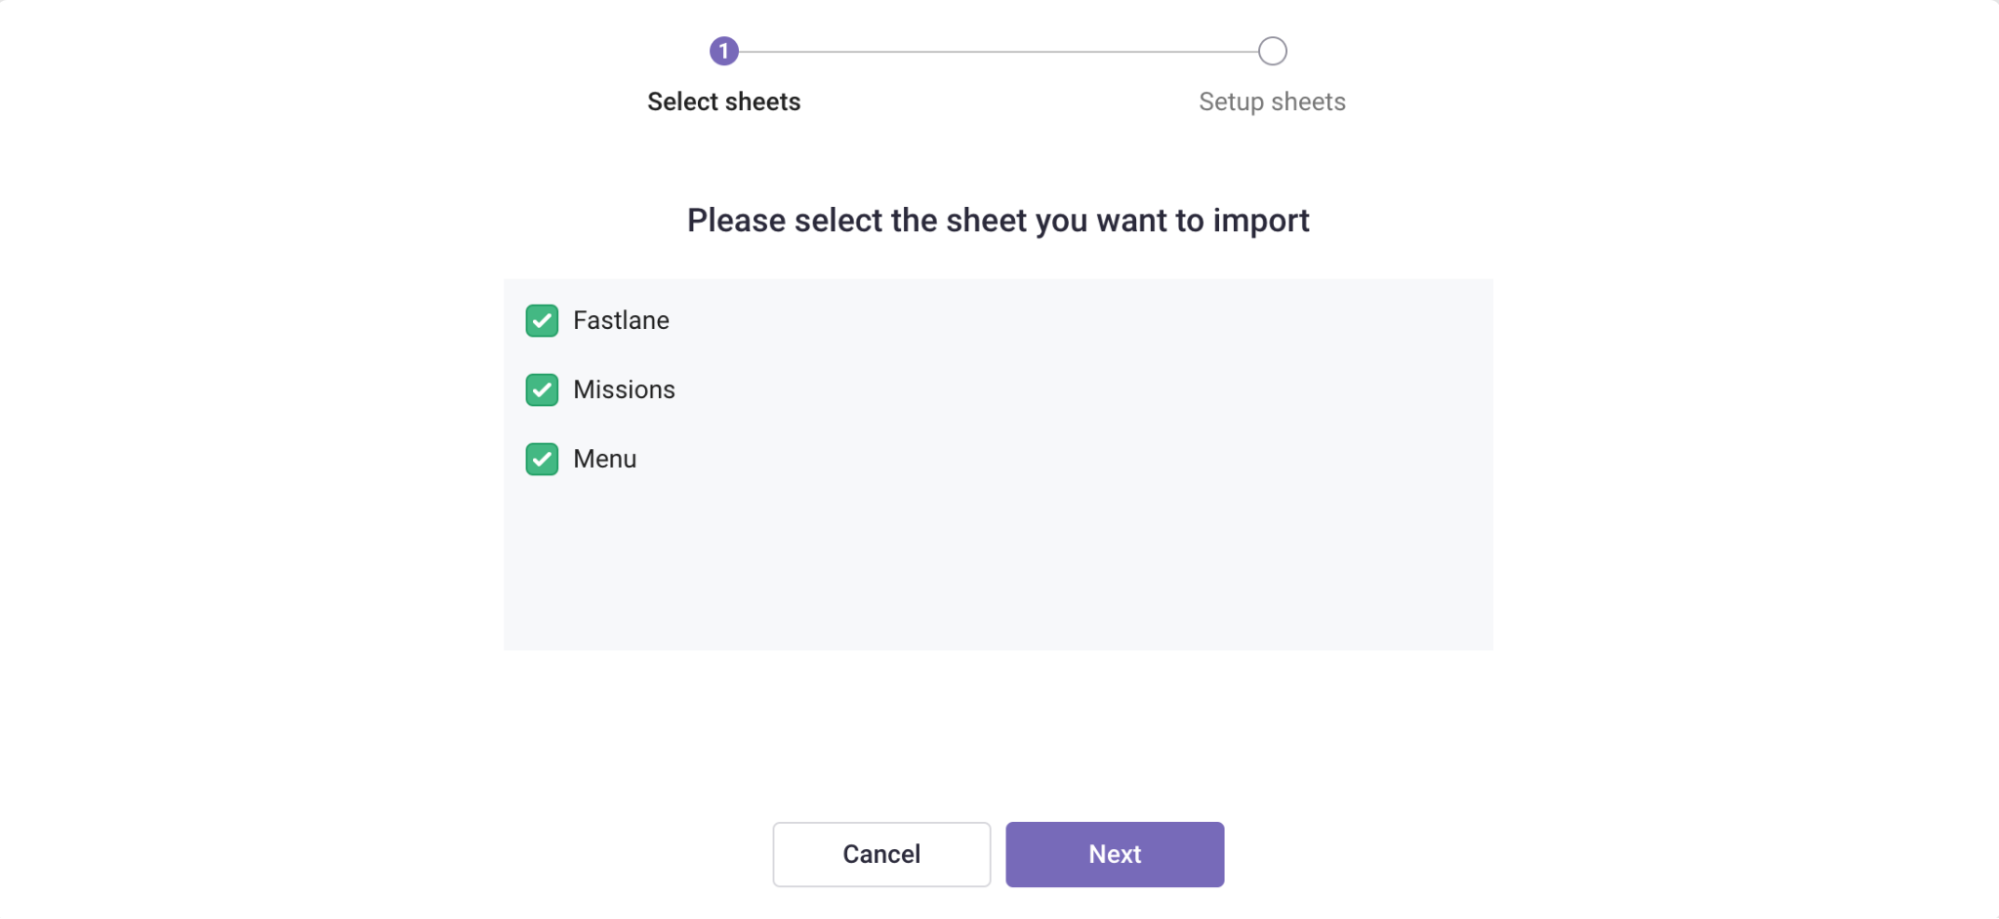
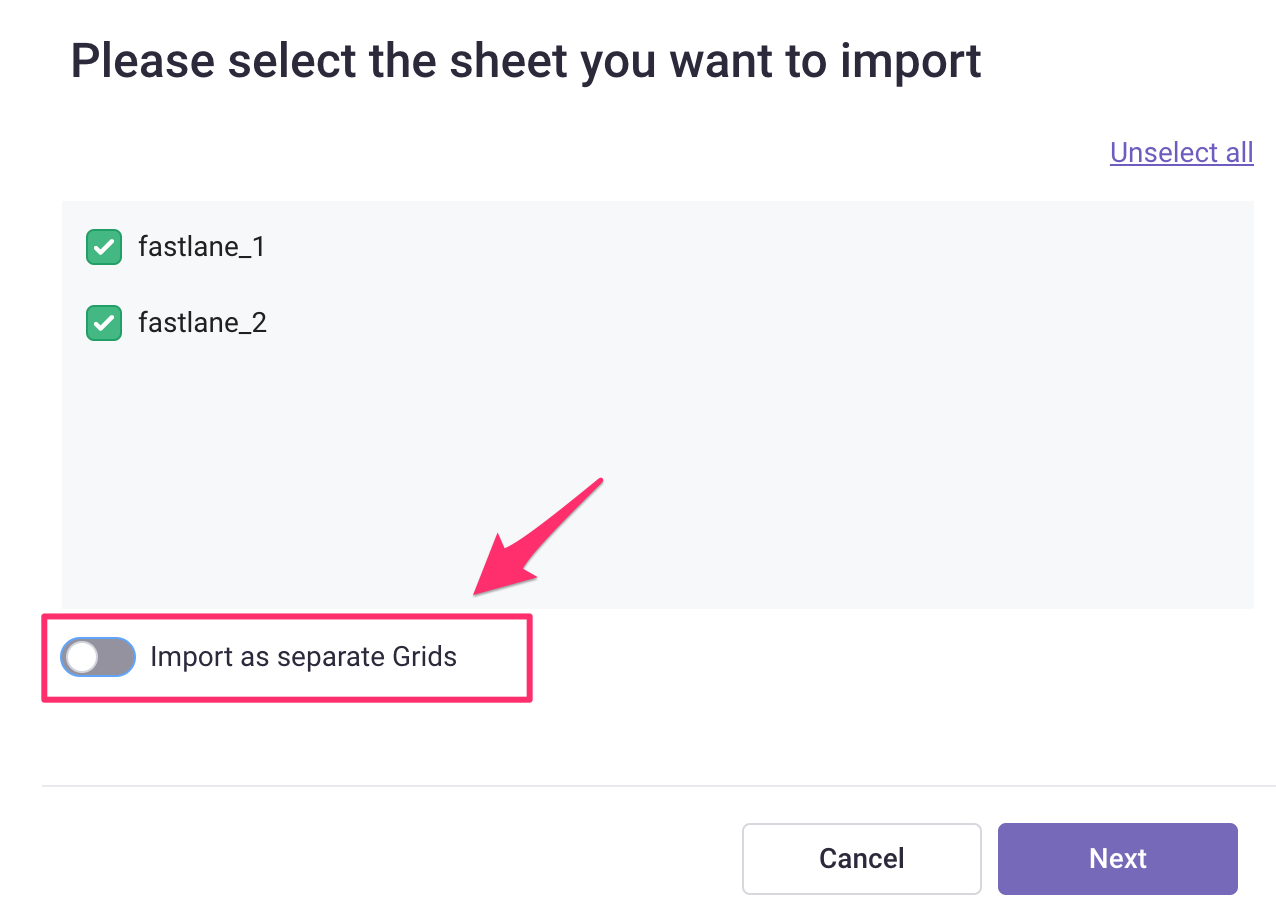
Select sheets (If you have multiple sheets in your Excel file)
Each sheet in an Excel file will be imported as a Grid. For instance, if your Excel file has 10 sheets, there will be 10 Grids in the database when imported successfully. We certainly do suggest however that you try to import all sheets to the same Grid (see below). Adding to the same Grid means that you can very quickly review all content in one place. It will also simplify the process when you want to send for translation. That will result in one export instead of an export for each Grid (and then having to import those loc files later).
- Select the sheets you want to import: Check the list of sheets and deselect any sheets you do not want to import.
- At the bottom, ensure the toggle in ON for Import as separate Grids.
- Click Next.
Note
The maximum file size of the imported Excel file is 200 MB.
Sheets qualified to import are marked as  , while sheets marked as
  indicate that they need some additional configuration. Click on those sheets to finish setting up and import.
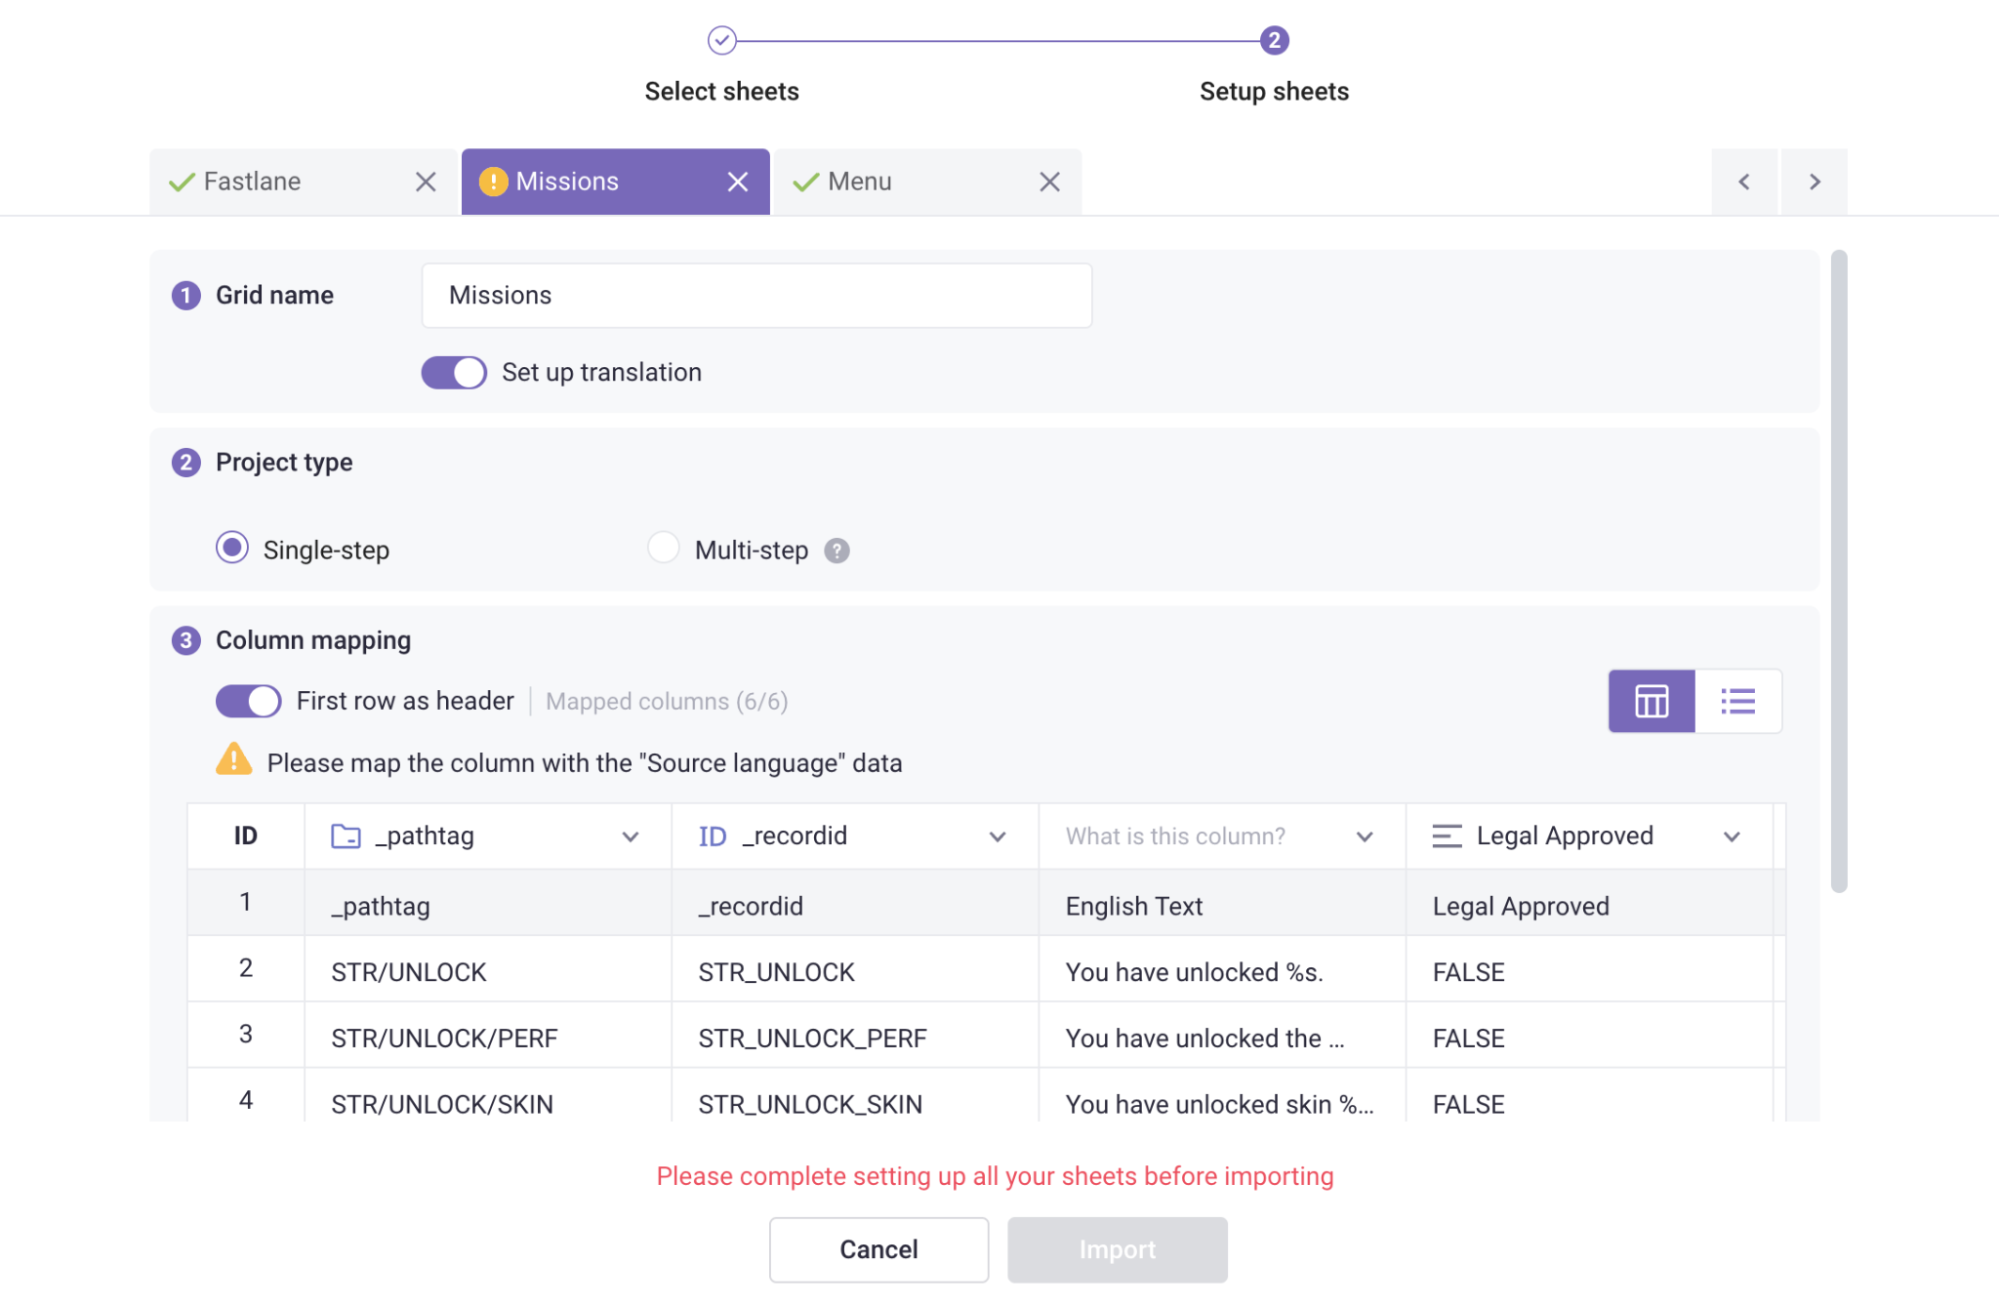
Set up sheets
-
Select the import mode by toggling on/off Set up translation:
- If you are importing a localization file which contains language columns (English, French, etc). You can continue to set up.
- If you are uploading a non-translate file, which does not contain language columns, like an asset management file, toggle off Set up translation.
Translation Grid: contains language columns
-
Select the project type:
- Single-step: if you’re translating from a single source language to one or multiple target language(s).
- Multi-step: if you’re translating from an initial source language to a pivot language and then to target languages. For example: Chinese -> English -> Global languages.
- Map the columns with the appropriate column types: Gridly will automatically map the columns for you depending on the column name. If you need to customize the data, you’ll be able to:
- Use first row as header.
- Manually adjust column types.
- Allow non-unique record IDs, global unique record IDs.
- Click Create and the Grid is now in your selected database.
Note
You need to have at least one source language column in your Translation Grid in order to be able to create it, so make sure you set a column as the source language column. For example:
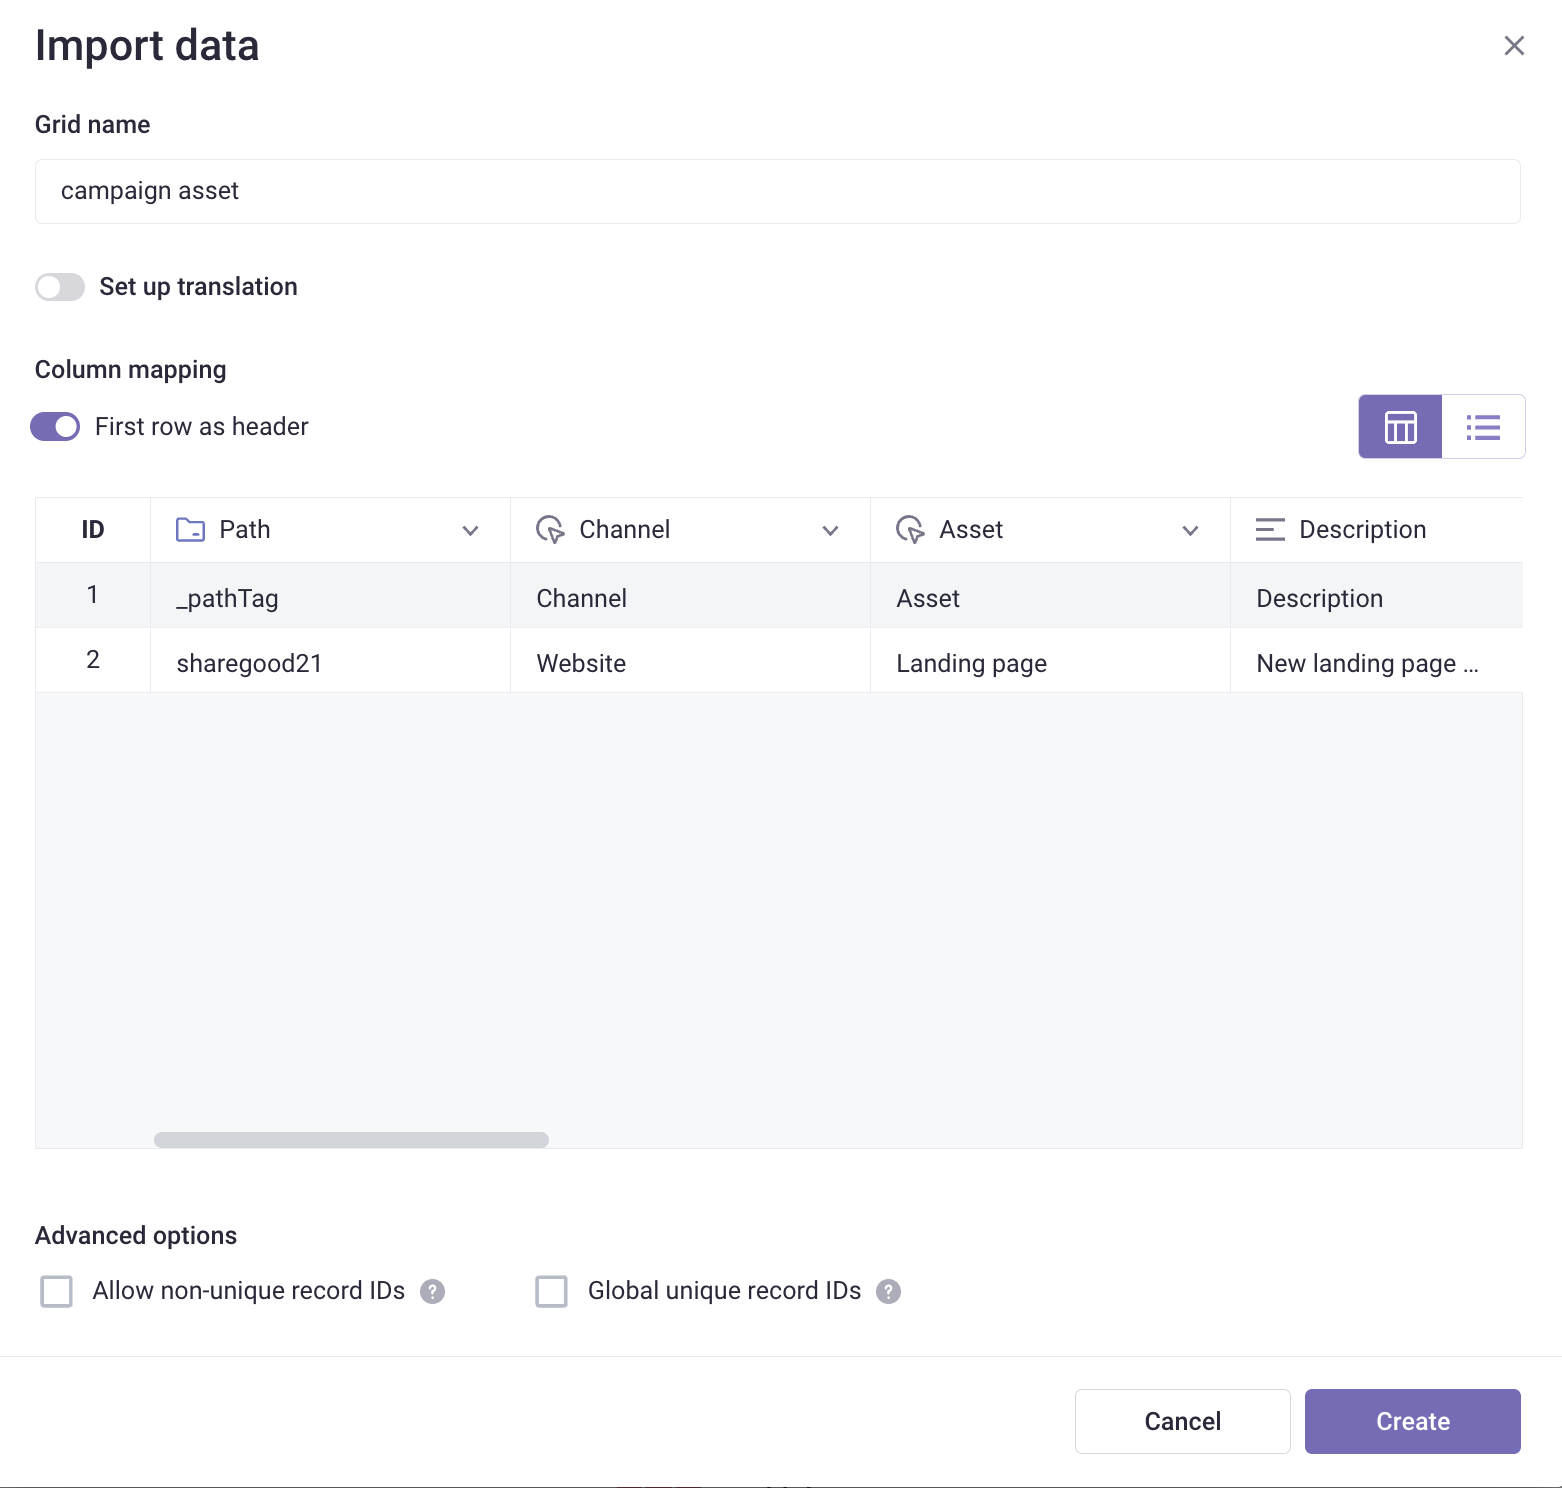
Non-translation Grid: does not contain language columns
Similarly, Gridly will automatically map the columns for you depending on the column name. If you need to customize the data, you’ll be able to:
- Use first row as header.
- Manually adjust column types.
- Allow non-unique record IDs, global unique record IDs.
Then, click Create and the Grid is now in your selected database.
Tips
For a simplified view, you can select the list view icon on the right-hand side.
Advanced: Import multiple sheets to one Grid
In many cases, you have a large number of sheets and you want to combine many sheets in an Excel file into one. Gridly allows you to combine the similar sheets* to one Grid and import to Gridly.
Note
Similar sheets are sheets with the same column names. We recommend aligning your column names before importing if you want to combine the sheets into one Grid.
Add sheets and mapping the columns
- After adding the Excel file to Gridly, select the sheets you want to import: Check the list of sheets and deselect any sheets you do not want to import.
- At the bottom toggle off Import as separate Grids, then click Next.
- Check the name, Grid type, and Project type as usual.
- Map the columns:
- Gridly will automatically match all the columns with the same name.

- If you have not changed the column name, you can click
 to add a column, then select which columns from each sheet to match.
- Gridly will automatically match all the columns with the same name.
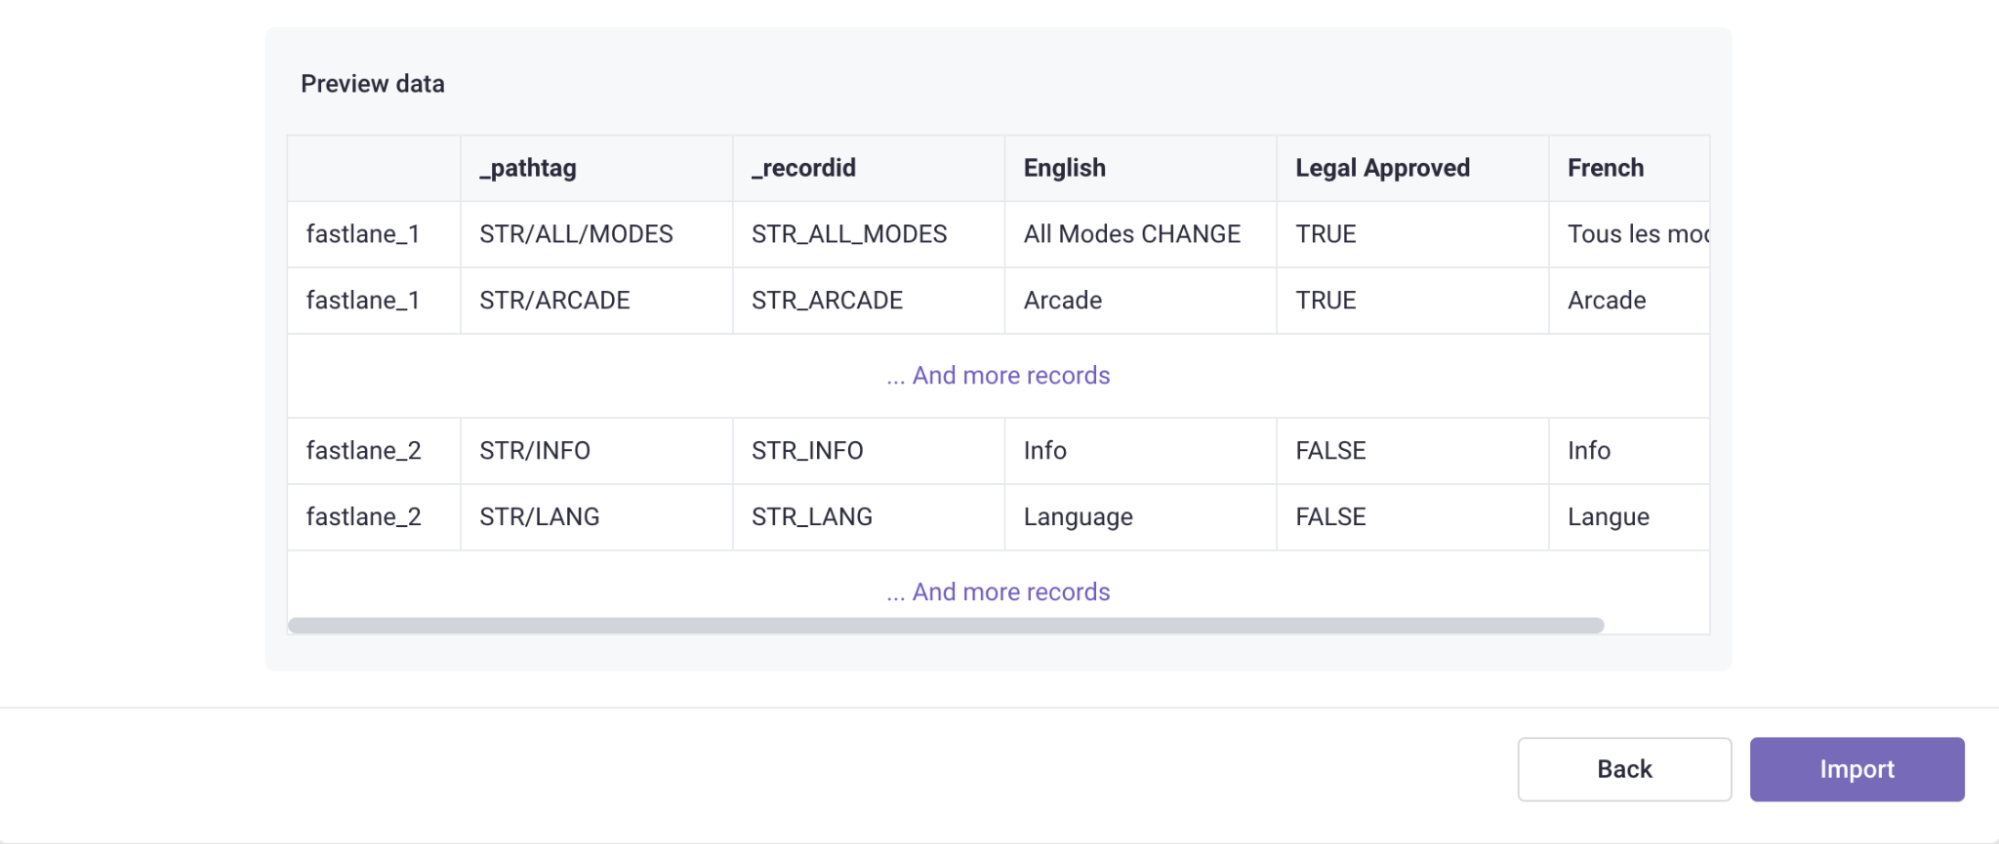
- Click Preview, then check if the records will be imported correctly.
- Click Import.
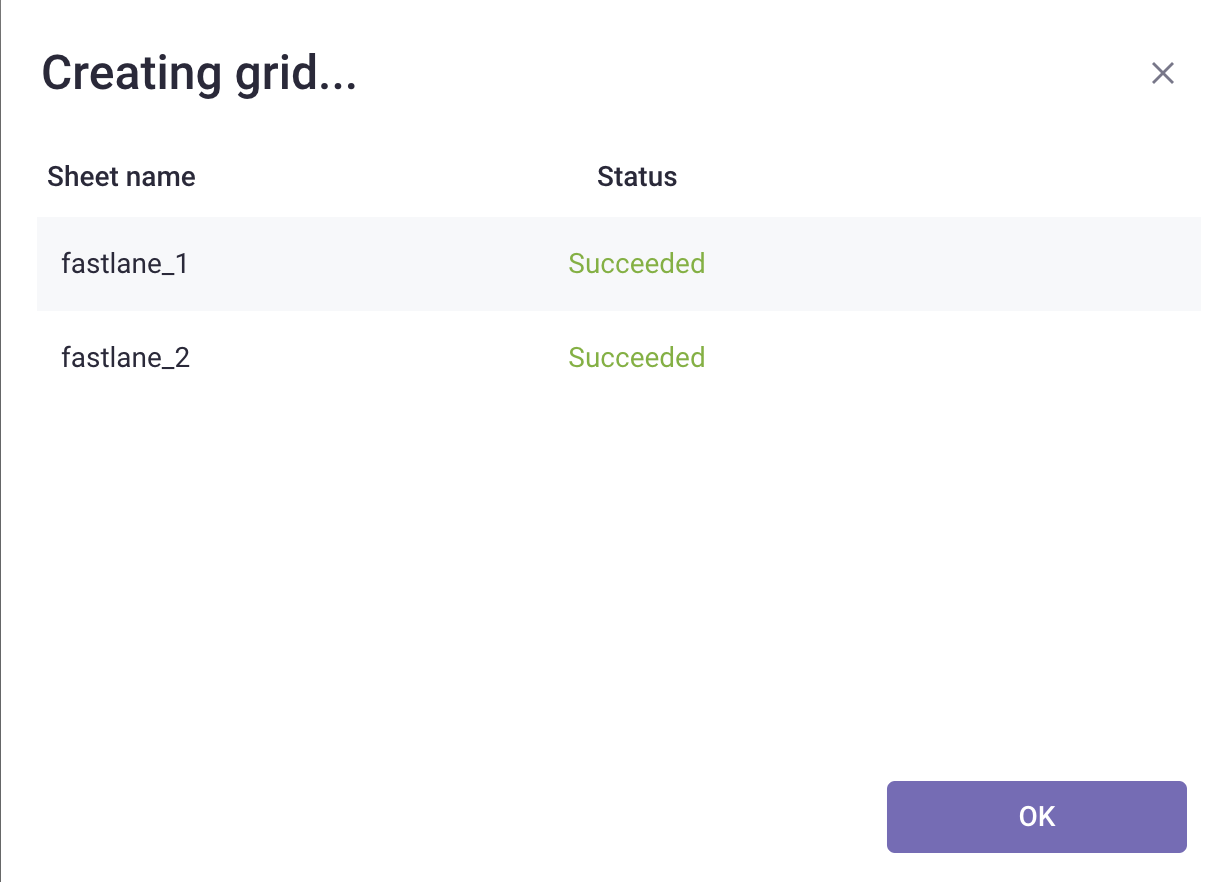
- Have a sip of coffee (or drink of choice) and wait while the sheets are imported. Once done, you’ll be notified about the result. Click OK and open the Grid.
Manage customization options before importing
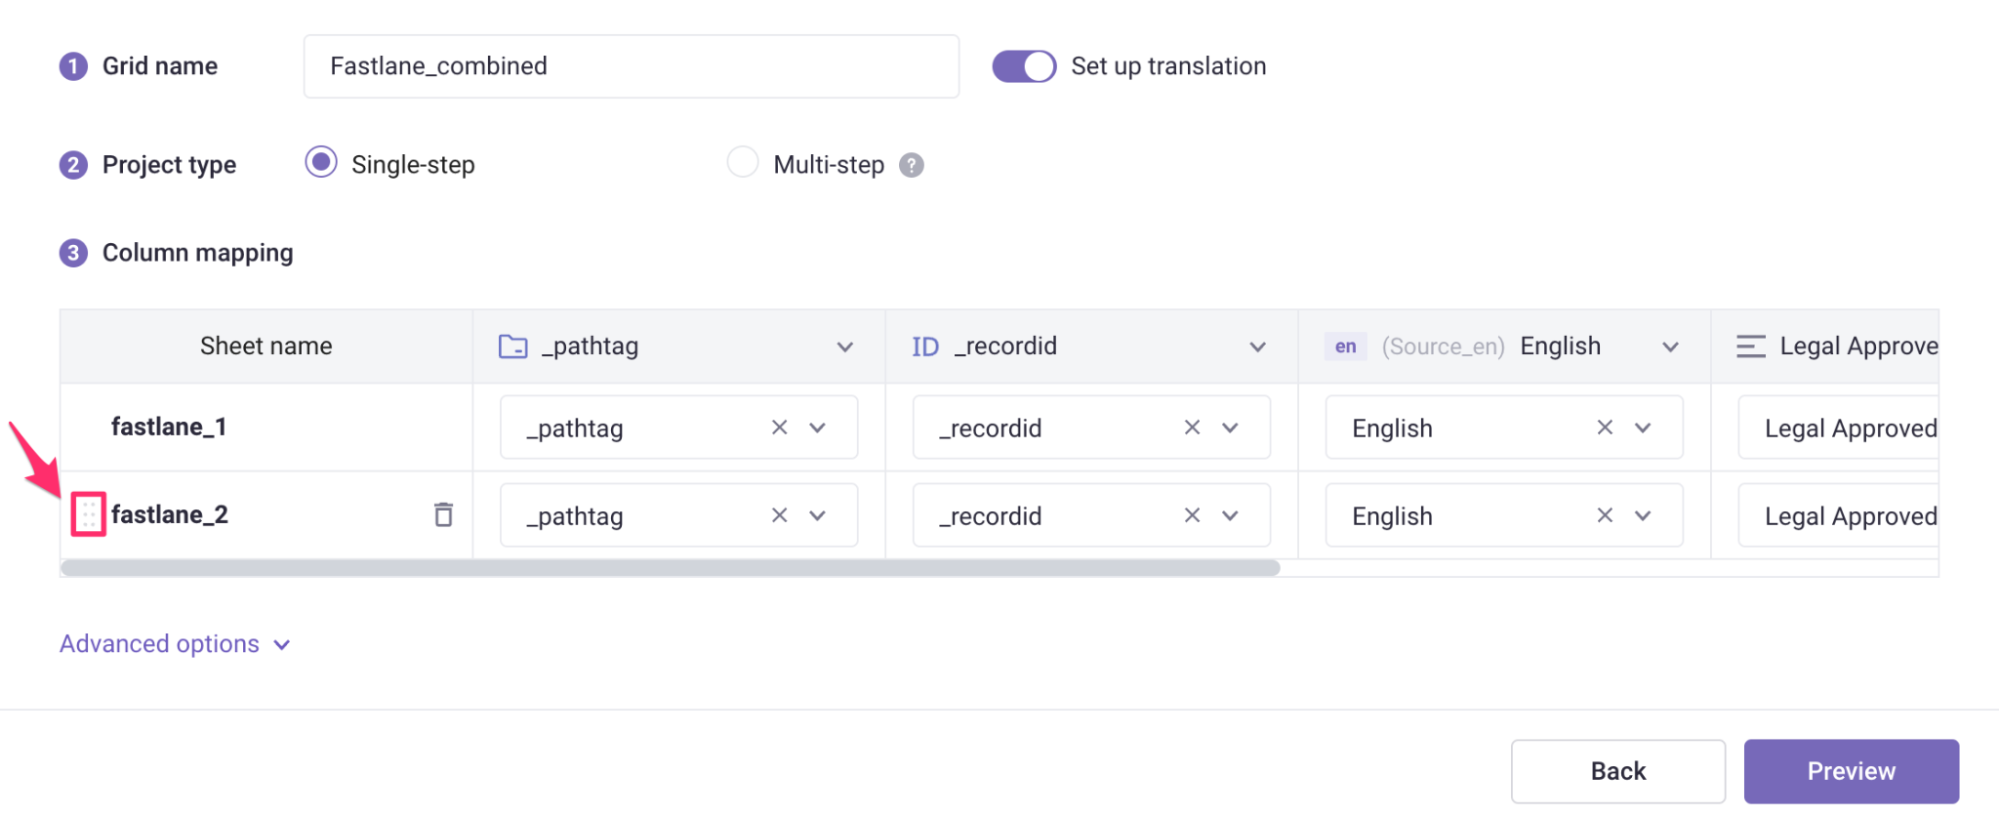
Manage order of imported records
The order of imported records is decided by the order of imported sheets. Click  and drag and drop to rearrange the order.
Delete a sheet
Click ![]() next to the sheet name to delete the sheet from the importer.
next to the sheet name to delete the sheet from the importer.
Change column properties
Click ![]() next to a column name to change the column name and type, or delete it if needed.
next to a column name to change the column name and type, or delete it if needed.
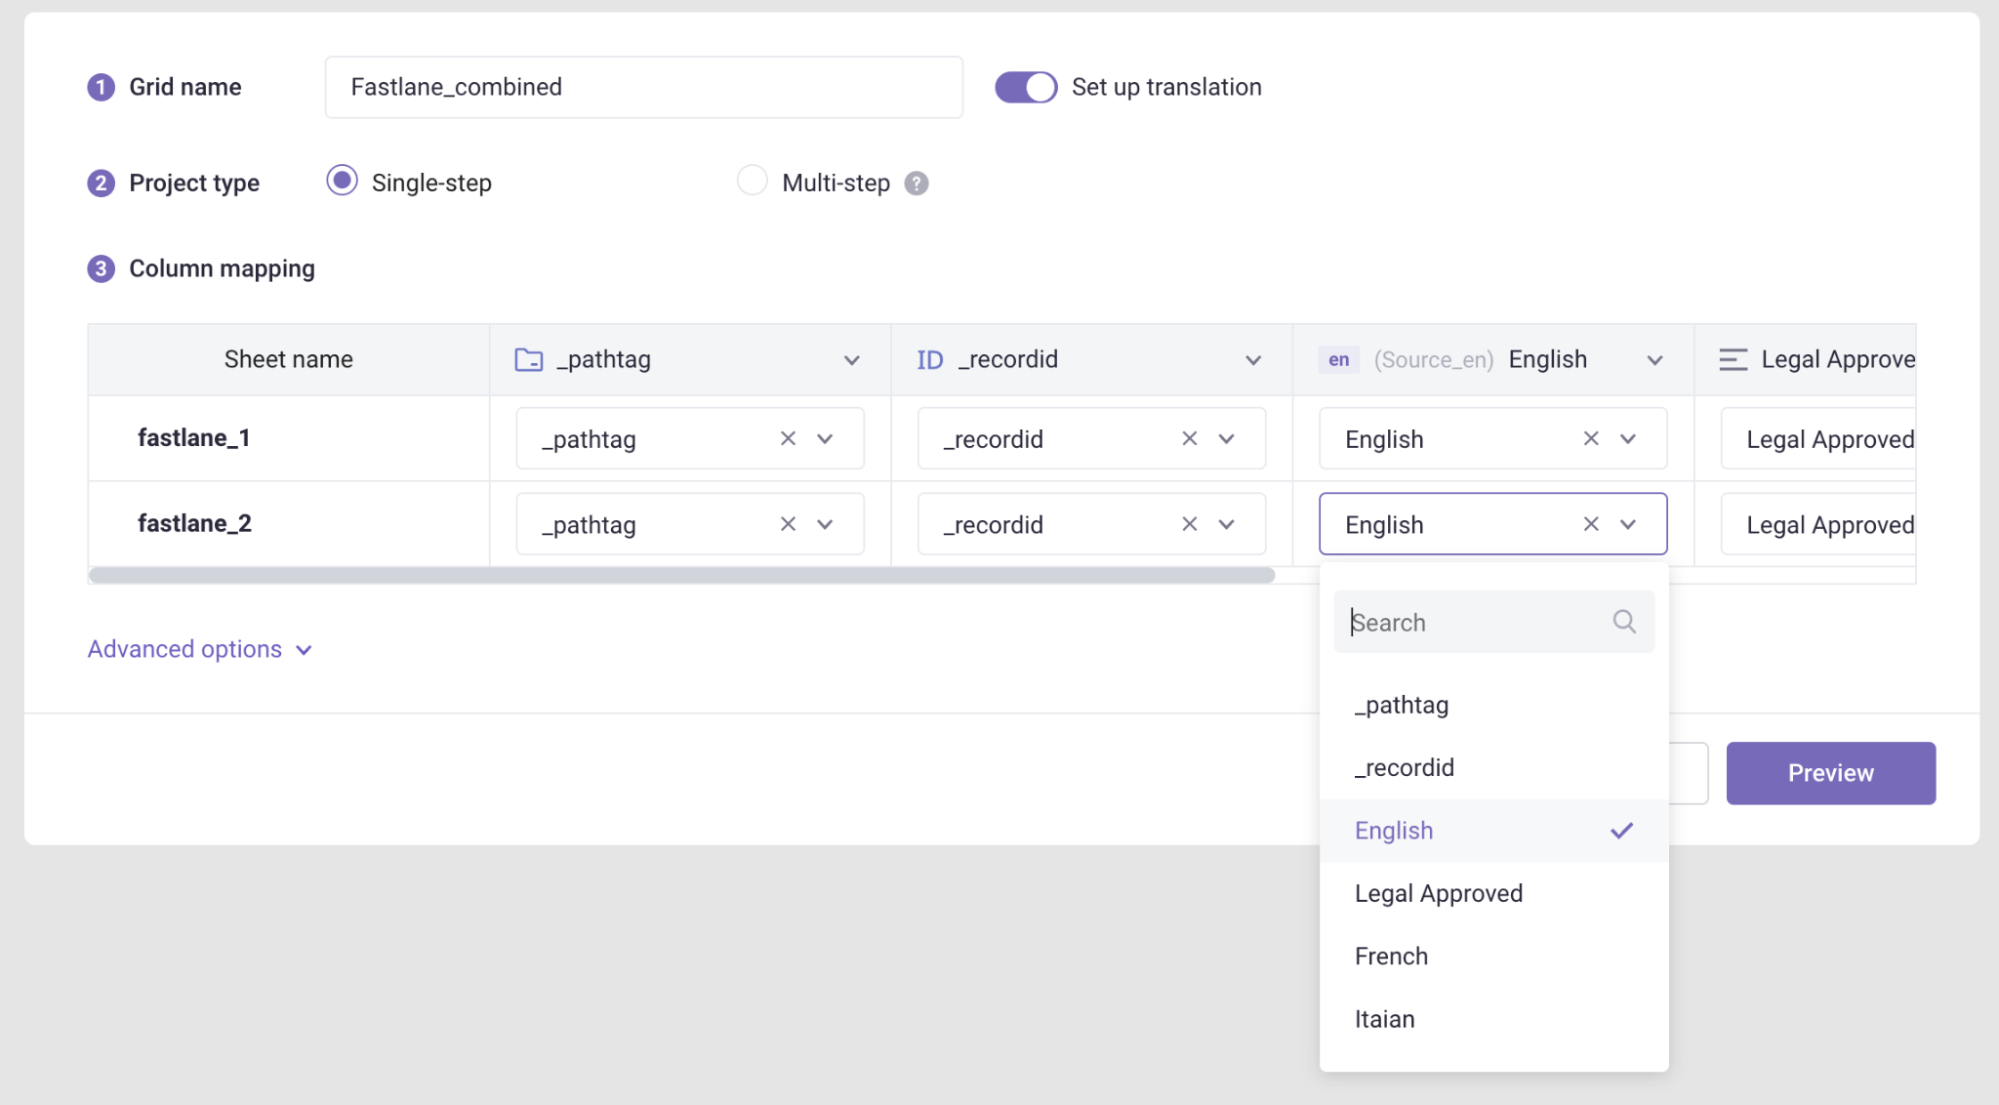
Change matched sheets
If you want to match a column from sheet A to another column in sheet B. Click ![]() next to sheet B’s column name and select another one.
next to sheet B’s column name and select another one.
TMS module
In the TMS module, you can create a Job by importing an Excel file. If you are unfamiliar with the TMS module, refer to this getting started with TMS guide.
- Open the TMS module and go to the Category in which you want to create the Job.
- Inside a Category, click Upload file.

- Select the Excel file you want to upload.
- Fill in Job details:
- Job name: Set as file name by default
- Description
- Assignee
- Due date
- Priority
- Target languages: Category's target languages will be selected by default
- Segmentation rule: Select a custom segmentation rule to determine how texts are segmented. If no custom segmentation rule is selected, original segmentation from the file will be used. Learn more in this document: Segmentation rules
- XLSX - File import settings:
- Import direction: Choose how Gridly will read your Excel files (by columns or rows, direction)
- Column: Left to Right
- Column: Right to Left
- Row: Top to Bottom
- Import comment
- Import sheet names
- Import hidden sheets, columns, rows
- Select sheets to import (required):
- Source language columns: Select an option
- Import all columns
- Import specific columns only
- Rows to import: Select an option
- Import all rows
- Import specific rows only: Row index starts at 0. You can enter a single row (e.g. 3) or a range of rows (e.g. 5-8)
- Source language columns: Select an option
- Import direction: Choose how Gridly will read your Excel files (by columns or rows, direction)

- Configure Job workflow: Select a workflow (inherit from Category settings). The selected workflow determines how many Tasks will be generated and the steps they will progress through from start to finish. You can uncheck a workflow step to exclude it from the workflow.
- Click Next to preview the Grid before importing.
- Click Complete.
- Wait for the process to finish. Click Manage job to see the newly created Job.
