
Table of contents:
You must first enable SSO and submit your signin URL, following the steps in this article: Configuring SSO in Gridly.
Setting up Single Sign-On in Microsoft Entra ID
- Sign in to the Microsoft Entra admin center as at least a Cloud Application Administrator.
- Browse to Identity > Applications > Enterprise applications > All applications.
- Select Enterprise applications in the side panel.
- Click Create your own application.
- Input “Gridly” as the app name and click Create.

In the Overview tab, click Get Started in the Set up single sign on box, then select SAML.

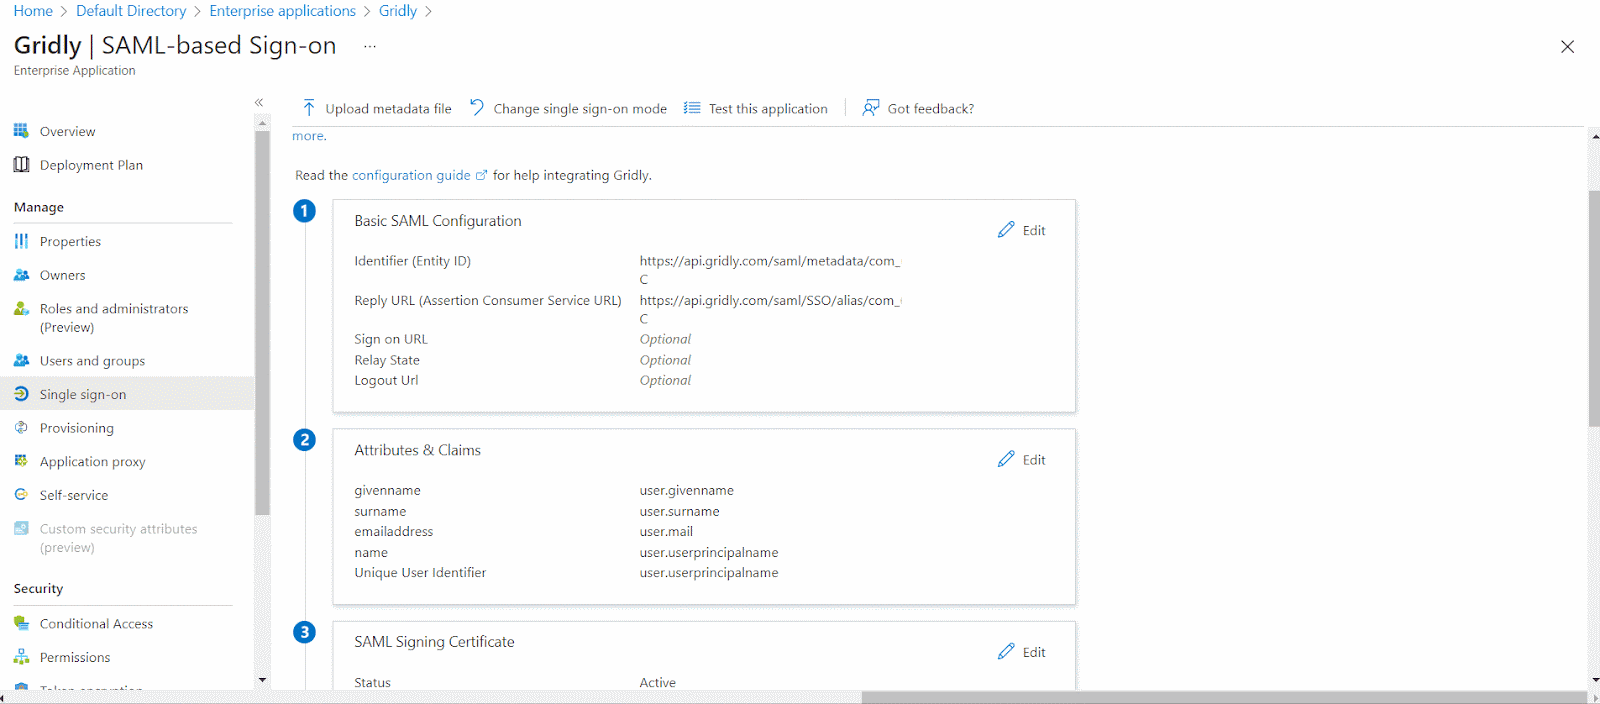
Basic SAML configuration
- Click
 for
for  Basic SAML Configuration to edit the settings.
 - Use the SAML information you've gather while configuring SSO in Gridly to complete this step:
- Click Add identifier, then copy the SP metadata URL from Gridly into the Identifier field (Entity ID).
- Click Add reply URL, then copy the Add Assertion Consumer Service (ACS) URL from Gridly into the Reply URL (Assertion Consumer Service URL) field.
- Click Save.

Attributes & Claims
- Click in
 Attributes & Claims section to edit the settings.
 - Click the Unique User Identifier (Name ID) field.
- In the Source attribute field, select user.mail in the drop-down list.
- Click Save.
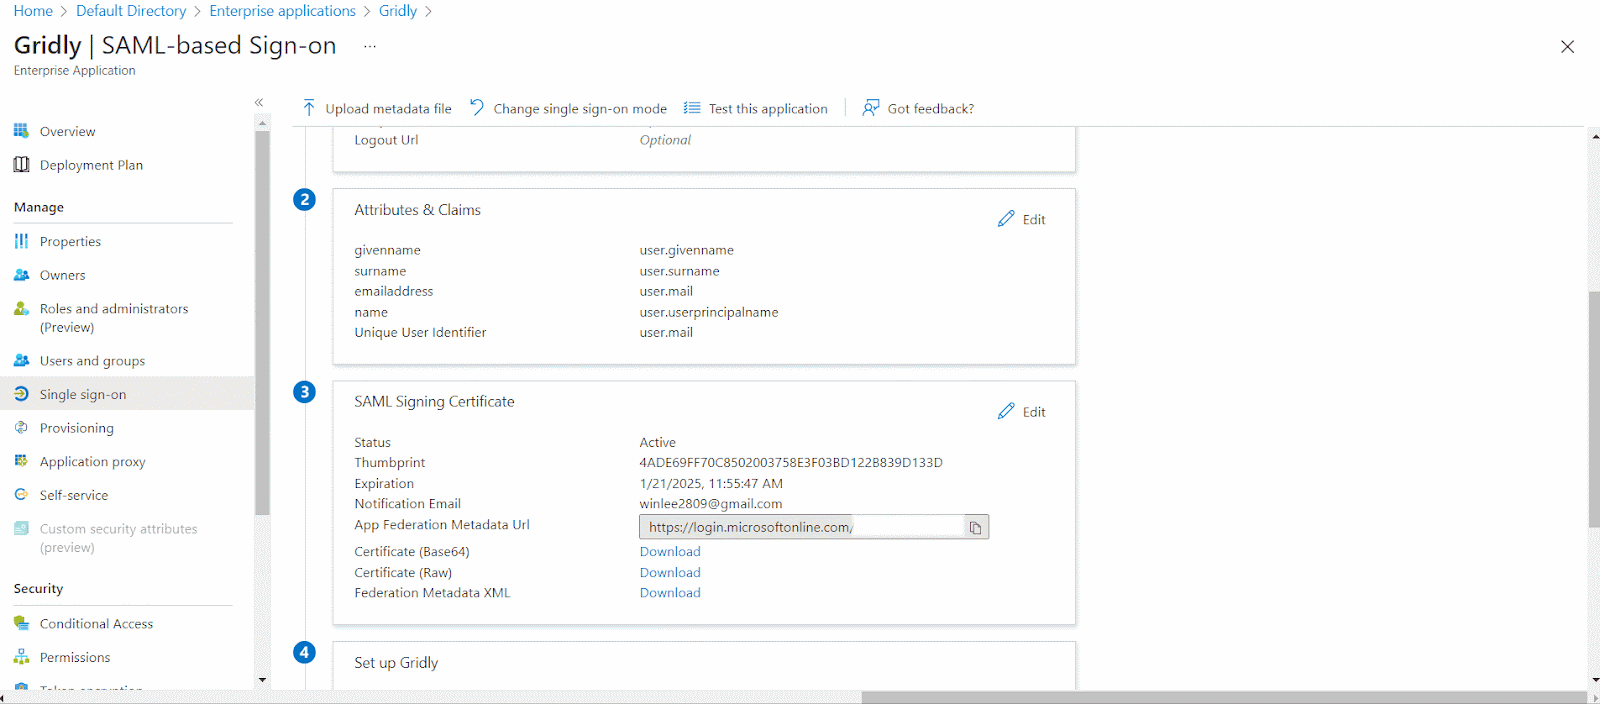
SAML Configuration for Gridly
- In the
 SAML Signing Certificate section, copy the App Federation Metadata URL to clipboard.
 - Paste in the IdP metadata URL field of Gridly and click Save.

Assign users to Gridly
You must assign Gridly integration to users in your organization for them to access Gridly through your identity provider:
- In the overview page, find the Manage section and select Users and groups.
- Select Add user/group, then select Users in the Add Assignment dialog.
- In the Users dialog, select the users you wish to add from the Users list, then click Select at the bottom of the screen.
- Optional: If you're expecting any role value in the SAML assertion, in the Select Role dialog, select the appropriate role for the user from the list and then click the Select button at the bottom of the screen.
- Click Assign.
Test Single Sign-on with Gridly
- Go back to the Single Sign-on tab in the Microsoft Intra admin center.
- Scroll down to section
 Test Single sign-on with Gridly.
 - Click Test > Test sign in.

Now assigned users can sign in to Gridly with SSO/SAML through your identity provider, or access https://app.gridly.com/signin and select Sign in with SSO/SAML.