This feature is available for both the CMS and TMS modules.
As of March 5th, 2025, memoQ is no longer a standalone add-on but is included in the TMS module for companies on the new pricing structure.
memoQ is a proprietary computer-assisted translation software suite which runs on Microsoft Windows operating systems. As well as desktop versions, memoQ also has a web version.
The memoQ Add-on for Gridly facilitates the exchange of content back and forth between Gridly and memoQ, replacing the need to manually export and import files with translations.
Setup
Install and create your first connection
To install the memoQ add-on:
- From Homepage, open the CMS module.
- Click
 in the top right corner.
 - Select memoQ from the add-on list and click Install.

Once installed, follow the instructions in the add-on settings:
-
If you are using memoQ cloud:
- Go to memoQ cloud. In the settings panel, select IP filtering for the Web Service API.
- Add IP address 18.192.141.172 to allow Gridly to connect to the Web Service API. It could take several minutes until this change takes effect.
- Copy the WEB SERVICE API ACCESS POINT and paste it into the box.
- Open the memoQ desktop application and select Server Administrator.
- Click
 to connect the memoQ server, under Category, select Web Service Interface.
 - Select Enable API Key, copy the key and paste it into the box.
- Click Connect to connect to your memoQ account.
-
If you are using memoQ server:
- Follow this guide to enable Web service API: https://docs.memoq.com/current/en/memoQ-server-deployment-tool/deptool-configure-server.html
- Copy the base address and append the suffix “/memoqservices/” to obtain a Web Service API access point. For example, if your base address is https://abc.com, then your Web Service API access point is https://abc.com/memoqservices/
- Paste the Web Service API access point into the corresponding box.
- Copy the API key and paste into the corresponding box.

Add new memoQ connections
You can connect Gridly to different memoQ accounts. To add a new memoQ connection:
- From Home page, select Integration settings from the left-hand side menu
- Switch to memoQ tab.
- Click
 .
. - Enter Connection name and Description.
- Click Create.
- Click on your newly created memoQ connection to configure it similarly to your first connection.

Pushing to memoQ from the CMS module
In the CMS module, the add-on pushes content from the active View of your Grid to memoQ where the translation documents for selected language pairs are created.
Once the Add-on is installed, a small memoQ icon will appear in the right-side panel in Grids. Click on the icon to open the Add-on. If everything is set up correctly, the button Push to memoQ is displayed.

If the button is not displayed, check that the active View contains a source language, a target language, and Dependencies are set between them.
Select content to push to memoQ
Use View filters to filter content to be pushed to memoQ from the View (for example, you may want to push only untranslated records to memoQ). The Add-on only pushes content displayed in localization columns within the current View.
You can also choose to push optional additional columns, containing information corresponding to attributes used by memoQ (Context key, Comment Column, Maximum length).
Push content to memoQ
After selecting the content you want to push to memoQ, click on the Push to memoQ button in the Add-on, accessible from the right-side panel. Here you can configure the settings before pushing content to memoQ:
-
Select push type and location:
- memoQ connection: Select one from your list of memoQ connections.
- Select push type:
-
New project: Create a brand new project in memoQ when pushing.
- Select memoQ template: Choose a memoQ template for your new project.
- Enter project name: Enter a name for your new memoQ project (Gridly database name will be used by default).
-
Enter file name: Content pushed from Gridly will be stored in a file. Enter a name for this file.

-
Existing project: Push content to an existing memoQ project.
- Select memoQ project: Choose a memoQ project to push content into.
-
Enter file name: Content pushed from Gridly will be stored in a file. Enter a name for this file.

-
New project: Create a brand new project in memoQ when pushing.
-
Select source language: Select source language to push to memoQ
- Segment source data: When this checkbox is selected, data will be split based on the segment rules in memoQ.

- Select Gridly target language: Select target language to push to memoQ

-
Other options:
- Does your project template have an import filter?: If your memoQ project does not have an import filter, choose “No, create a new one for me”. Otherwise, choose “Yes, use my filter”.
- Push also Up-to-date records: By default, Out-of-date and Unset records are pushed to memoQ. Select this checkbox to also push Up-to-date records.
- Select columns for Context key, Comment column, and Maximum length. This is optional.

- When you are happy with the push configuration, click the Push button to push content to memoQ. Refresh the project page in memoQ, your content will appear under Translations tab.

Notes
- Source and target languages must be part of the active View.
- Columns must be of localization data type and Dependencies need to be set between the columns.
Deliver translations from memoQ to Gridly CMS
Once content is pushed to memoQ, the Add-on creates translation documents with language pairs in memoQ. When any of the translation documents is set to Delivered, it serves as a trigger to push the content back from memoQ to Gridly.
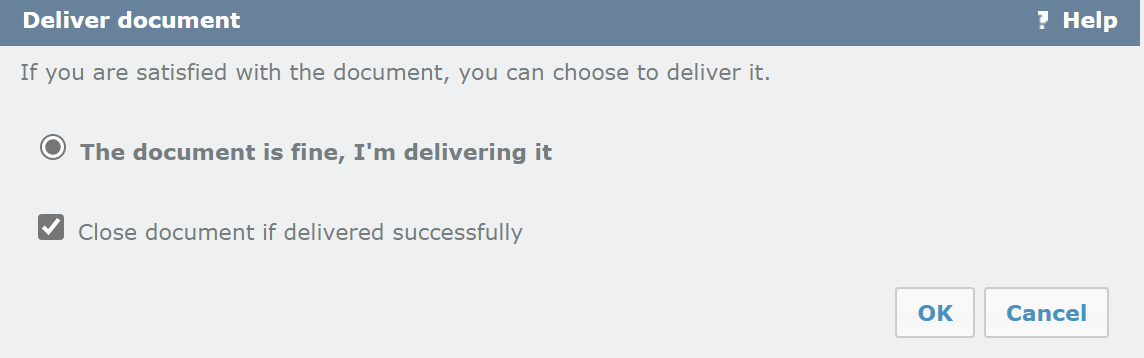
After delivering the translation document from memoQ, the content is automatically updated in your Grid and corresponding Views.
How Dependencies are updated by the add-on
If out-of-date or unset records are updated with new translations from memoQ, their dependency status will automatically be changed to up-to-date.
The status of records that are currently out-of-date or unset and were not changed by translators in memoQ will stay the same, even when content is pushed back from memoQ to Gridly. This is due to no change being performed in memoQ.
Pushing to memoQ from the TMS module
Configure Category settings
In the TMS module, you can use memoQ to work on Tasks if Category type is memoQ integration. Before pushing your Tasks, you must first select a memoQ connection and a default memoQ project for you Category:
- Click
 next to Category name and select Settings.

- Select memoQ.
- Configure these settings:
- memoQ connection: Select a memoQ connection to use.
- Default memoQ project to push: Select a memoQ project to push Tasks under this Category to.
- Does your project template have an import filter?: If your memoQ project does not have an import filter, choose “No, create a new one for me”. Otherwise, choose “Yes, use my filter”.
- Click Save.

Push TMS Tasks to memoQ
To push TMS Tasks to memoQ:
- Click
 and select Push configuration.
 - Configure these settings:
- General info
- Filename: If left blank, original filename will be used.
- memoQ project (set in Category settings).
- Source language: Select source language to push to memoQ.
- Target languages: Select target languages to push to memoQ.
- Push also Up-to-date records: By default, Out-of-date and Unset records are pushed to memoQ. Select this checkbox to also push Up-to-date records.
- Import filter for memoQ (set in Category settings).
- Select columns for Context key, Comment column, and Maximum length. This is optional.
- General info

- Click Save configuration.
- Click Push to memoQ.
- Refresh the project page in memoQ, your Tasks will appear under Translations tab.

Deliver translations from memoQ to Gridly TMS
When you have finished the translation in memoQ and delivered the file, translated content will be delivered straight to the corresponding Gridly TMS Task.
Click on Task's name to review delivered content from memoQ. Note that this file is read-only and cannot be edited.
