Webhooks are automated messages sent between apps - a type of notification that includes detailed information about new items in apps.
You can connect Gridly webhooks to external systems to:
- Update content on your sites or apps instantly
- Send notifications about changes in Grids to the systems you use
- Build custom integrations with Gridly
If you are not familiar with creating an Automation, please view the following article: Creating Automation
Webhooks event
You can configure webhooks for all available triggers in Automation in this list, including (updated 02/2024):
- Record created
- Record updated
- Record deleted
- Column created
- Column updated
- Column deleted
- Ticket created
- Ticket updated
- Ticket deleted
- Ticket status changed
- Comment added
- Manual Record Trigger
Webhook request timeout
Webhook requests sent by Gridly have a maximum timeout of 75 seconds. If a webhook request takes longer than the timeout to complete, the automation rule will be shown as “Failed” in the Run history.
Setup
After creating the automation, you need to configure the trigger and action.
Add Trigger
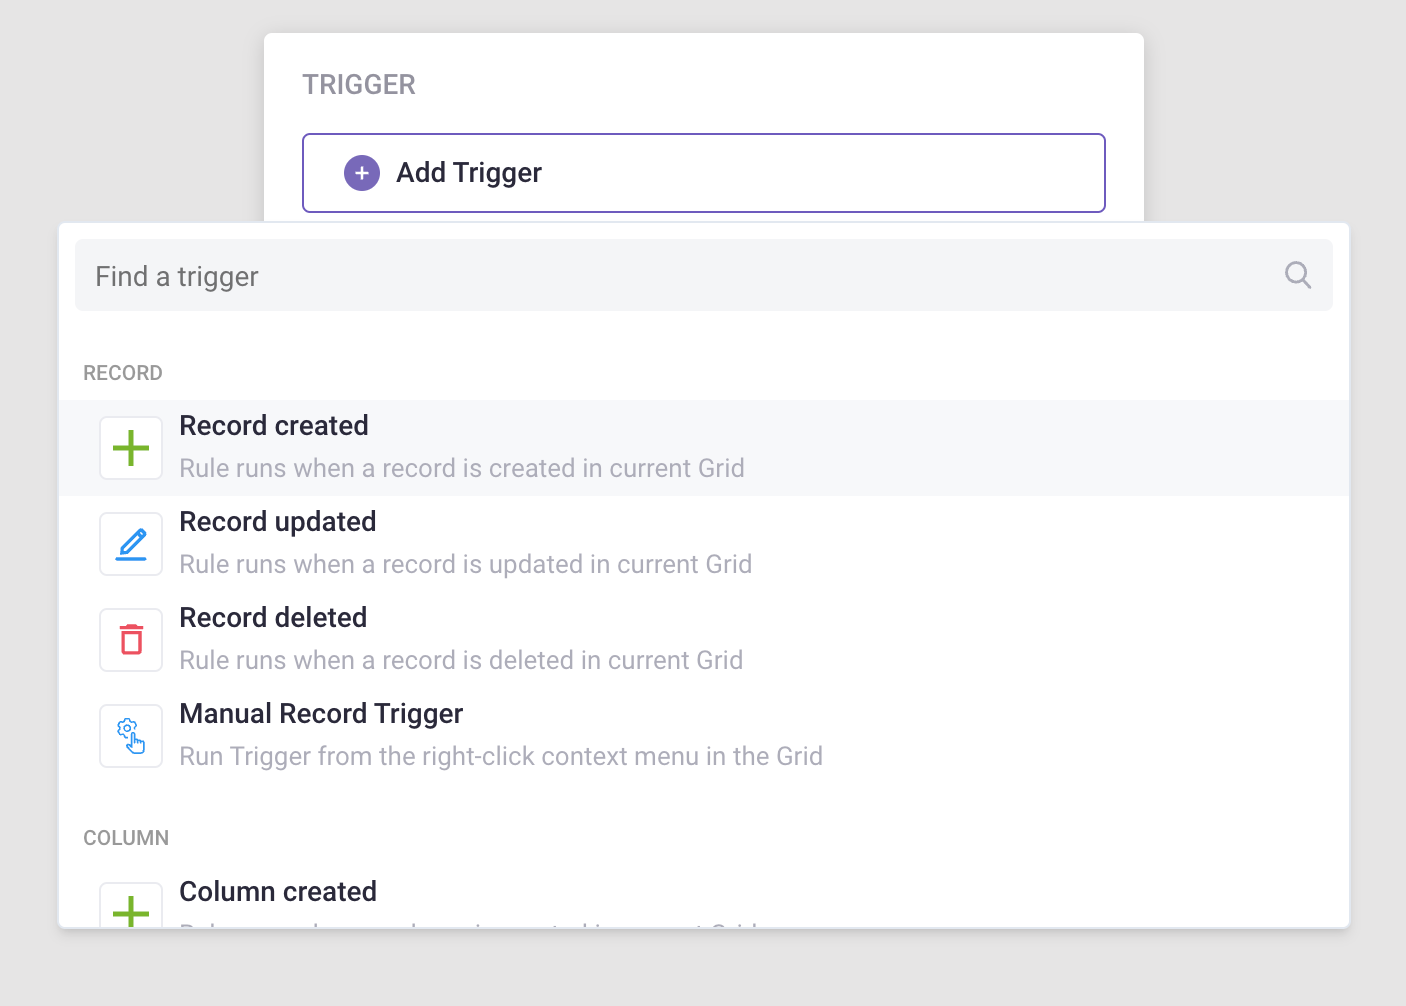
In the Automation designer, click Add Trigger, then select from one of the available triggers.
Add “Send web request” action
- Click Add Step and select Send web request in the list of actions.
- Select the HTTP Method: Gridly offers POST, PUT, and DELETE methods.
- Use the POST or PUT methods if you’re sending files.
- Use DELETE if you want to delete a resource from the server.

Optionally, you can add:
- Query string parameters: Specify your query parameters. Set a fixed value or select a Grid cell as value.
- Headers: Can be used for various purposes, such as an authorization method to enhance security.
- Payload: You can customize your payload here. If you want to send an empty payload, input '{}'. If you leave the field empty, the action will send all information, including that of the database, Grid, view, trigger event, user, cell's data, and all variables.
- Output fields: Output variables let us pass data from the Send web request action to any remaining actions in the automation run.
- Postbacks: Map the output fields from the Lambda function to the columns in Gridly, this helps Gridly update the returned values from Lambda functions to the correct columns.
Note
If your webhook endpoint (URL) is behind a firewall/private network, you’ll need to whitelist our IP address: 18.192.141.172/32.
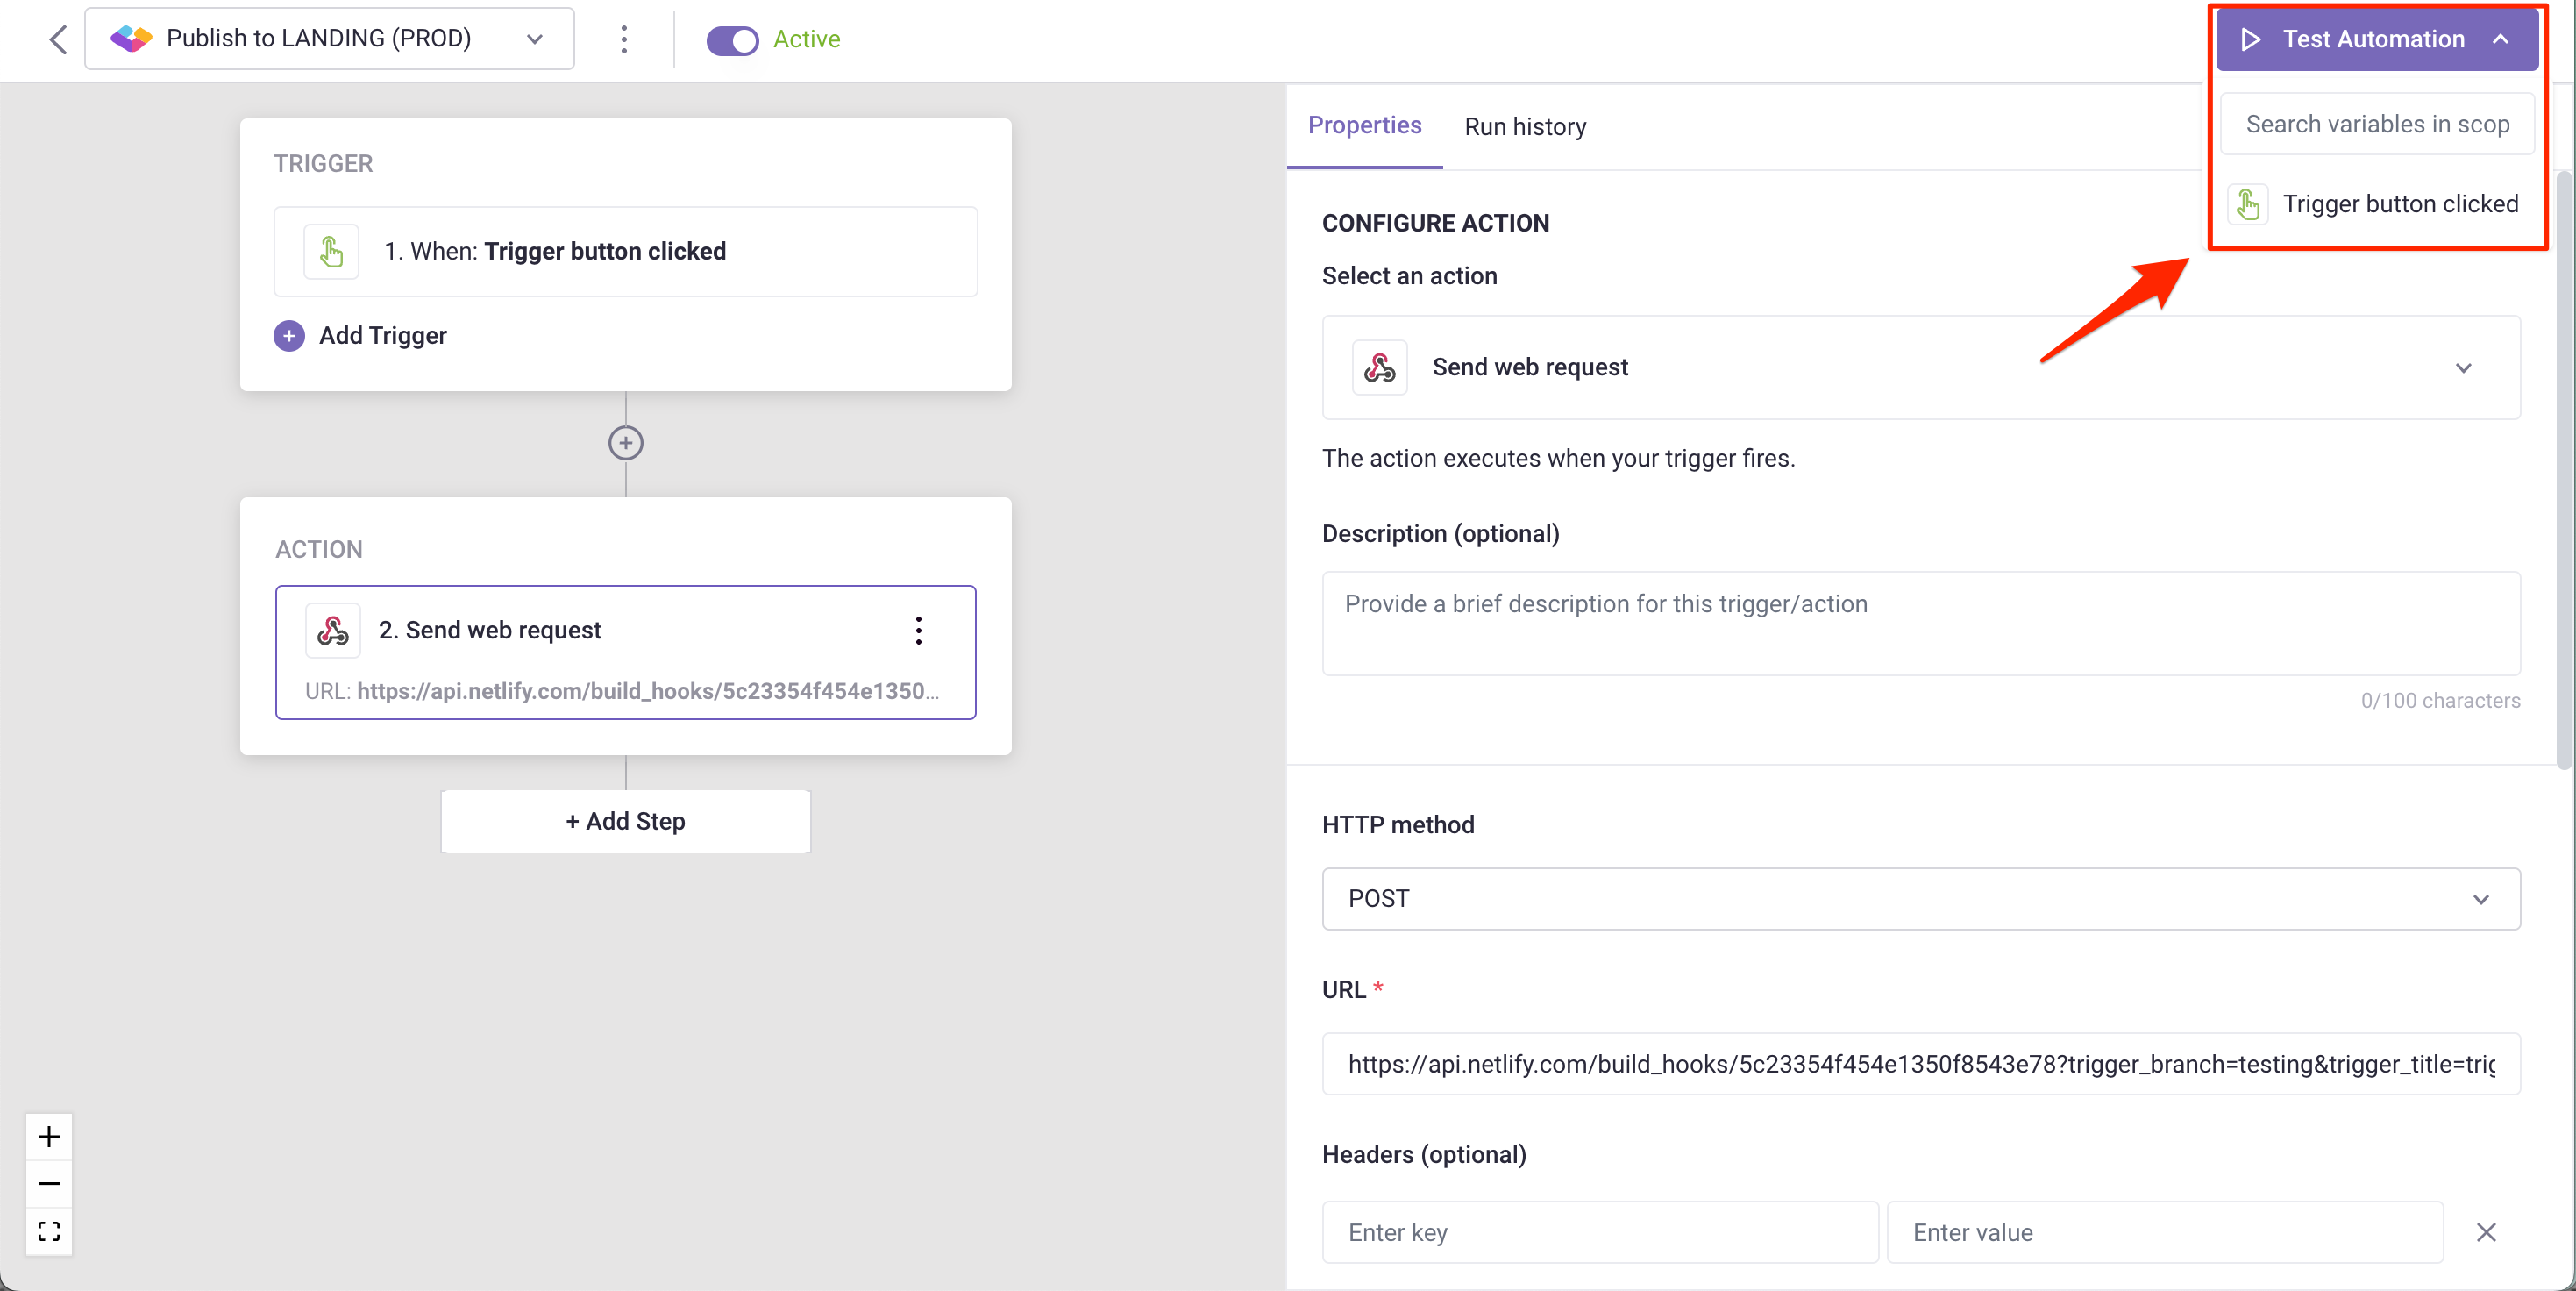
Test Automation
- Switch the toggle on to turn on the automation
- Click Test Automation. If your automation is not turned on, Gridly will require that you turn on the automation in the resulting pop-up message. Click on the toggle to turn on and select Test again.
Quick example: Update content on sites when clicking the “Execute” button using webhooks
This example will demonstrate how to connect Gridly with Netlify using webhooks. This automation will notify the build hook and trigger a build in Netlify when the Execute button is clicked.
Please note that this tutorial focuses on showcasing how to send webhooks between apps. All other necessary configurations have been completed in advance.
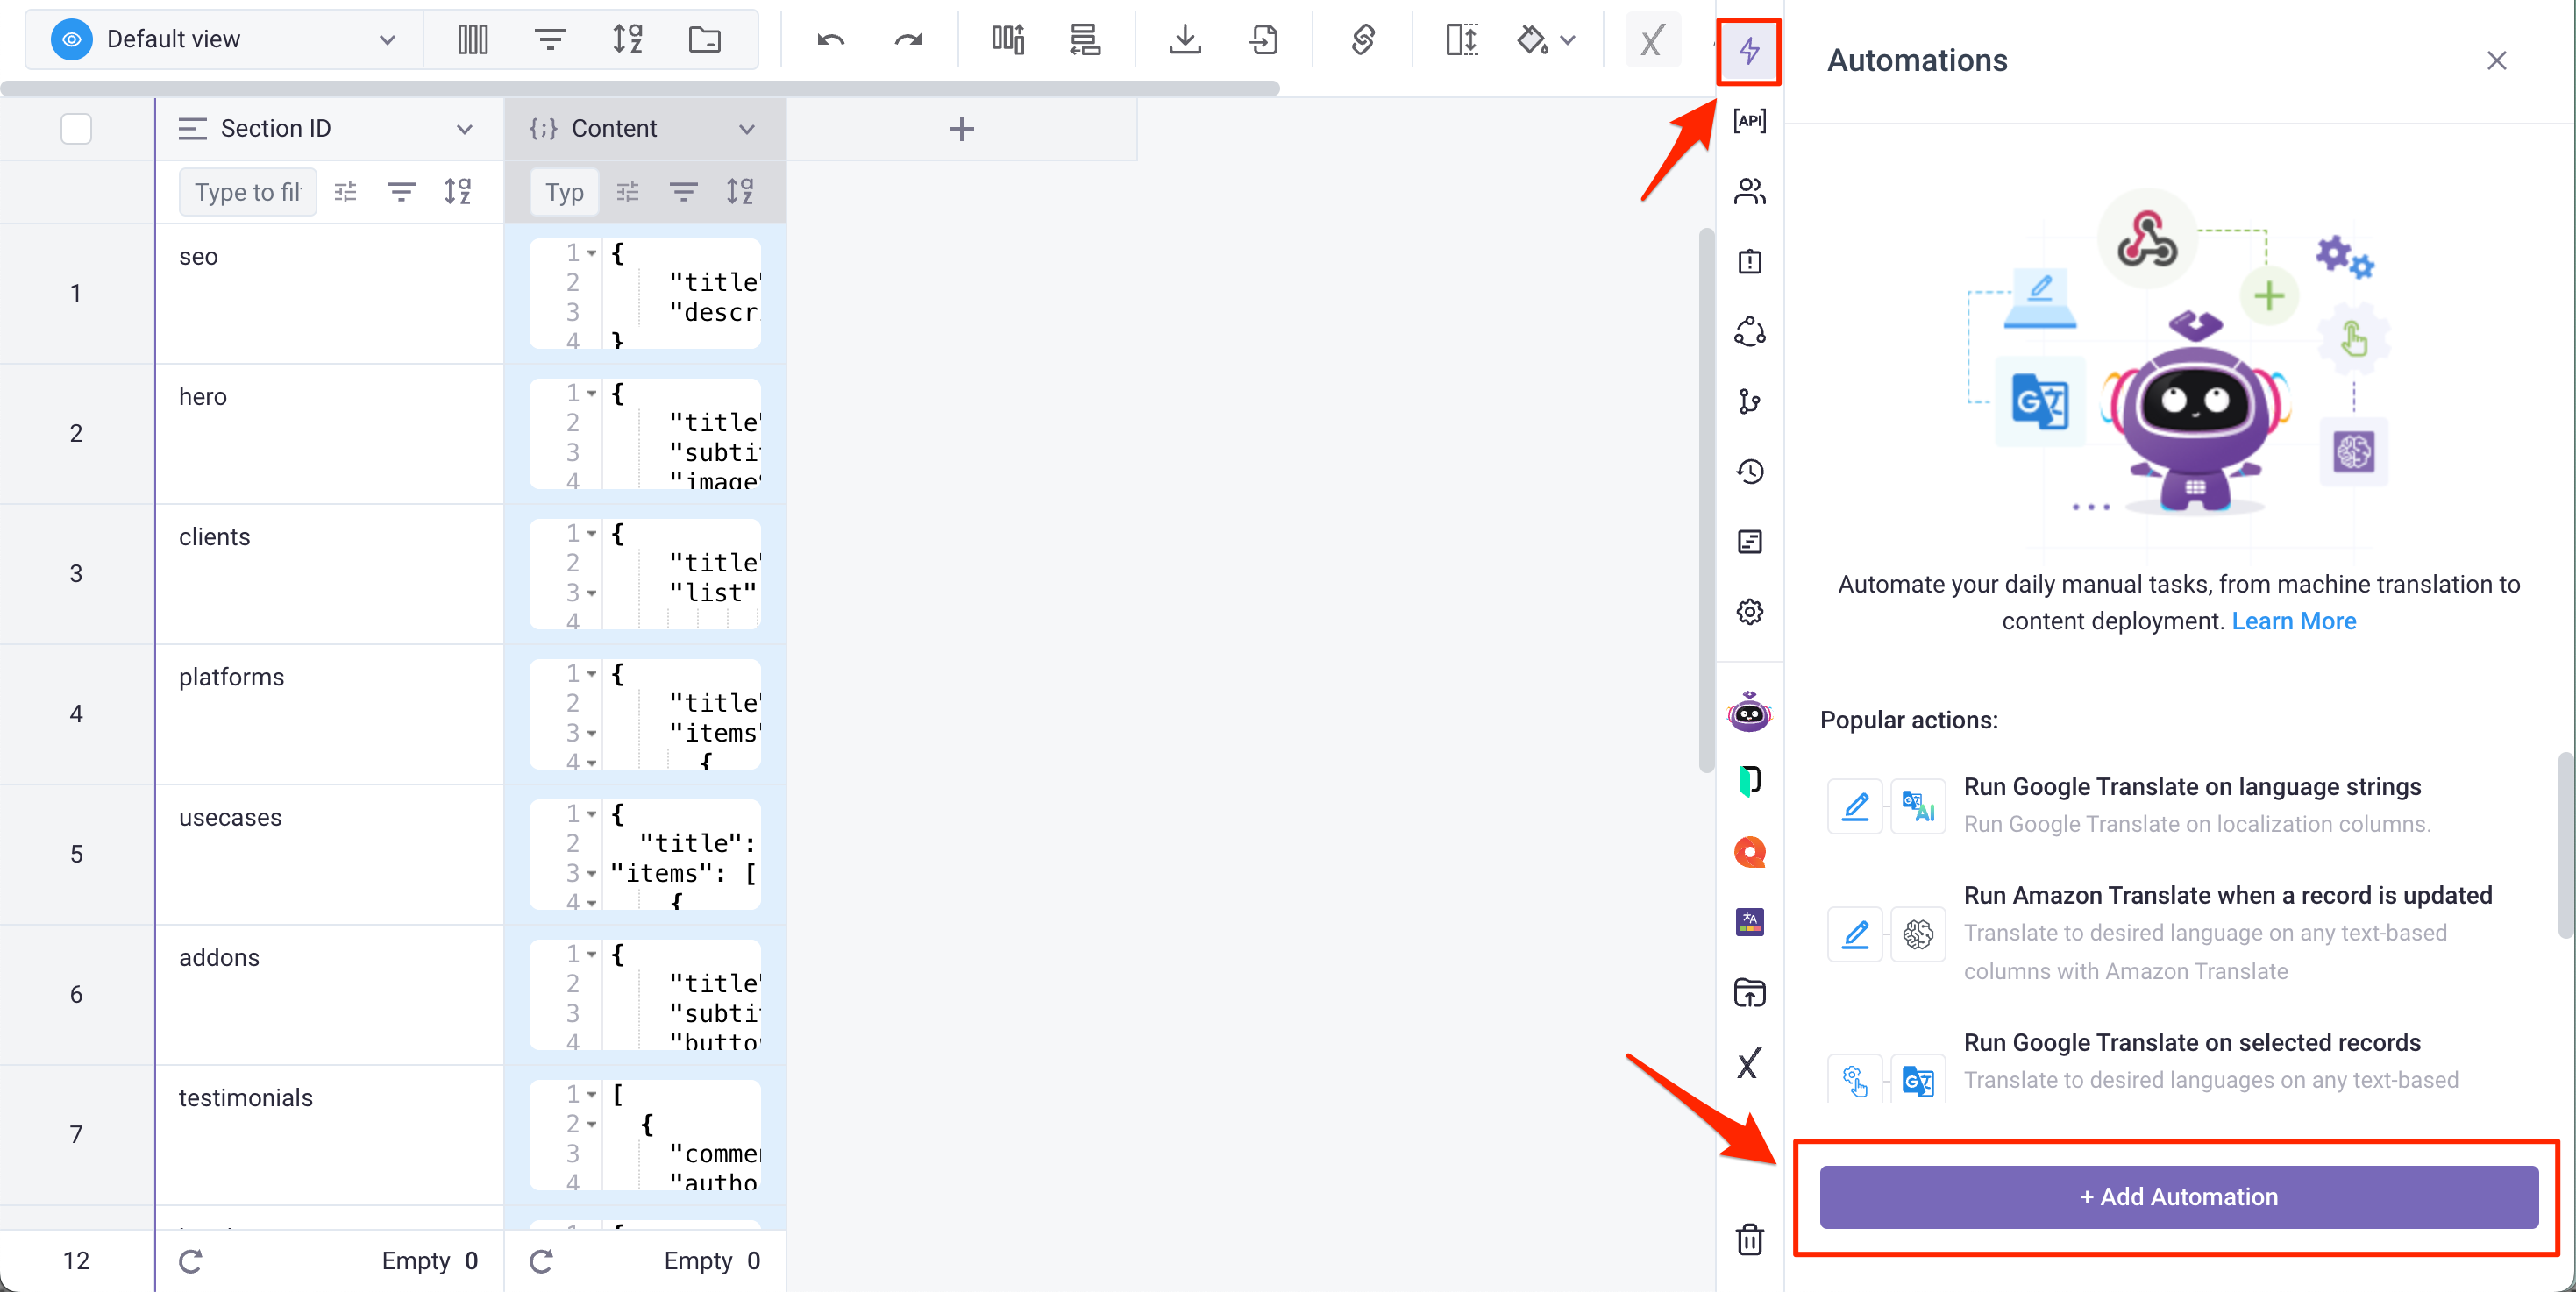
- Open the Grid used to store the website's content.
- On the right side panel, click
 to access the Automation tab, then select Create an Automation.
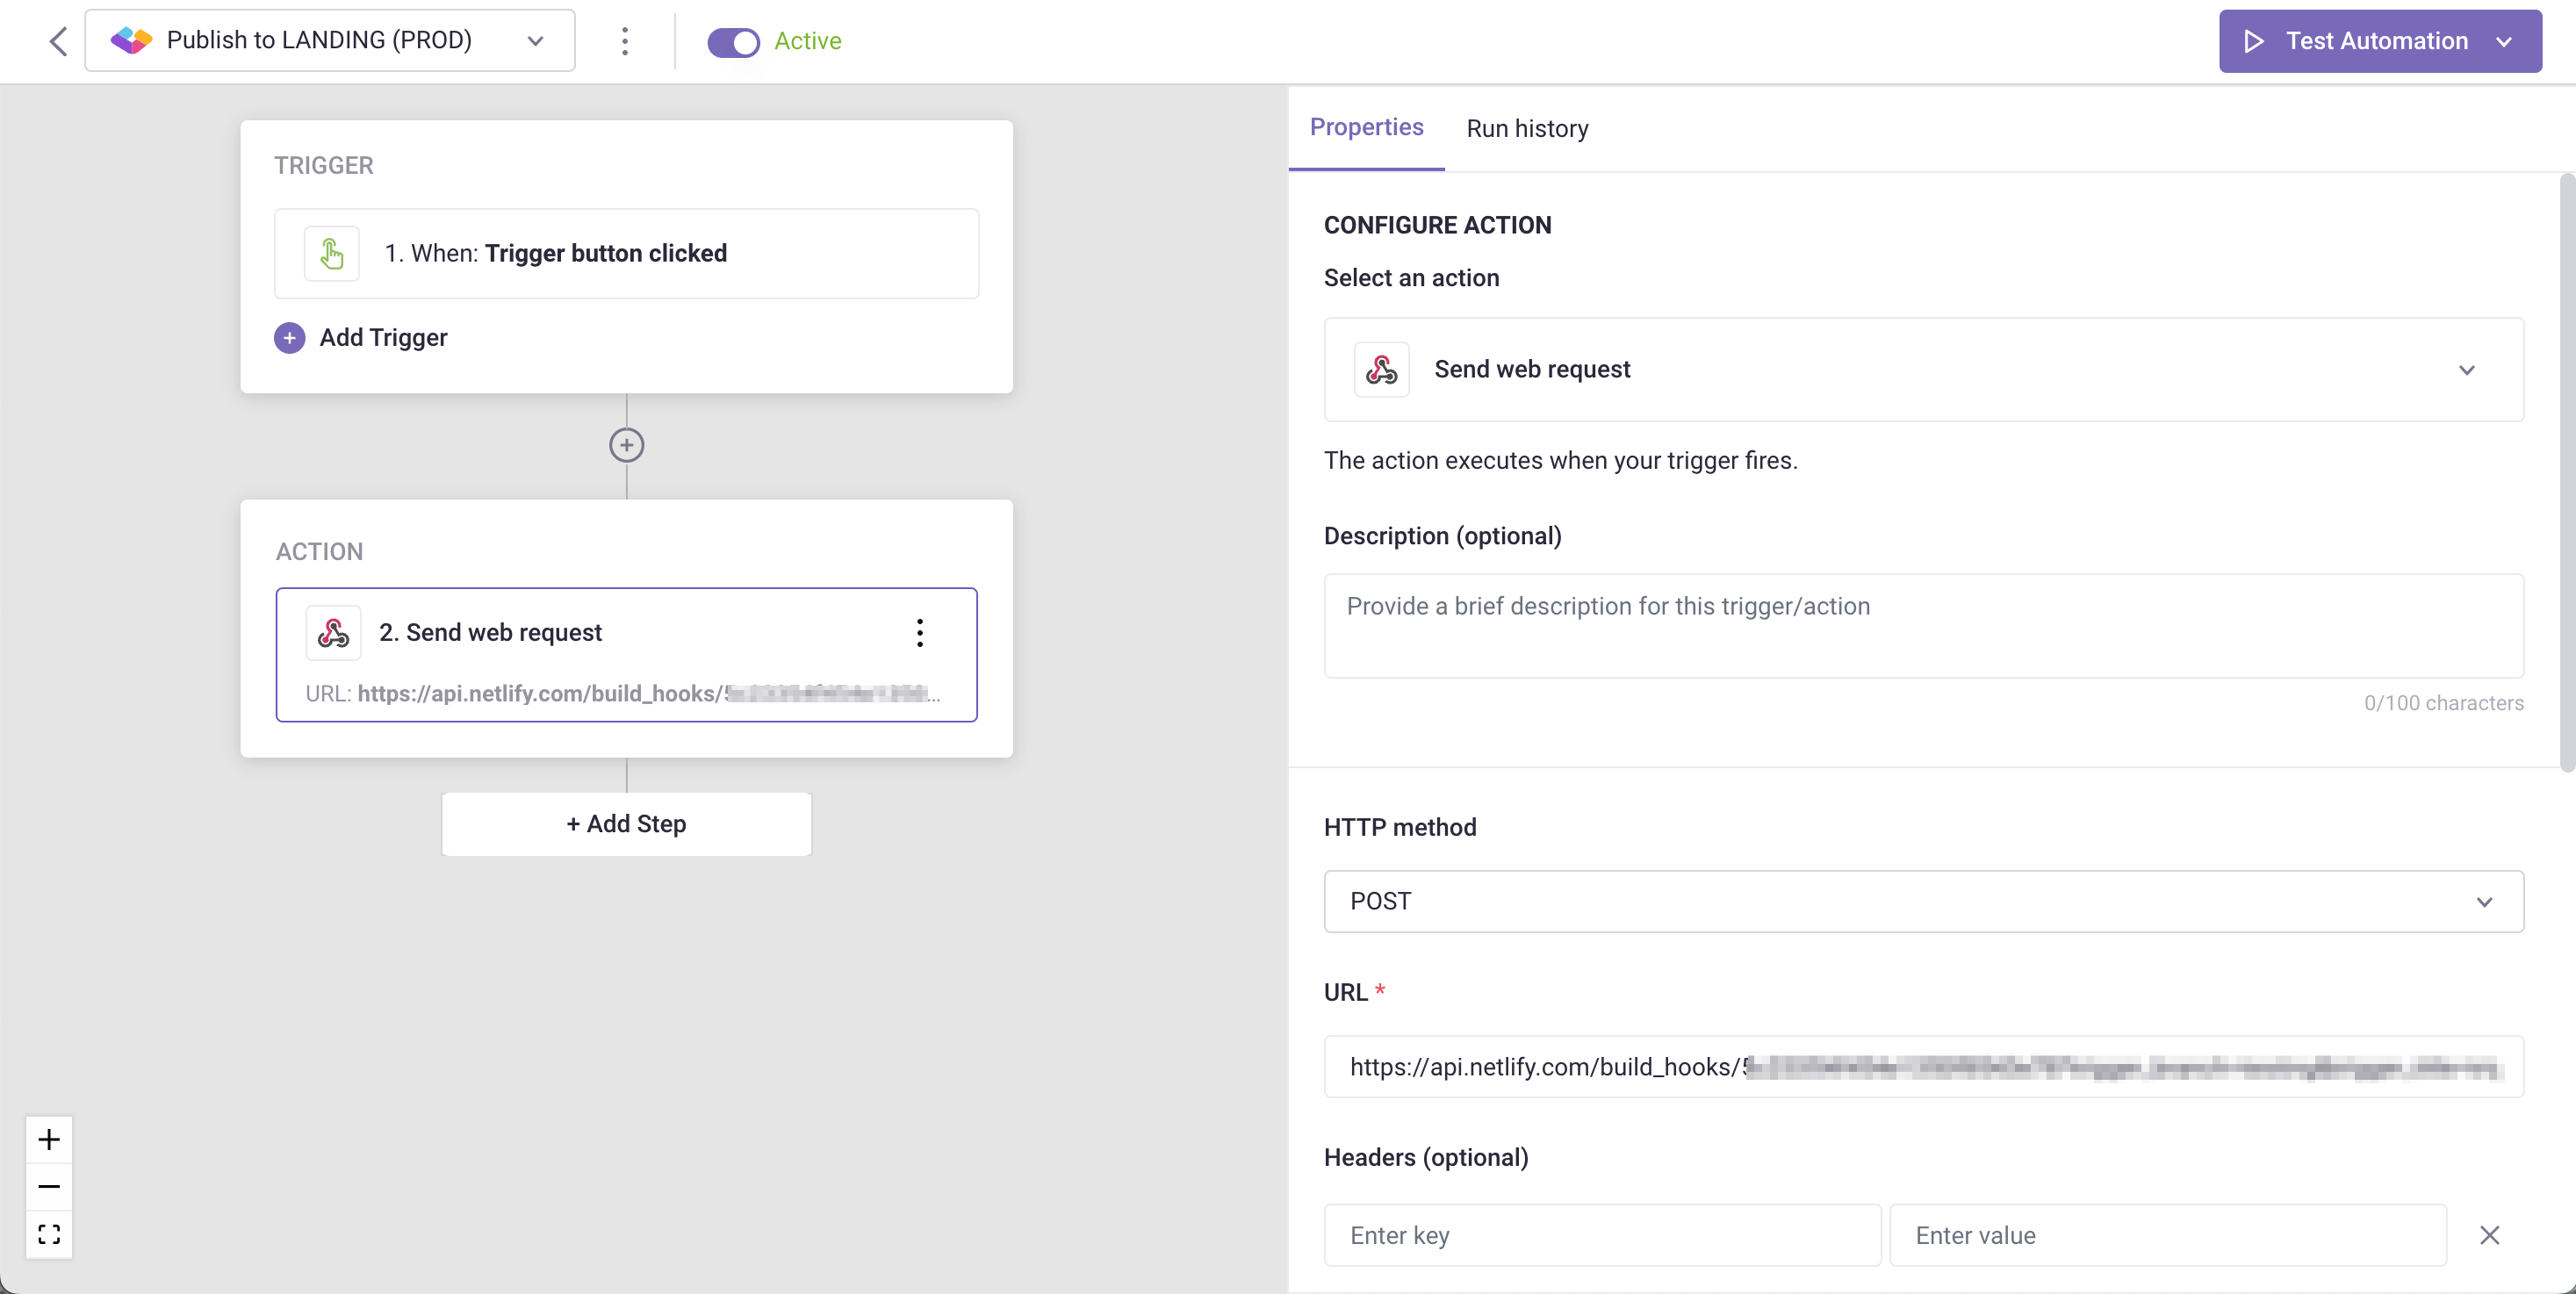
- Click Add Trigger, and choose Manual Record Trigger as the trigger.
- Next, click Add Step, and select the Send web request as the action
- Enter the Hook URL that you get from Netlifty in the URL field. Learn more here about how to obtain the Hook URL from Netlify.
- Test the Automation.
- To publish content instantly, click Execute in the Automation tab. This action will trigger a build and initiate a new build process in Netlify.
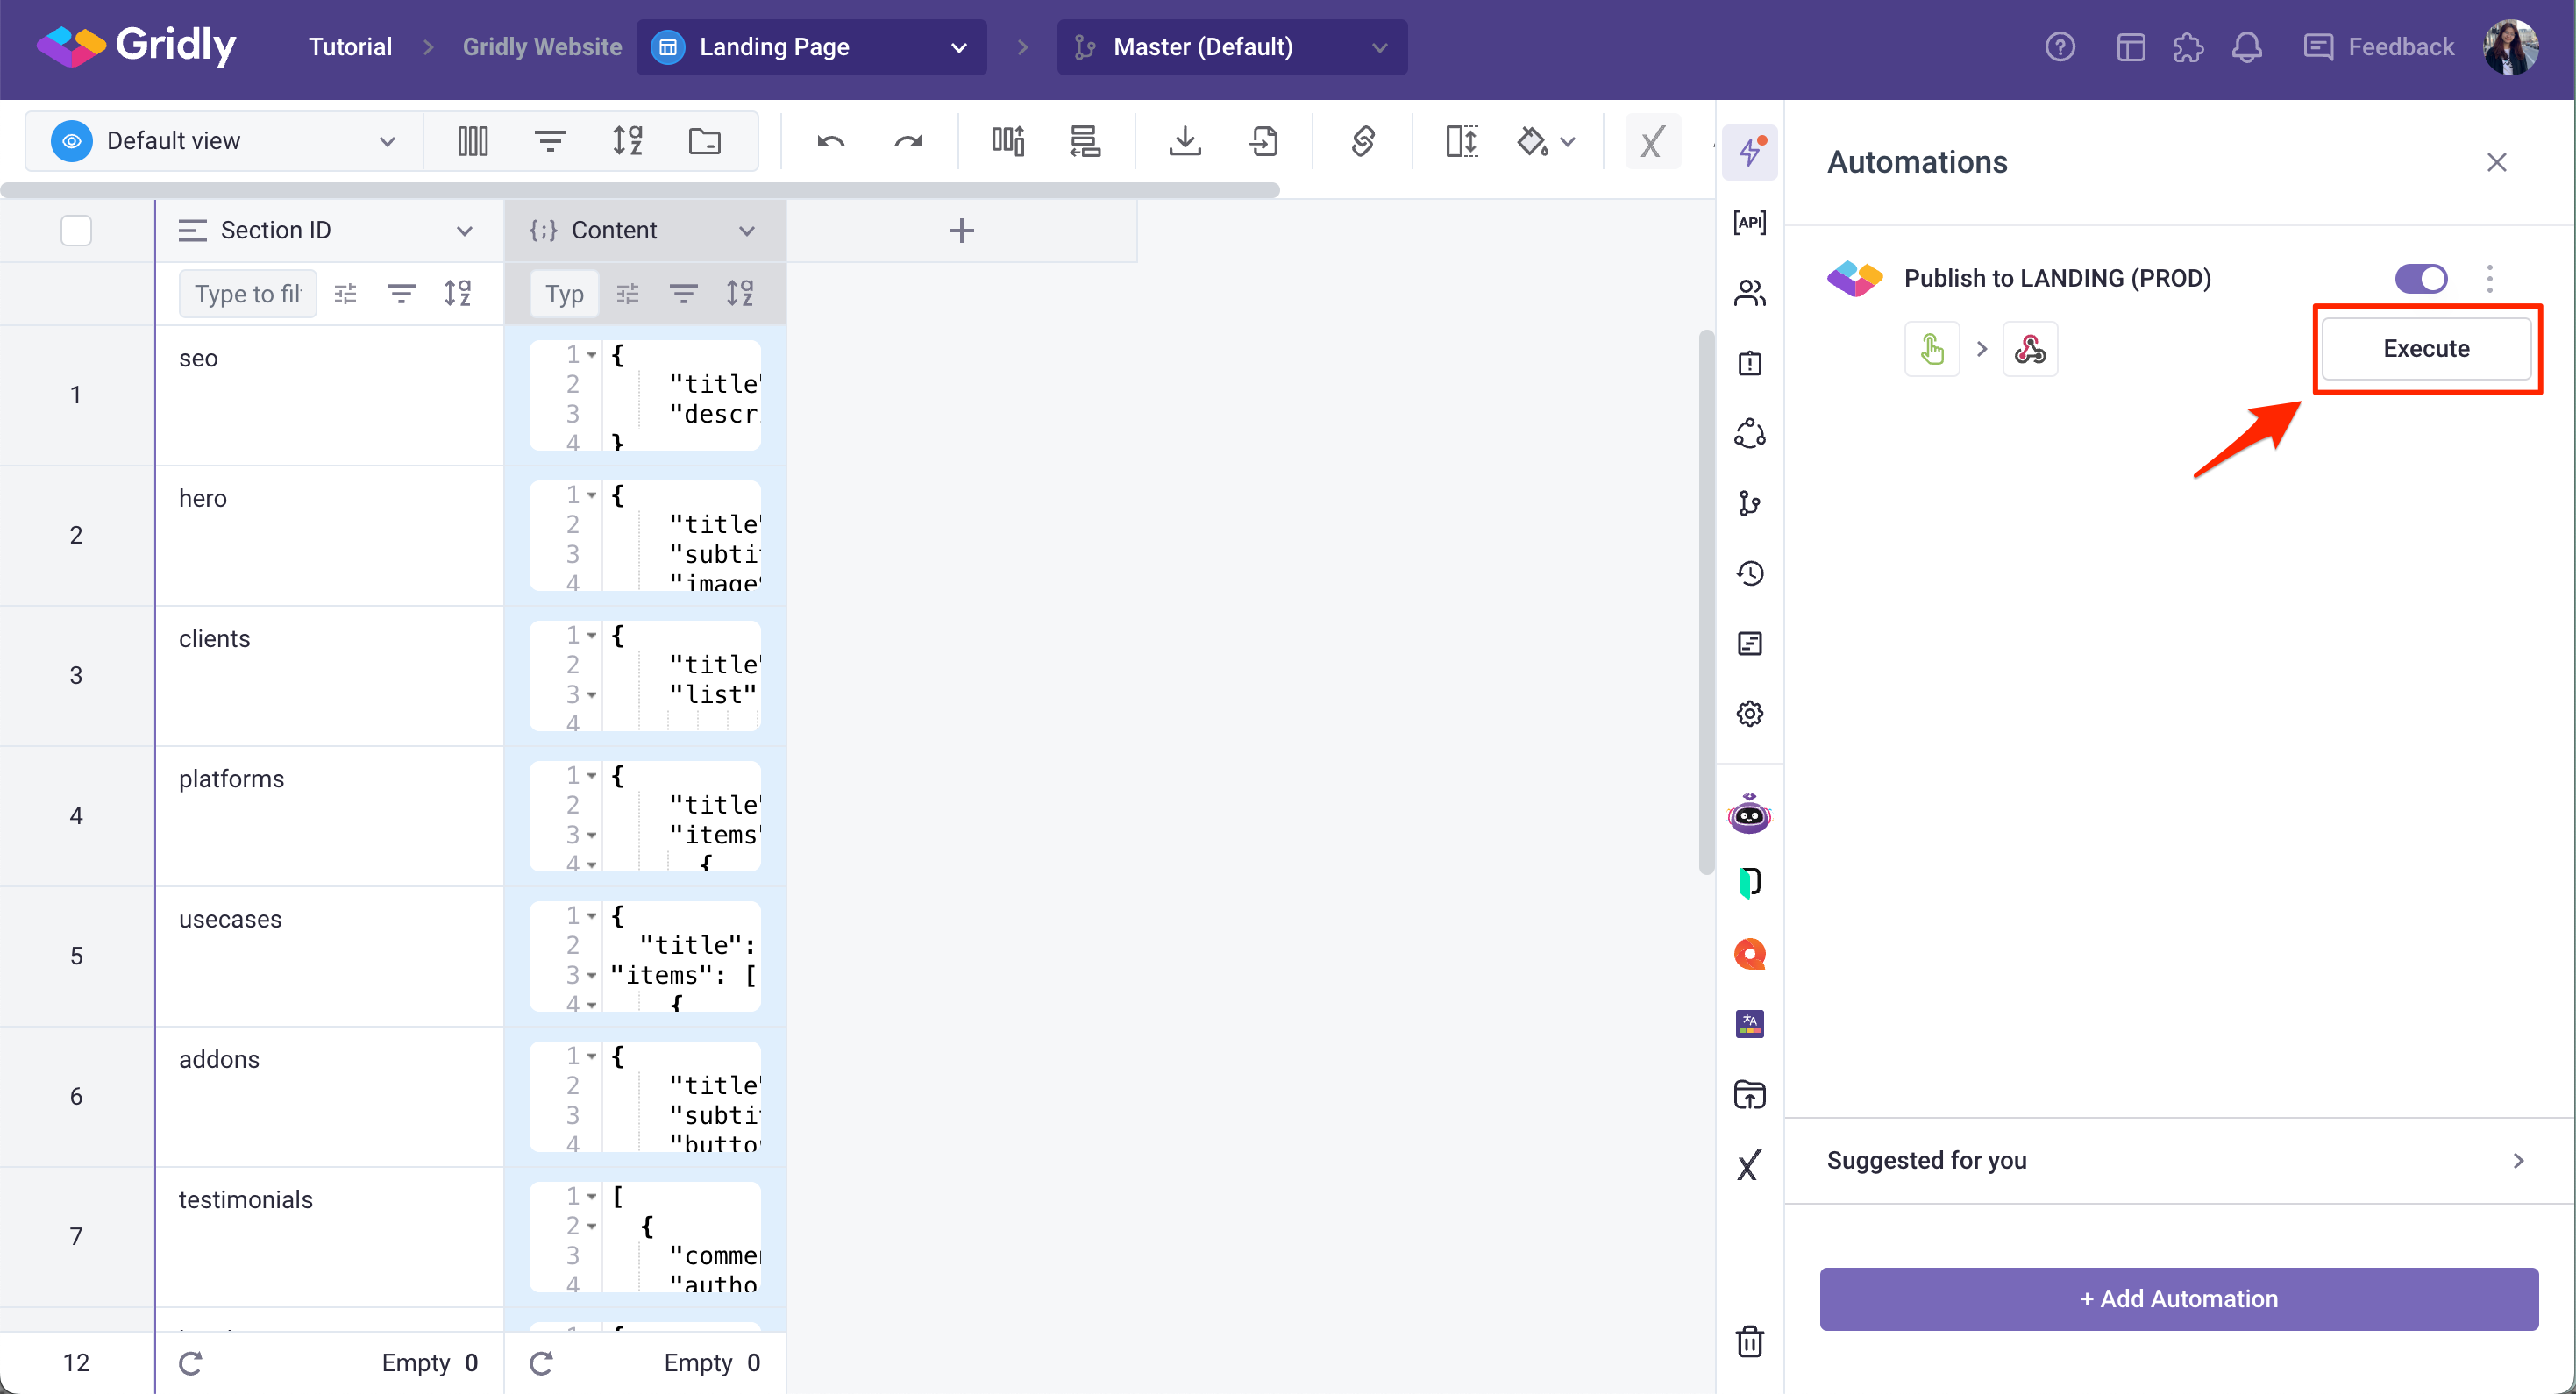
- Wait for a few seconds and your website will be updated with new content
If you’re interested in updating your content in real-time easily - without latency, check out Gridly CDN
To view all related articles to Automation, click here.