 Thy Nguyen
Prerequisites
SAML single Sign-on is only available on the Enterprise plan. If you are interested in inquiring about Enterprise pricing, please contact us here.
Enable SSO and submit your signin URL, following the steps in this article: Configuring SSO in Gridly
Setting up Single Sign-On in Azure AD
- Sign in to your Azure AD account, then select Azure Active Directory in the main page.
- Select Enterprise applications in the side panel.
- Click New Application.
- Input “Gridly” as the app name and click Create.
- On the Overview tab, click Get Started in the Set up single sign on section.
- On the Select a single sign-on method page, select SAML.
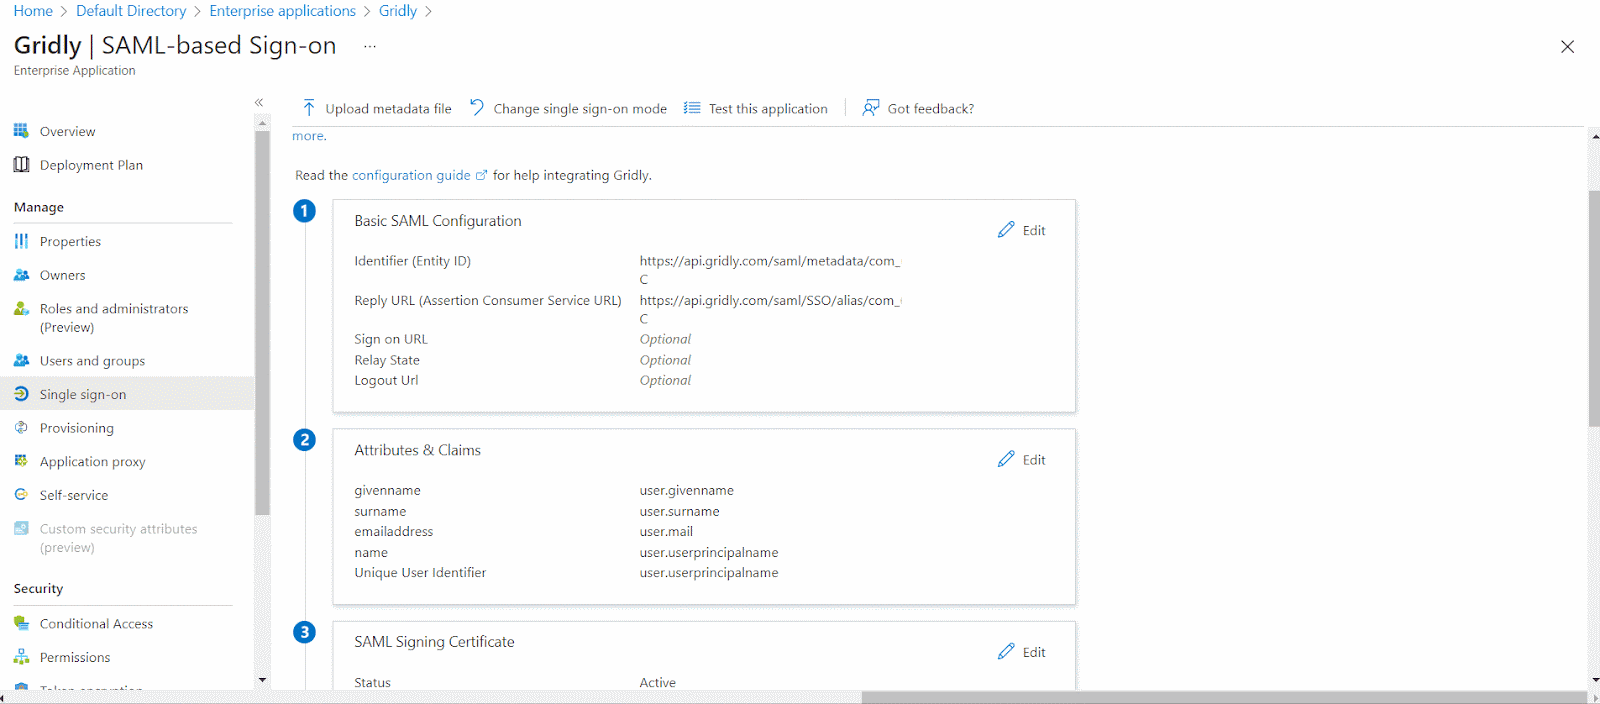
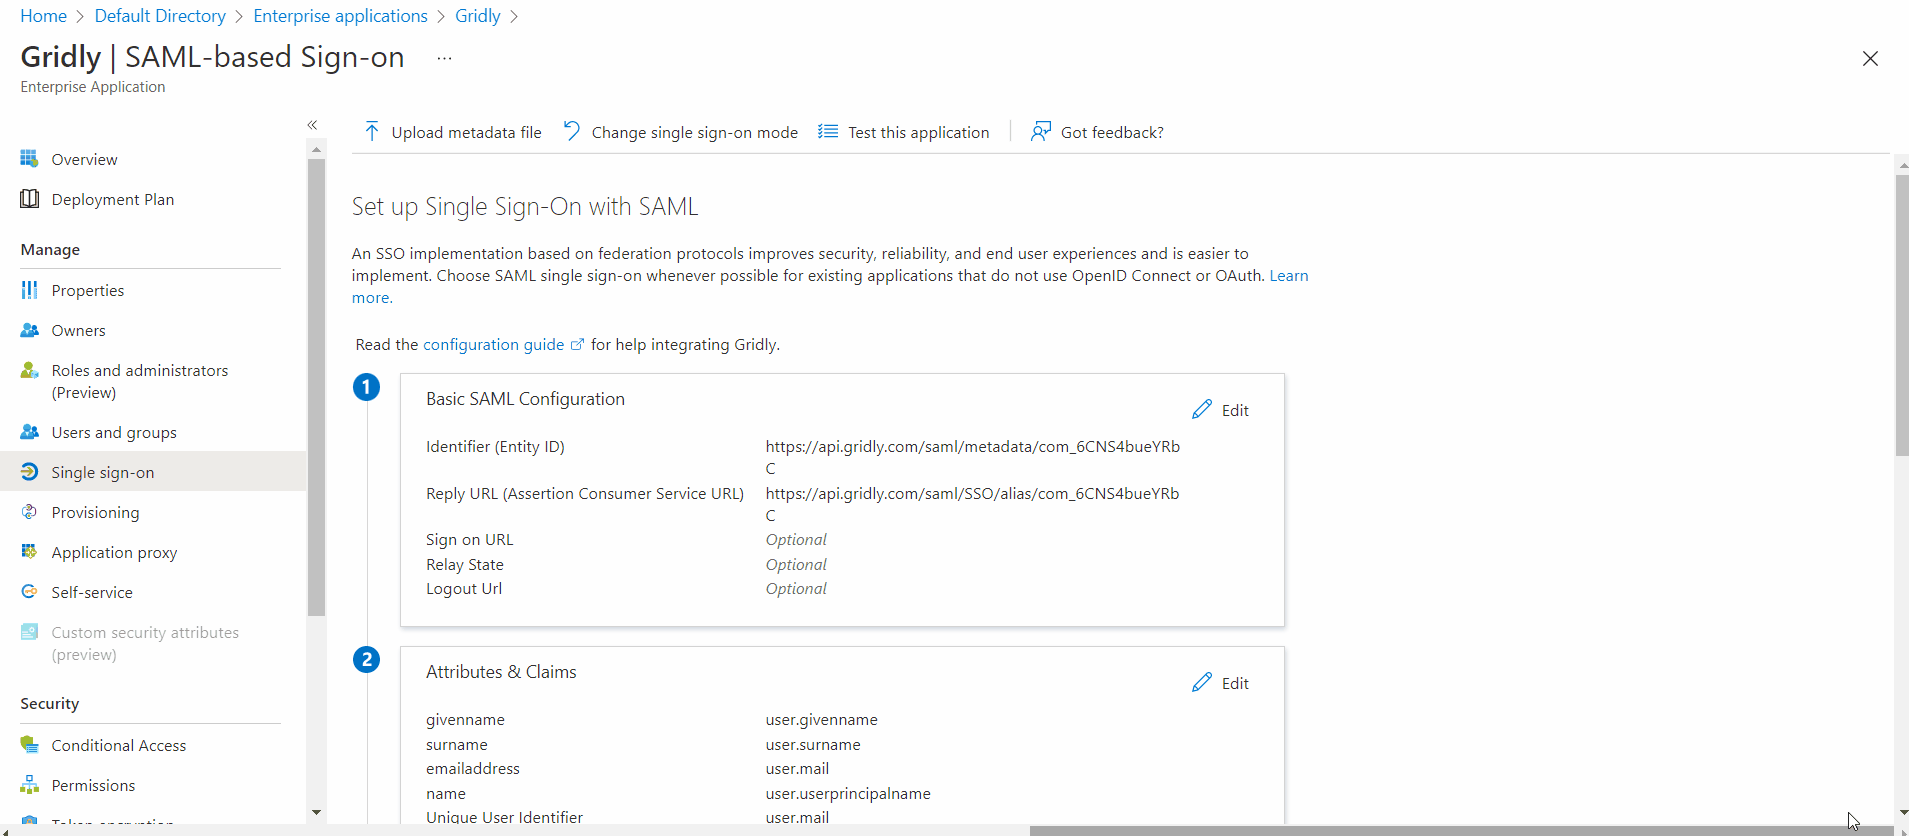
Basic SAML Configuration
- Click
 for
for  Basic SAML Configuration to edit the settings.
 -
Use the SAML information that you’ve gathered in the "Setting single sign-on in Gridly" step to configure the settings of your integration.
- Enter the SP metadata URL from Gridly into the Identifier field (Entity ID) and check to mark this identifier as primary.
- In the Reply URL field, enter the Add Assertion Consumer Service (ACS) URL from Gridly.
- Click Save.

Attributes & Claims
- Click in
 Attributes & Claims section to edit the settings.
- Click the Unique User Identifier (Name ID) field.
- In the Source attribute field, select user.mail in the drop-down list.
- Click Save.
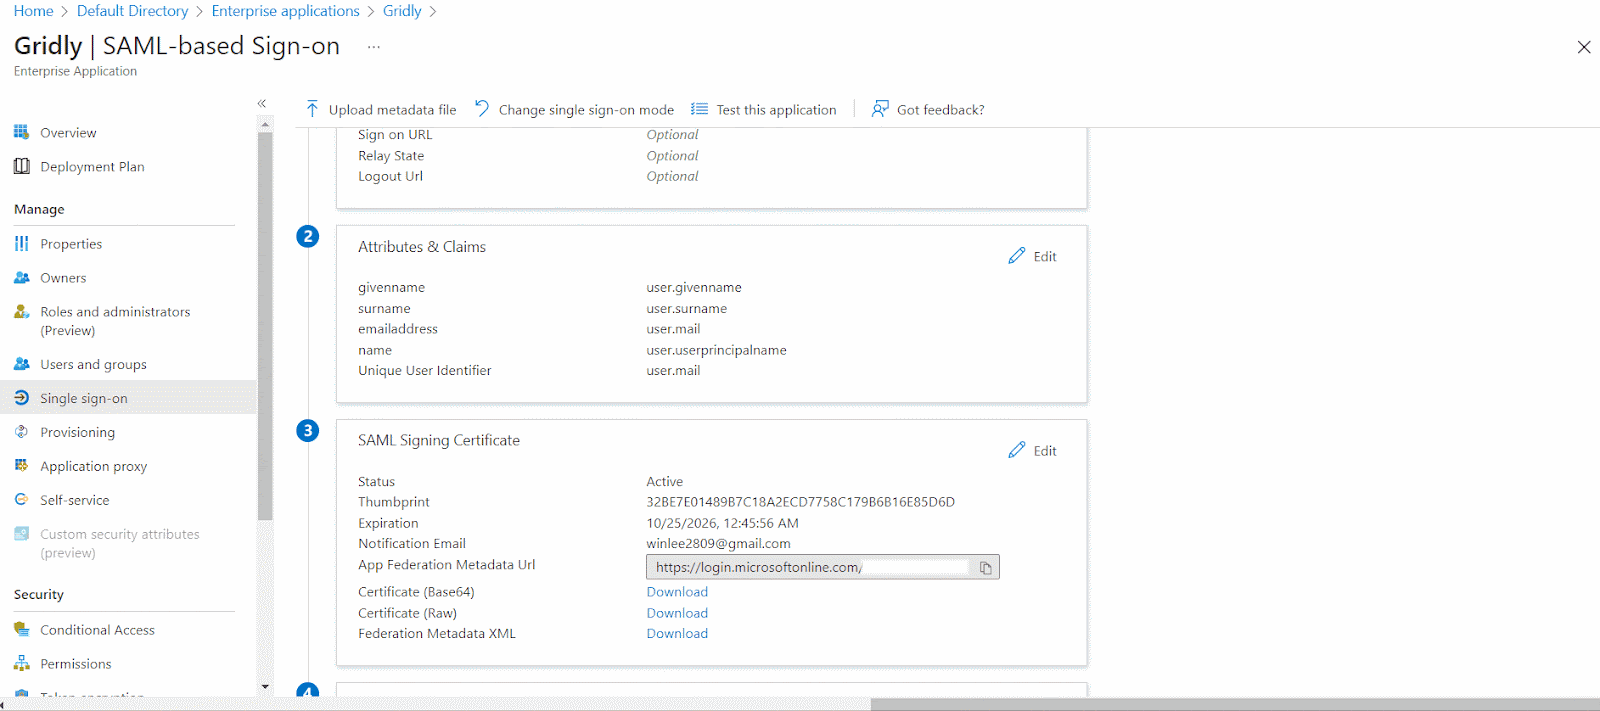
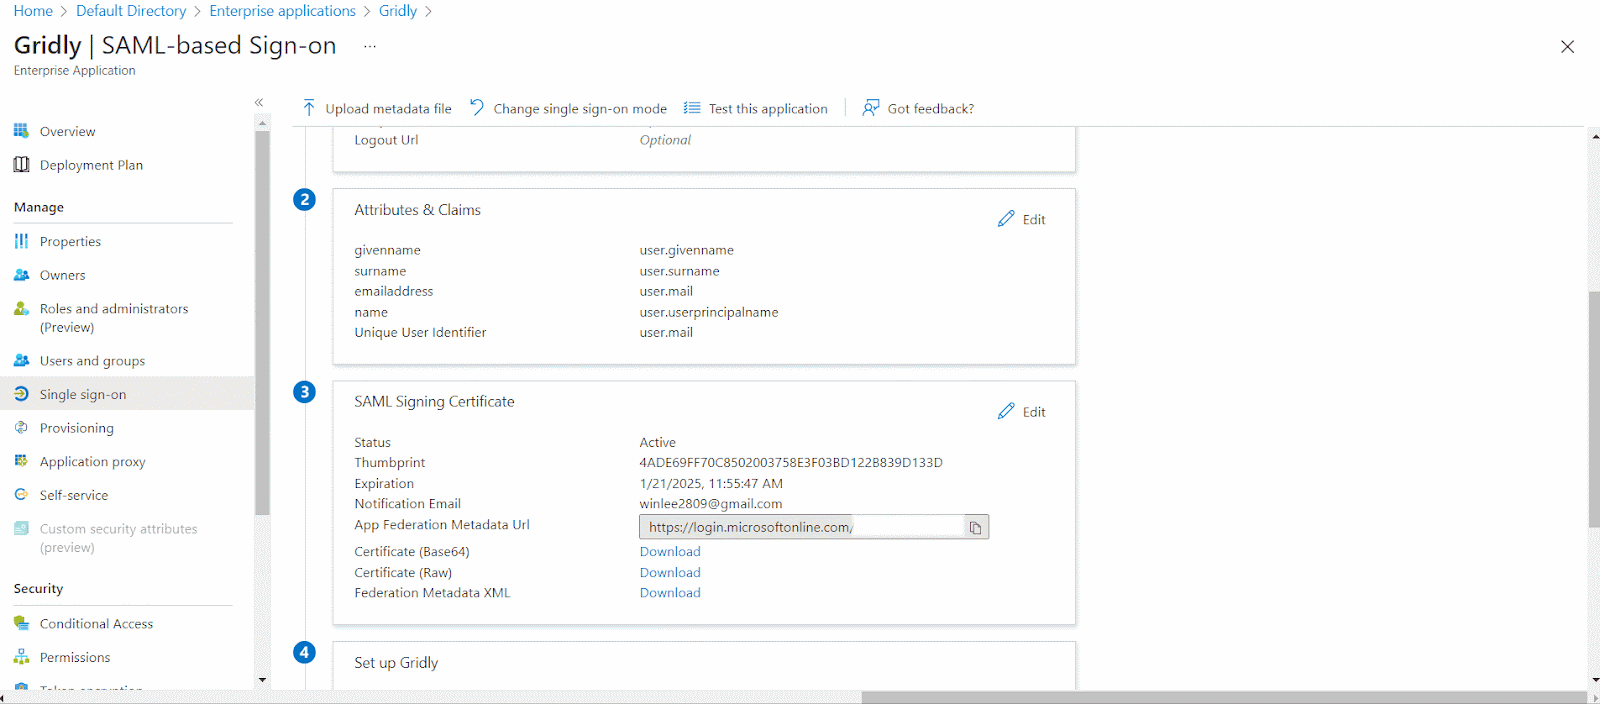
SAML Configuration for Gridly
- In the
 SAML Signing Certificate section, copy the App Federation Metadata URL to clipboard.
 - Fill in the IdP metadata URL field with Login URL in Azure and click Save.
Assign users to Gridly
You must assign Gridly integration to users in your organization for them to access Gridly through your identity provider:
- In the overview page, find the Manage section and select Users and groups.
- Select Add user/group, then select Users in the Add Assignment dialog.
- In the Users dialog, select the users you wish to add from the Users list, then click Select at the bottom of the screen.
- Optional: If you're expecting any role value in the SAML assertion, in the Select Role dialog, select the appropriate role for the user from the list and then click the Select button at the bottom of the screen.
- Click Assign.
Test Single Sign-on with Gridly
Click on Test this application in Azure portal and you should be automatically signed in to the Gridly for which you set up the SSO.
Now assigned users can log in to Gridly with SSO/SAML. You can login to Gridly through your identity provider, or access: https://app.gridly.com/signin and select Sign in with SSO/SAML.