
Table of contents:
- What is a database
- Add a new database
- Access control for databases
- Back up databases
- Create new branches for Grids inside a database
- Database settings
What is a database
Databases are the second tier in the Gridly CMS organizational structure. Databases sit within Projects, and a database can contain one or many Grids.
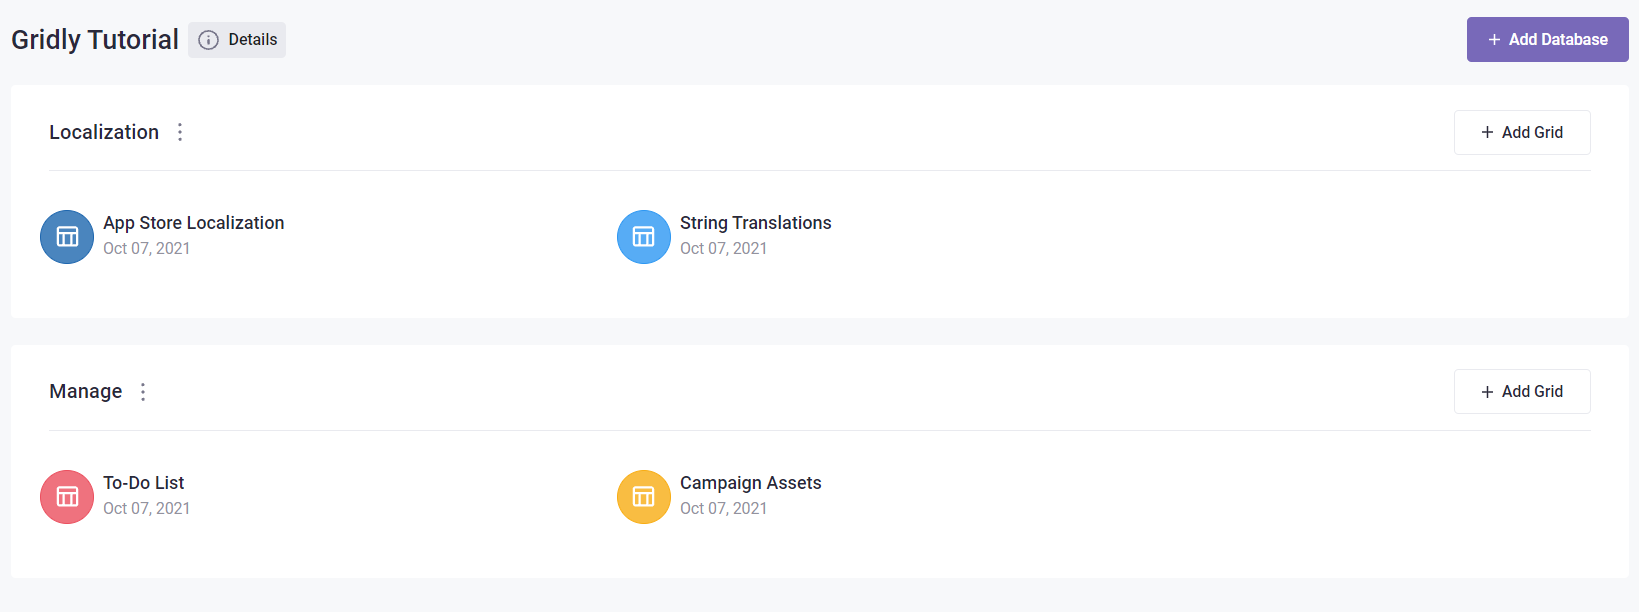
Each database serves as a container, helping you organize your data into different categories for different purposes. In the screenshot below, there are two databases in project "Gridly Tutorial":
- "Localization" database - which is used to manage localizing, and
- "Manage" database which is used for management.

Add a new database
To add a new database, click on the + Add Database icon in the top right of the project area.

A new database will be inserted at the top of the project area. Enter a name and press Enter (Return).

To rename a database, click the menu icon to the right of the database name, and enter a new name in the grey box.
Access control for databases
If a team member has access to a database, they can access all the Grids inside it. To control which user groups can access the database:
- Click
 next to database name.
 - Select Share to group.
- Choose with groups you want to share the database to.
- Click Share.

Back up databases
Refer to this article: Back up database.
Create new branches for Grids inside a database
You can quickly create new branches for multiple Grids inside a database:
- Clicknext to database name.
- Select Create multiple branches.
- Configure these options:
- Select Grids: Select the Grids in the database for which you want to create new branches.
- Select branch: Select the original branch you want to branch off from. If there are more than 2 Grids, make sure the their original branches have the same name.
- Enter the branch name to create
- Include shared groups: Select this checkbox to share the new branch to the same user groups as the original branch.
- Include automations: Select this checkbox to include the Automations from the original branch in the new branch.
- Click Create.

Database settings
- Clicknext to database name.
- Select Settings. There are 3 tabs for your settings:
General tab
Configure general details for your database:
- Database name
- Check the uniqueness of record IDs: Toggle this on to prevent duplicated Record IDs across all the Grids under the database. This can only be toggled on when the database is empty with no Grids inside.
-
Datetime settings: By default, Gridly uses the company-wide date and time format set by your Owner. You can override this at the database level by toggling on Use my custom format and selecting your preferred formats, which will be applied for all Grids in this database. This setting can be overridden by the datetime settings in User preferences.

Localization setting tab
Settings here will override Project settings. These settings will be applied for all the Grids inside the database.- Localization setup:
- Master TM: Select the Translation Memory (TM) to be used as the Master TM.
- Reference TMs: Select one or multiple Translation Memory to be used as reference, meaning you can't add new entries to these TMs.
- Use working TM: Select this to use Working TM.
- Auto ingest new translation text: Select this if you want to automatically add new translation to the Master TM. If no TMs are selected, translations will be stored in the default TM.
- Translation status of target cell: Select a translation status for target cell after fetching from TM.
- Glossary and Non-translatable: Select the Glossaries and Non-translatable list for the database.

Quality assurance tab
Select QA models. These settings will be applied for all the Grids inside the database.
