

Table of contents:
The "Jira Ticket Creation" automation action creates tickets in Jira Cloud when specific events occur in your Grid. Use this to streamline project management workflows and keep your development team synchronized with content changes.
If you are not familiar with creating an Automation, please view the following article: Creating an Automation.
Not the Automation action you need? Check out the full list of all Automation actions in Gridly.
After creating the Automation, you need to configure the trigger and action. In this example, we’ll create an Automation that creates a ticket in Jira Cloud whenever a ticket is created in Gridly.
Add trigger
Click Add Trigger and select a trigger. We'll select Ticket created for this example.

Add JIRA Ticket Creation action
Add your Jira API token to Gridly
The Jira Ticket Creation action doesn’t accept a raw API token. You need to add the token in Gridly’s API key management, then select it in the action.
- Generate a Jira API token by logging into https://id.atlassian.com/manage-profile/security/api-tokens.
- In Gridly, go to Integration settings > API key management, then click Add new key.
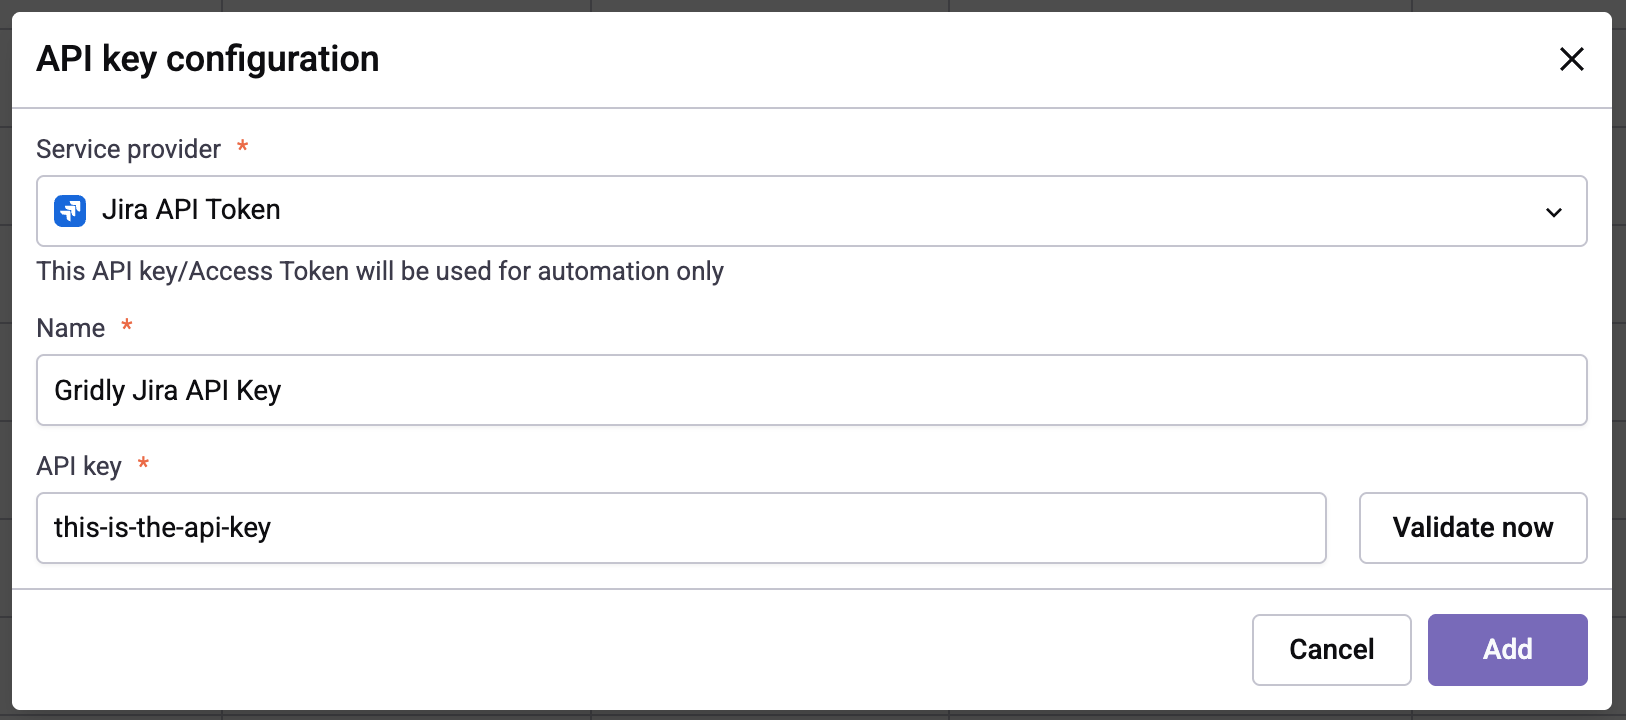
- In the API key configuration dialog, fill in the following fields:
- Service provider: Select Jira API Token.
- Name: Enter a name that helps you recognize this key later, for example, “Gridly Jira API Key”.
- API key: Paste the API token you generated in step 1.
- Click Add.
For more details, see Integration API key management.
Add the action to your automation
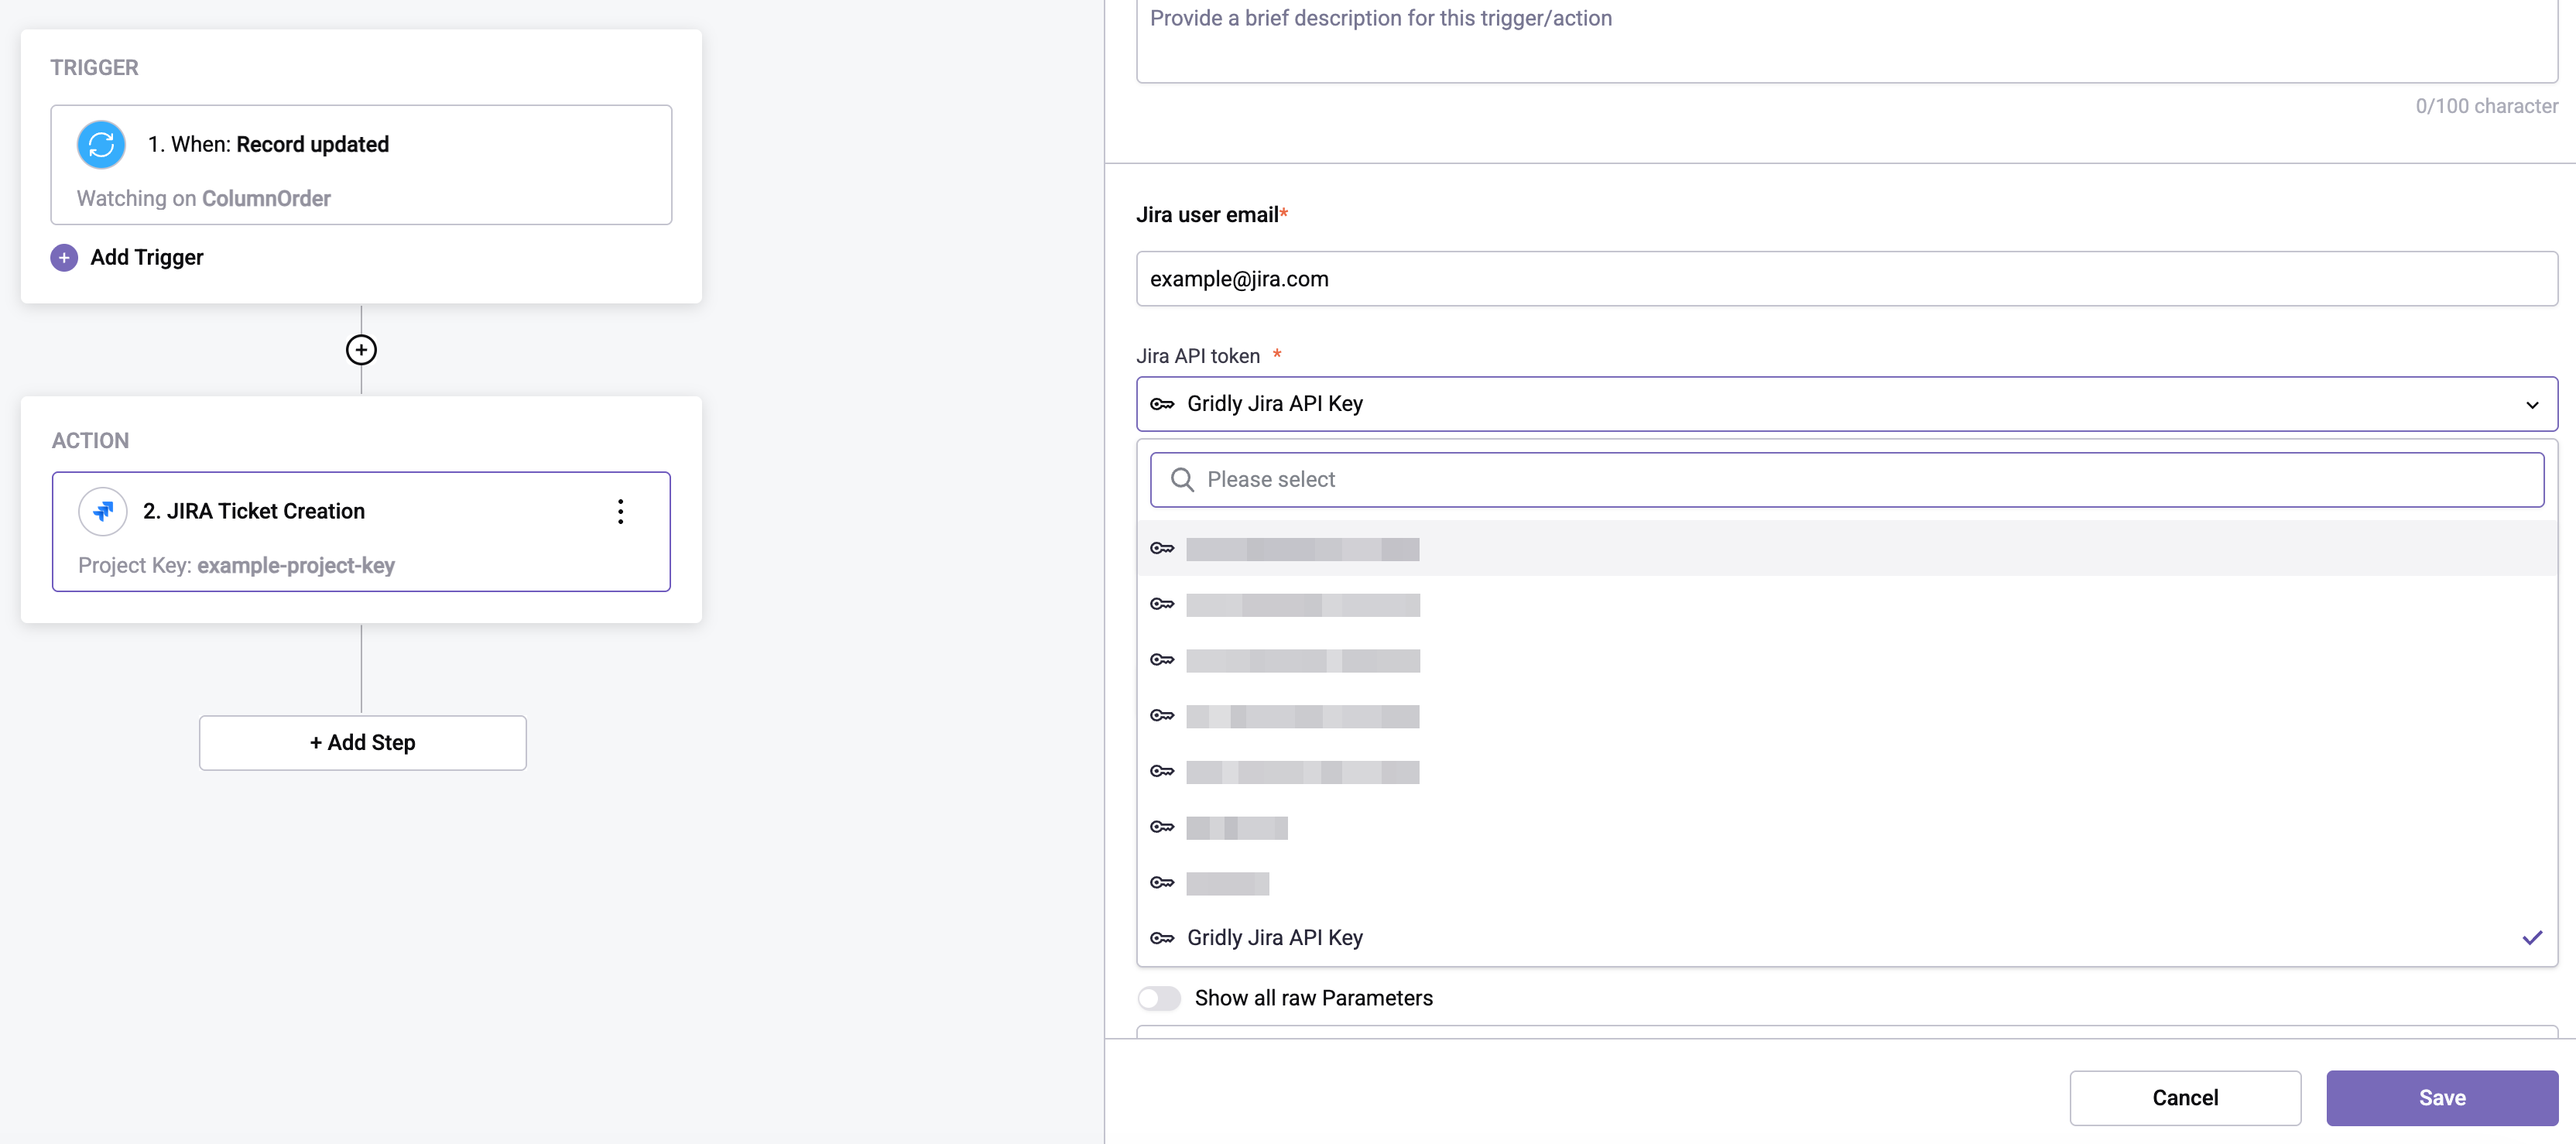
- Click Add Step and select Jira Ticket Creation in the list of actions.
- Input the following fields using your information in Jira:
- Jira user email: Enter the email address associated with your Jira account.
- Jira API token: Select the key you added in API key management.
- Jira company workspace URL: Copy your Jira workspace URL from your browser’s address bar.
- Jira project key: Enter the project key, which is the prefix before the issue number. For example, in “JRA-123,” the project key is “JRA.”
- Ticket type: Select which Gridly ticket type to send to Jira: Task, User Story, or Bug.
- Issue details: Fill in the Ticket Summary and Ticket Description for the new Jira issue.
Test your Automation
- Turn on the Automation using the switch next to Automation name.
- Click Test Automation. If your Automation is not turned on, Gridly will require you to turn it on in a pop-up message.
Don't see what you need? Gridly can support custom development for solutions not available out of the box. Contact support@gridly.com to discuss your requirements.