
Table of contents:
A Glossary is a database containing single words or expressions related to a specific subject. Using a Glossary can help keep translations consistent and reduce translation time.
A glossary consists of terms. When a term in the source language is detected, it will automatically be highlighted and shown in the suggestion pop-up.
Setting up a Glossary in Gridly is easy, you can add terms and terms details manually or by importing a CSV/TBX file.
This feature is available in all modules.
Using a Glossary
CMS module
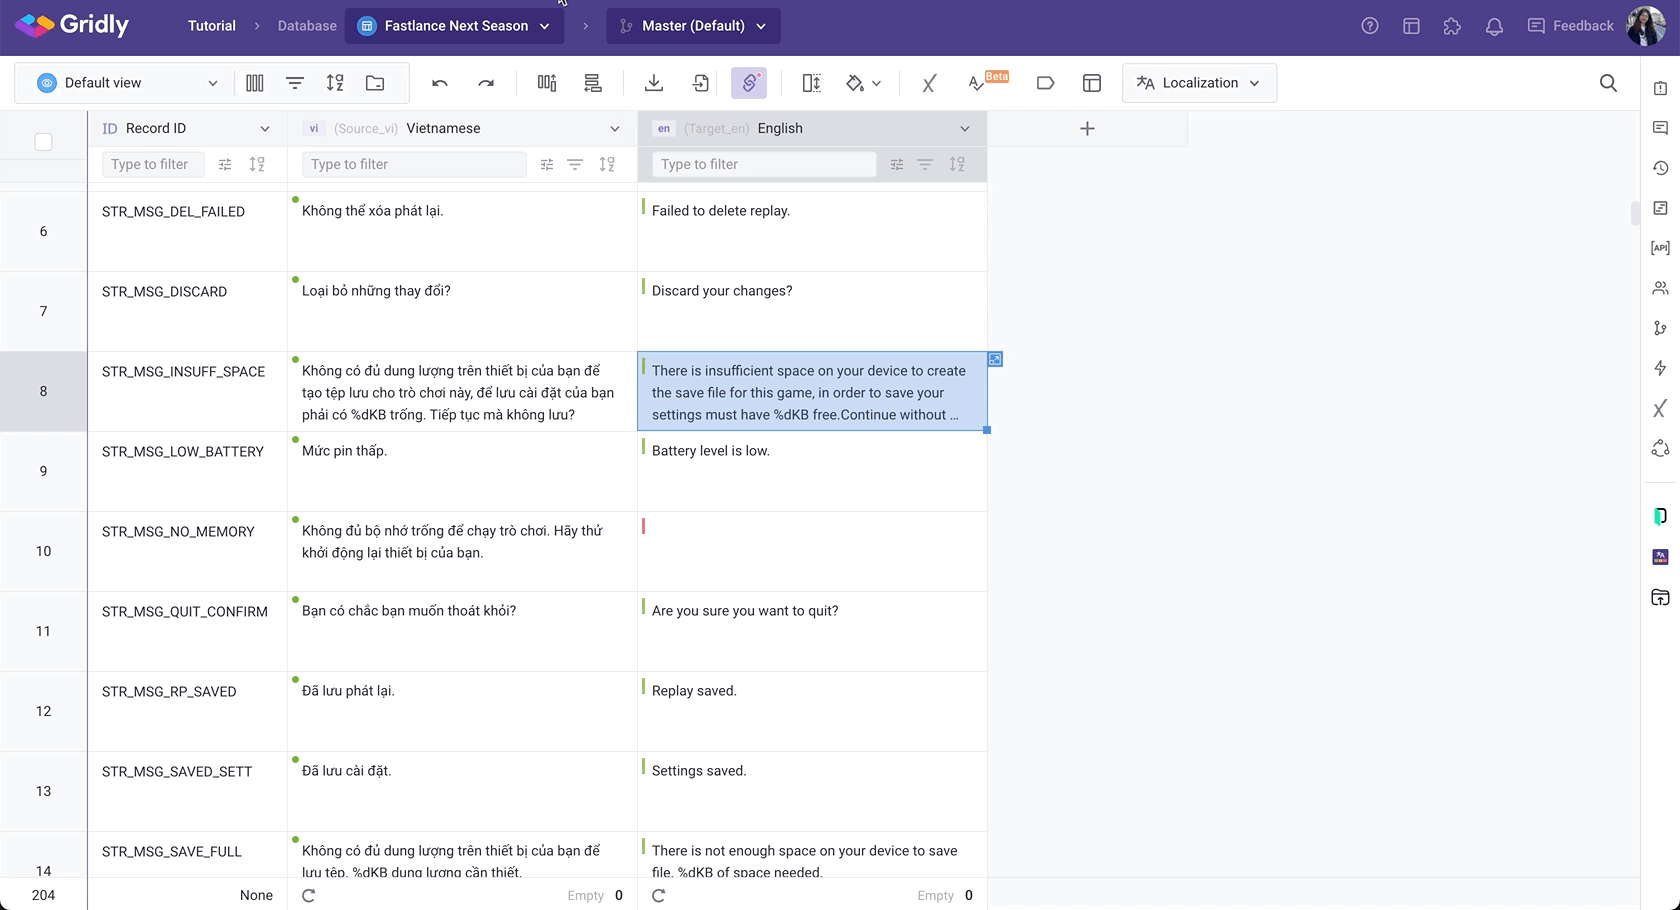
Once a translator starts editing the cell in the target language column, every detected term will be highlighted and shown in the Glossary tab in the suggestion pop-up.
- Use Shift+Tab to switch between Translation Memory and Glossary in the suggestion pop-up.
- Double click, or click
 to insert a term.
CAT module
Detected terms are highlighted in both source and target segments. You can also view them in the CAT pane. Click Add Term to add a new term directly from the CAT pane.

Create a Glossary
Owner and Admin users have appropriate rights for managing Glossaries by default. To grant the ability for other custom roles, please refer to this article: Manage Company Roles.
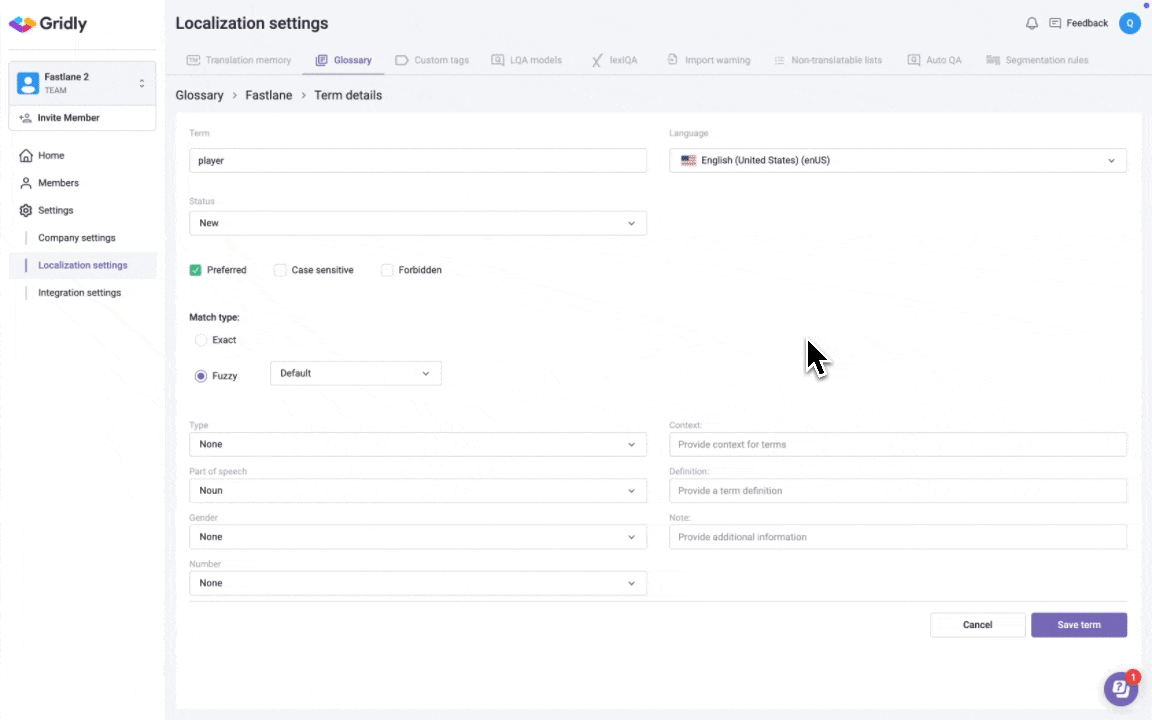
- From the Homepage, select Localization settings.
- Switch to the Glossary tab.
- Click Add Glossary to create a new Glossary.

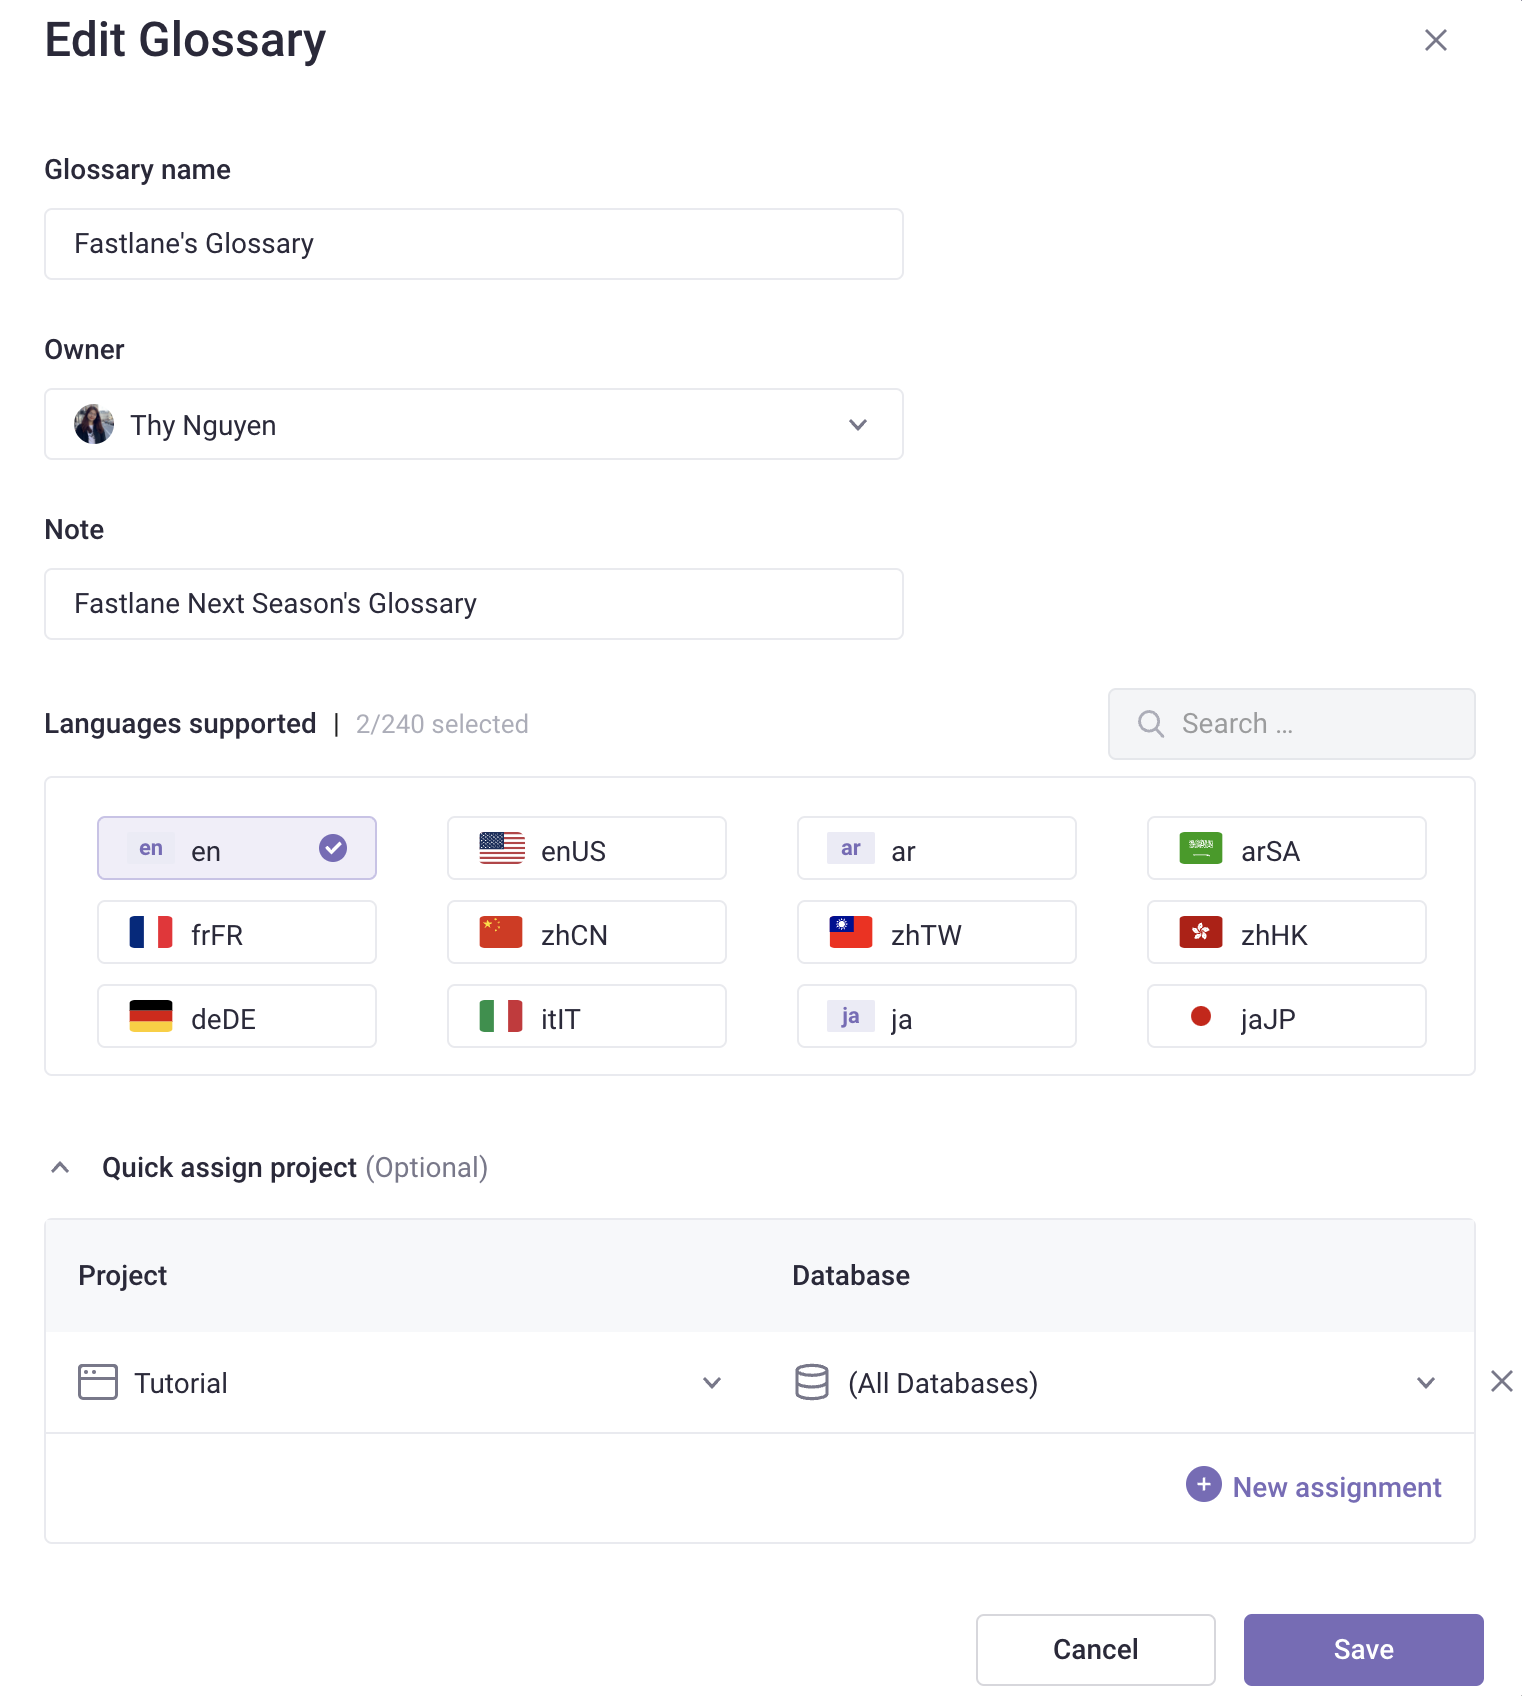
- Enter the following information:
- Glossary name
- Select the Owner of the Glossary
- Note (optional)
- Select the supported languages.
- Assign this Glossary by selecting a project/database.
- Once done, click Create.
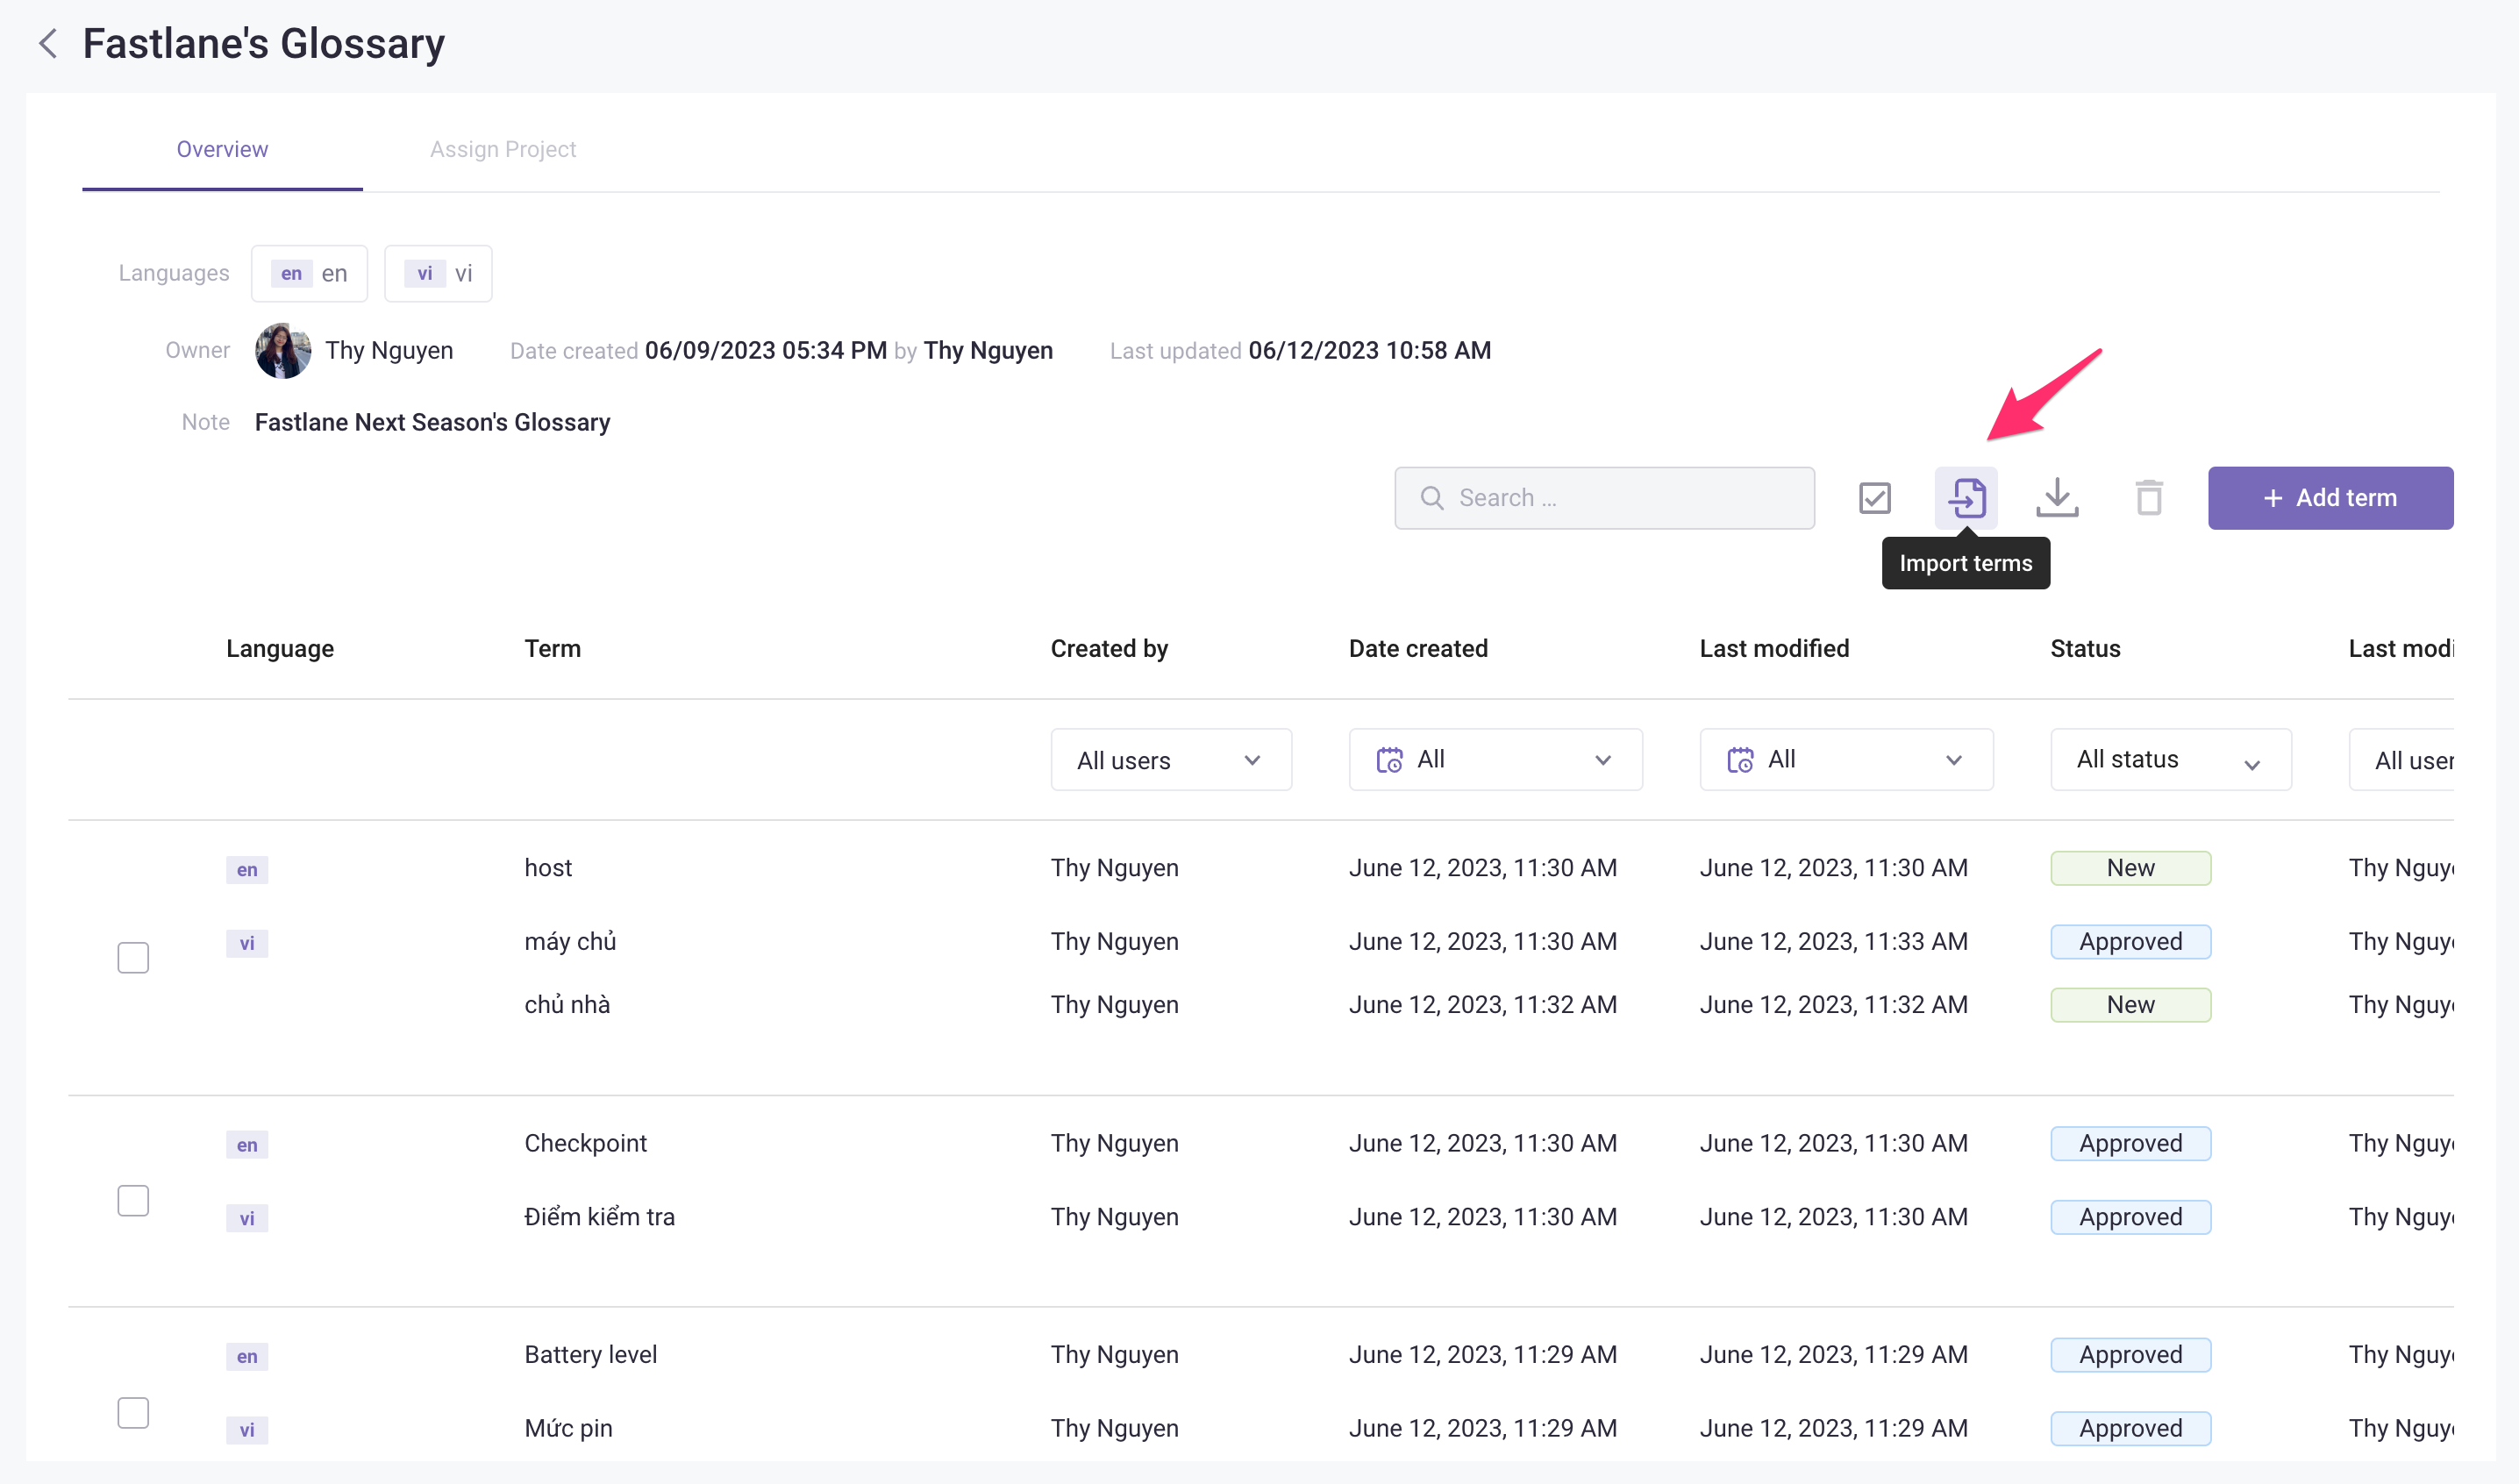
To rename, import terms, export terms, or delete a Glossaryc click ![]() to the right-hand side of that Glossary and select an option from the dropdown menu.
to the right-hand side of that Glossary and select an option from the dropdown menu.

Add terms to your Glossary
You can add terms to your Glossary by: importing a TBX/CSV file, or add the term directly in Gridly.
Import terms
- Click
 to import terms if you've already got a TBX/CSV file.
 - Select the TBX/CSV file.
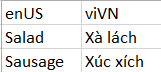
When importing a csv file, the header should be named based on the language codes. For example:
Add term directly in Gridly
- Click Add Term if you want to create new terms directly in Gridly.
- Enter the term and click Add.

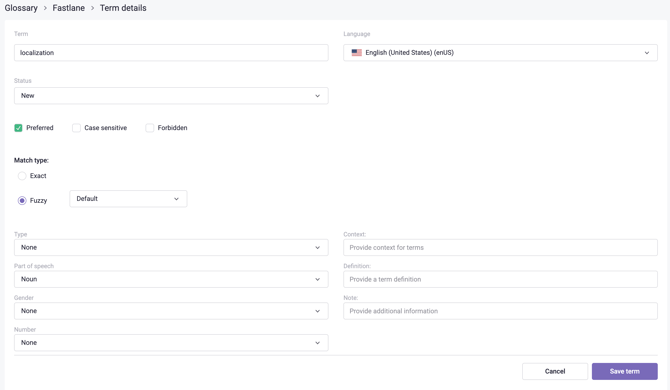
Edit term details
Click on a term to open the Term details and edit term variation:
- Term
- Language
- Status: new, approved.
- Preferred
- Case sensitive
- Forbidden
- Match type
- Type: abbreviation, acronym, full form, phrase, short, variant.
- Part of speech: adjective, adverb, noun, verb
- Gender: feminine, masculine, neutral
- Number: plural, singular, uncountable.
- Context
- Definition
- Note
Once done, click Save term.
Match types
Exact match
The term will only be detected when it appears exactly as entered in your glossary, with no variations.
Fuzzy match
Fuzzy match allows the system to detect variations of your term, such as different grammatical cases, plural forms, or slight variations. This is particularly useful when you need more flexible term matching.
Terms must be at least 2 characters long to use fuzzy match. If your term has fewer than 2 characters, the fuzzy match option will be disabled.
When you select fuzzy match, you can choose between two options:
Default fuzzy match
Gridly automatically matches the original term plus up to 6 additional characters.
Example: If your term is "game", the system will match: game, games, gamer, gamed, gameplay
Custom fuzzy match
Custom fuzzy match gives you more control by allowing you to set a marker to define which part of the term should match exactly (prefix) and which part can vary (suffix):
- Prefix must match exactly
- Suffix can vary by up to 6 characters
How to use custom fuzzy match:
- Select Custom under fuzzy match options.
- Your term will appear in a preview box.
- Drag the marker to place the marker within your term. The marker must be placed at least after the second character.
Example: If your term is "play|er":
- Gridly will match the prefix "play" exactly
- The suffix can vary, so it will match: play, player, playtime, playing, played, playful
Manage terms in a Glossary
Add/Remove terms in a language
Hover to a term and click ![]() to add a new term in the selected language. Similarly, click
to add a new term in the selected language. Similarly, click ![]() and confirm to remove a term.
and confirm to remove a term.

Approve terms
You can approve a term by clicking the status of the term and change it. To approve multiple terms, you can select terms and click ![]() to approve selected/all terms.
to approve selected/all terms.

When you approve a term, spellcheck will automatically ignore it. This means glossary terms with "Approved" status won't be flagged as spelling errors, even if they wouldn't normally be recognized by the spellchecker. Similarly, QA check will categorize it as Information instead of Error. This is particularly useful for:
- Product-specific terminology
- Brand names
- Technical terms
- Industry-specific jargon
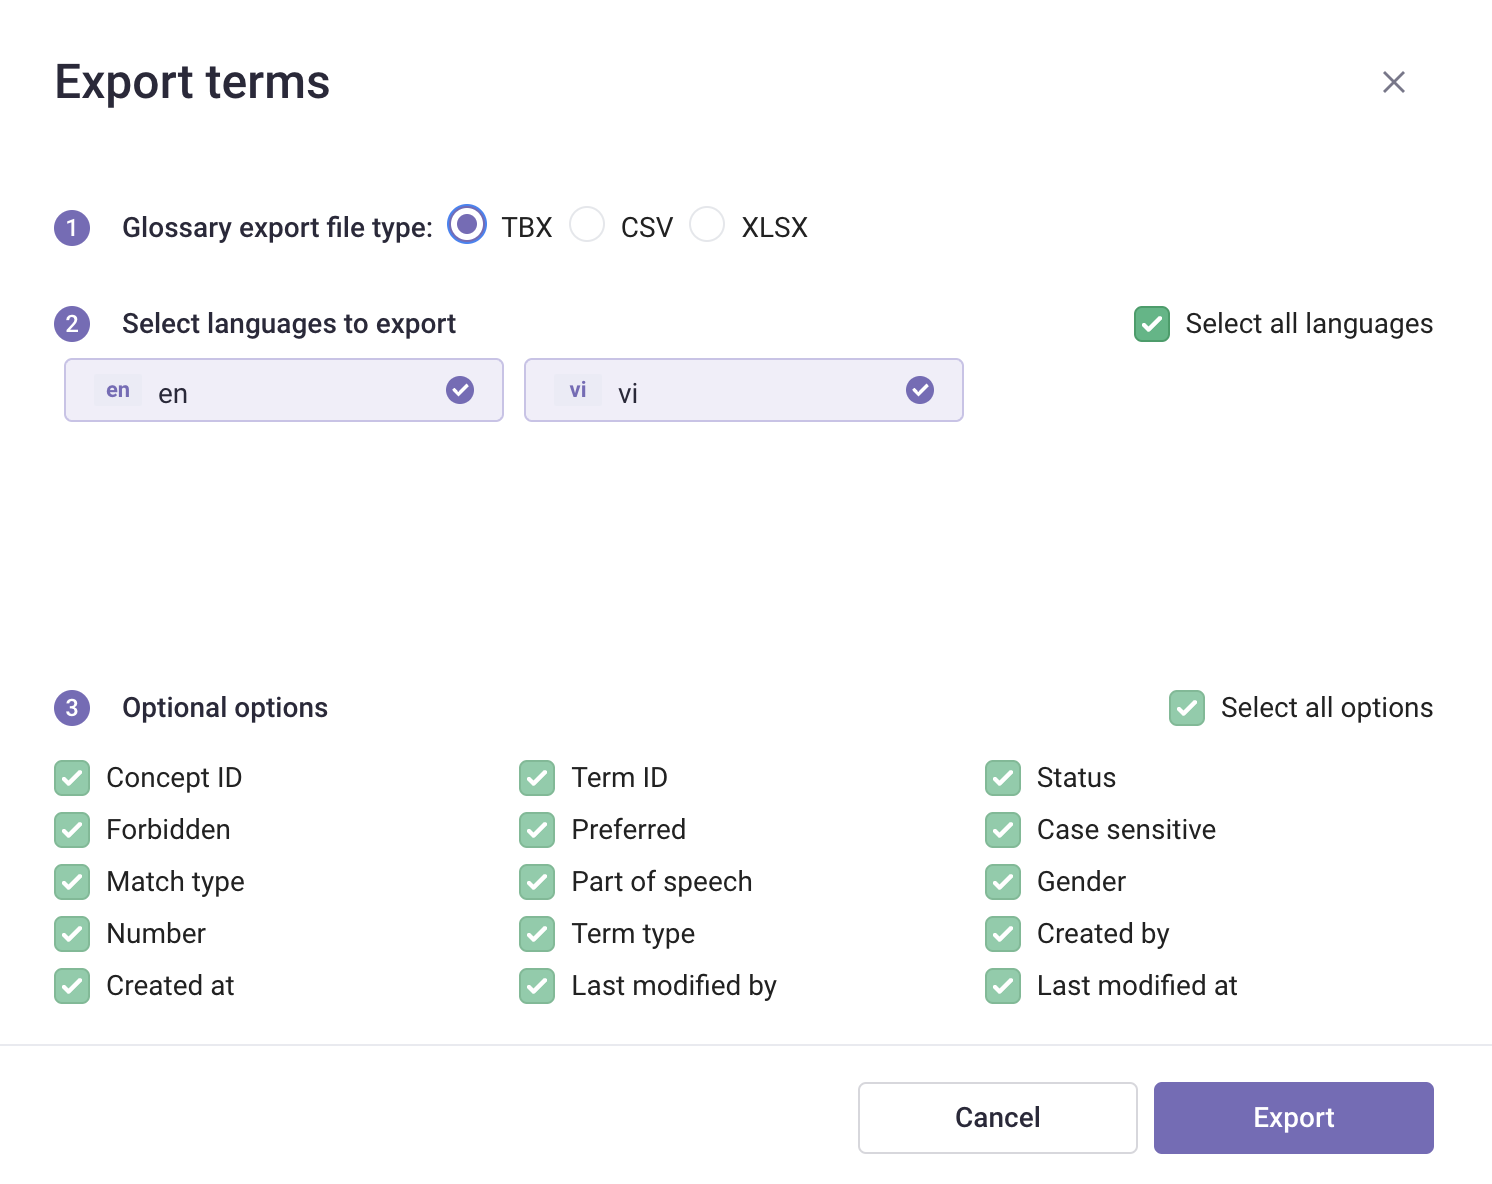
Export terms
- Open a Glossary, click
 to export terms.
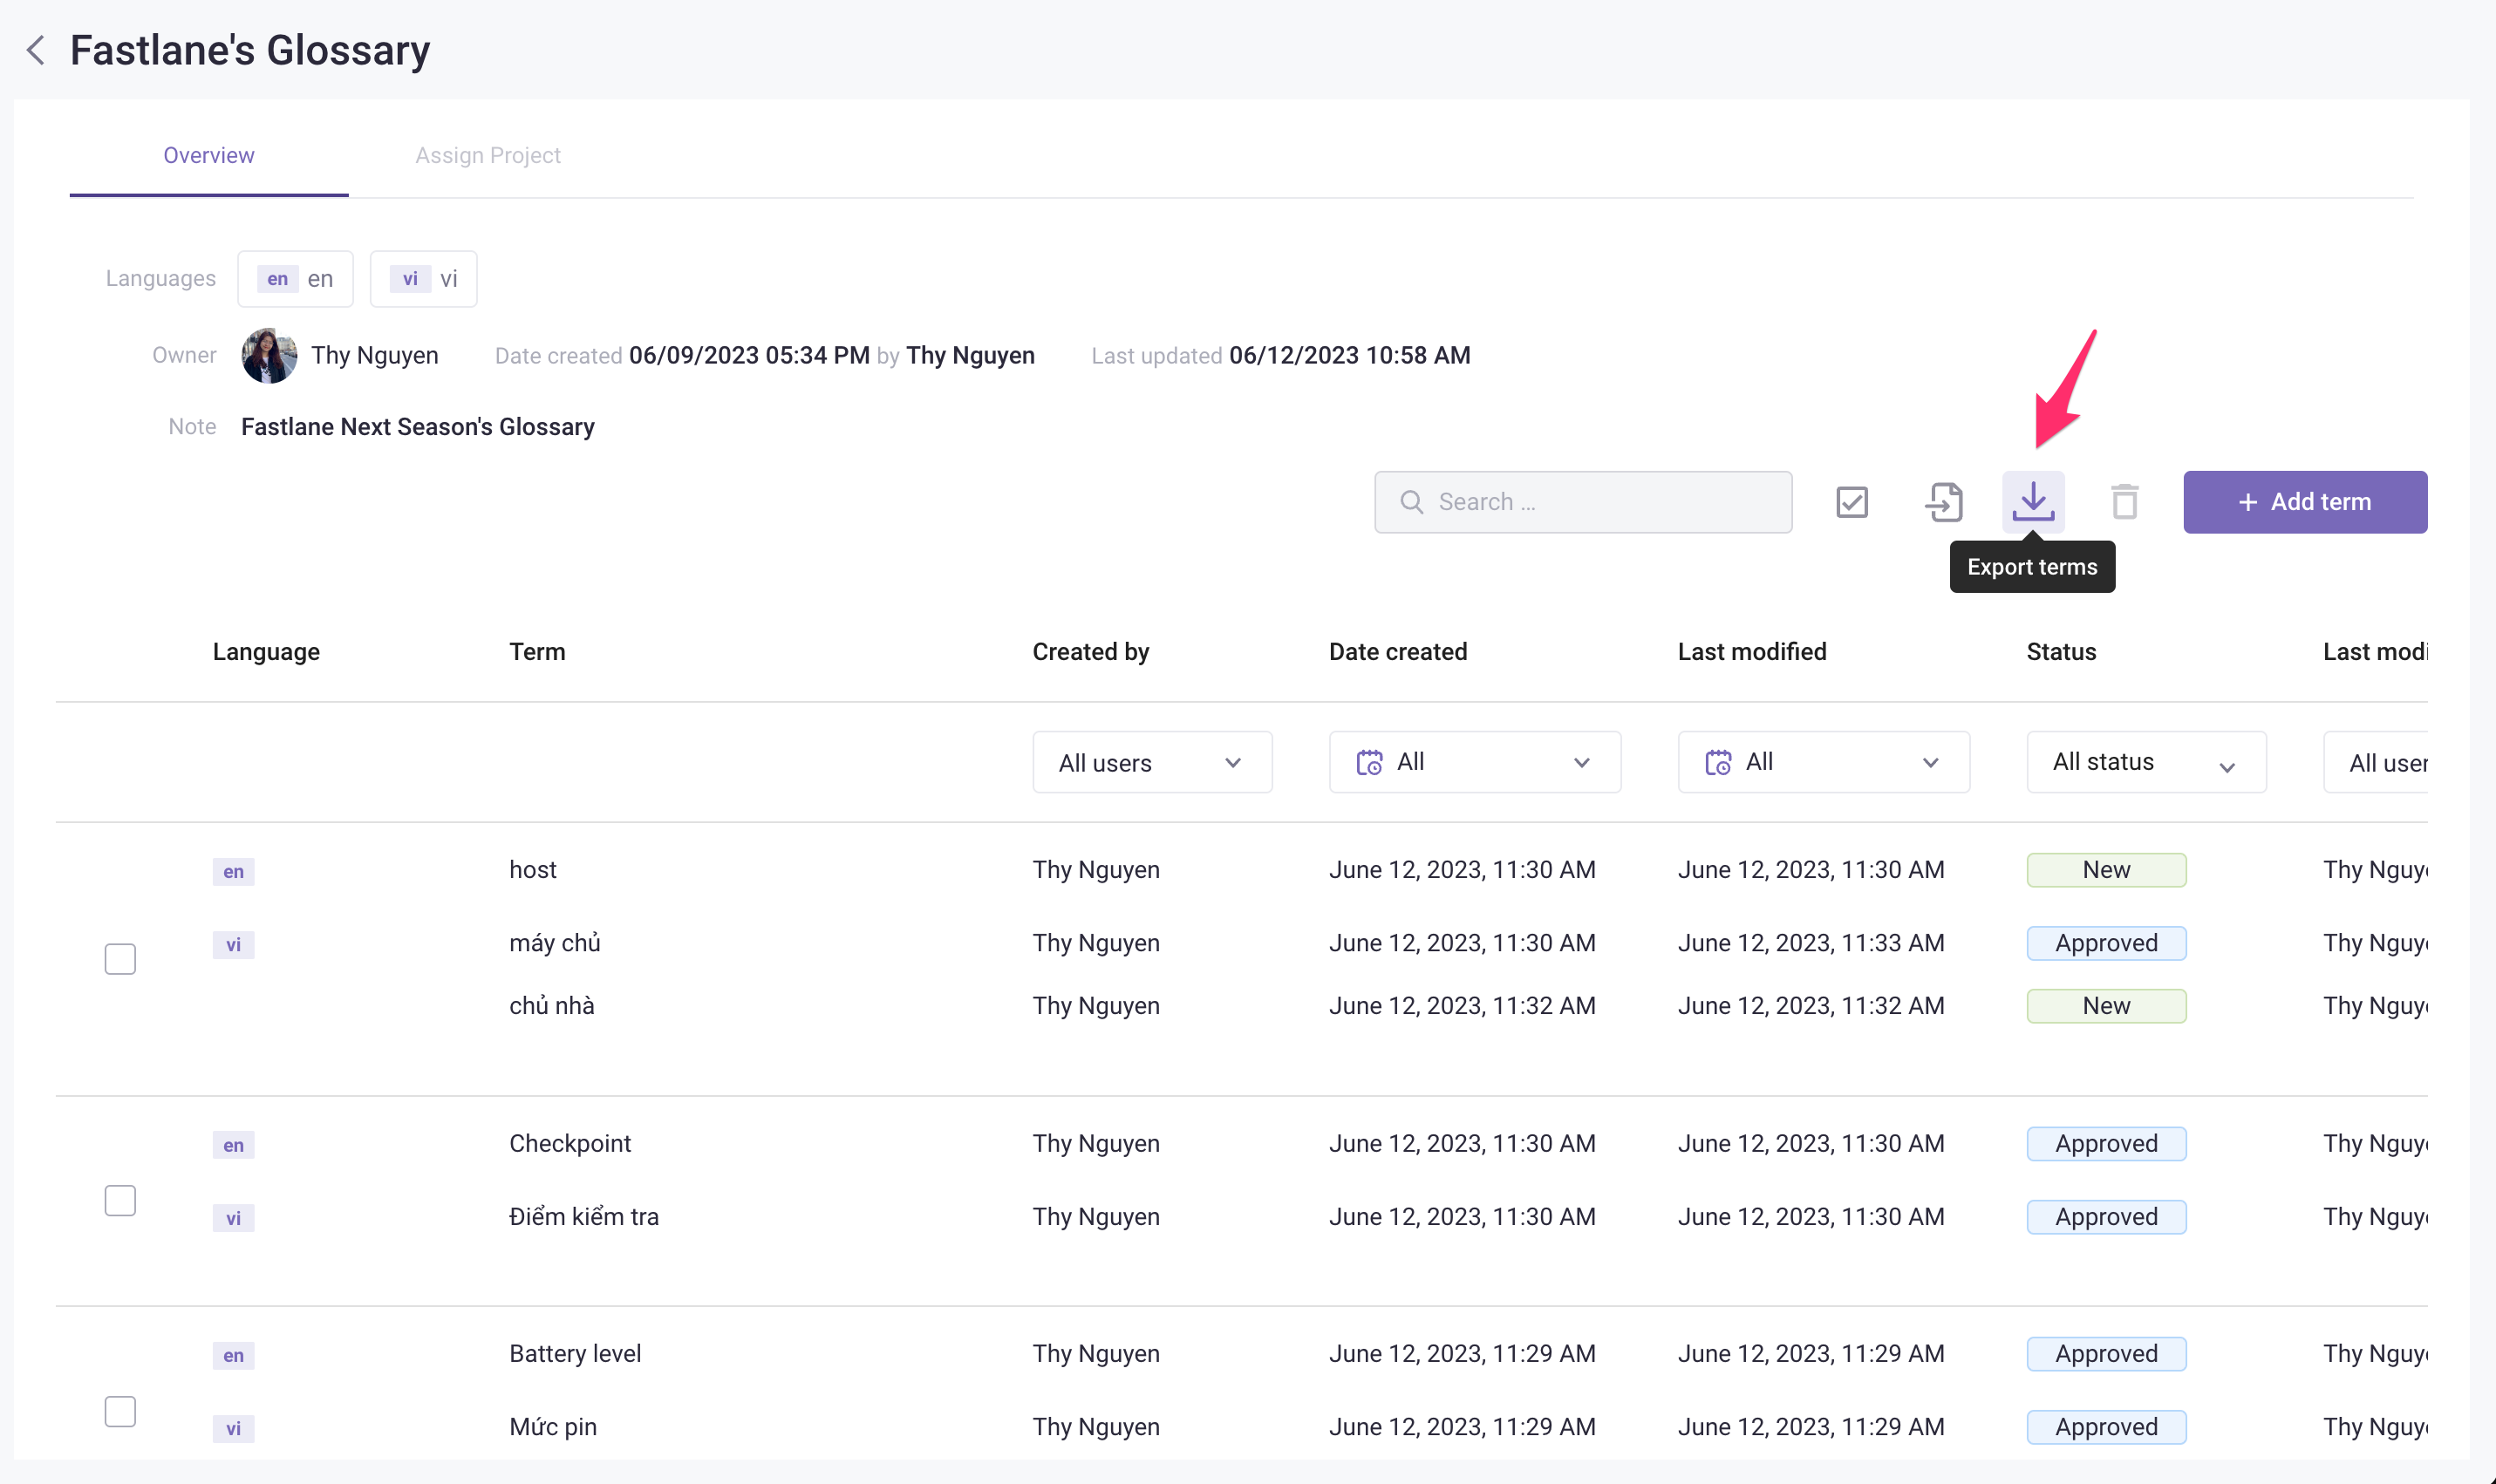
- Select the export file type: TBX, CSV, XLSX.
- Select languages to export.
- Select the optional options you would like to include in the exported file. If you exported the file in TBX format, you will be required to export all Optional options.
- Once done, click Export.
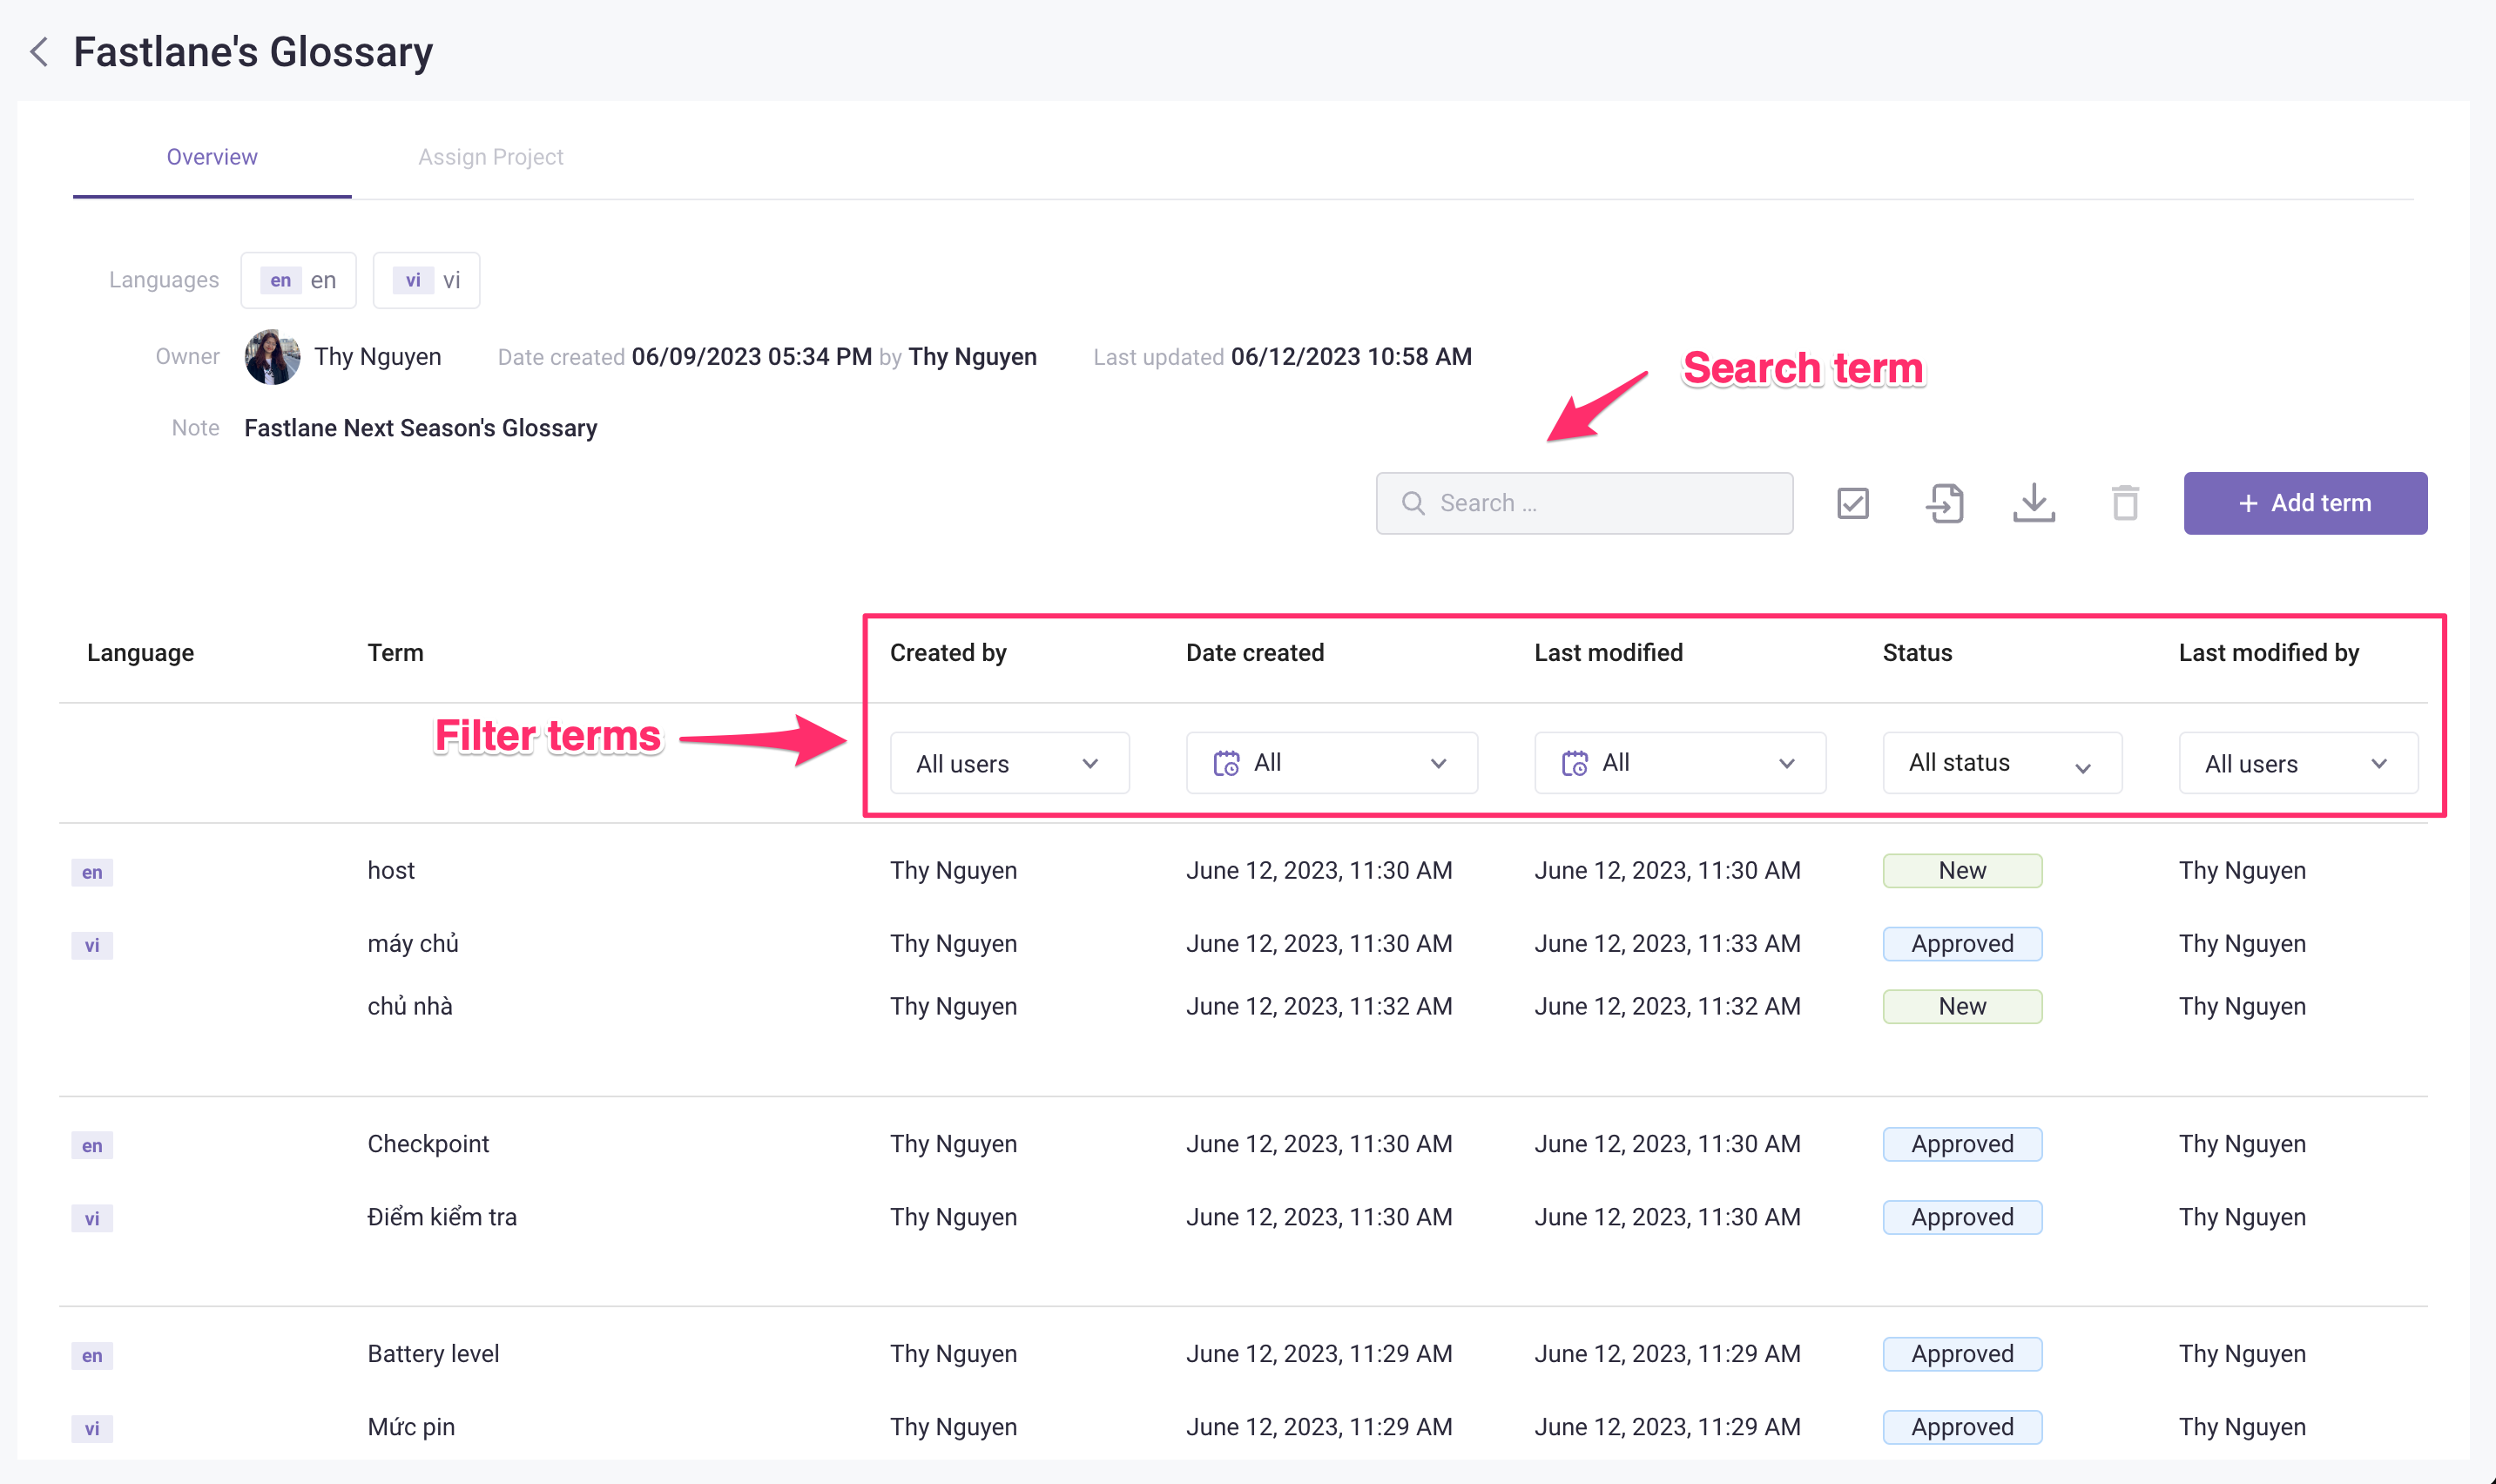
Search & Filter terms
Search for a Glossary by name using the search bar. Filter terms by created user, created date, last modified date, status, and last modified user.
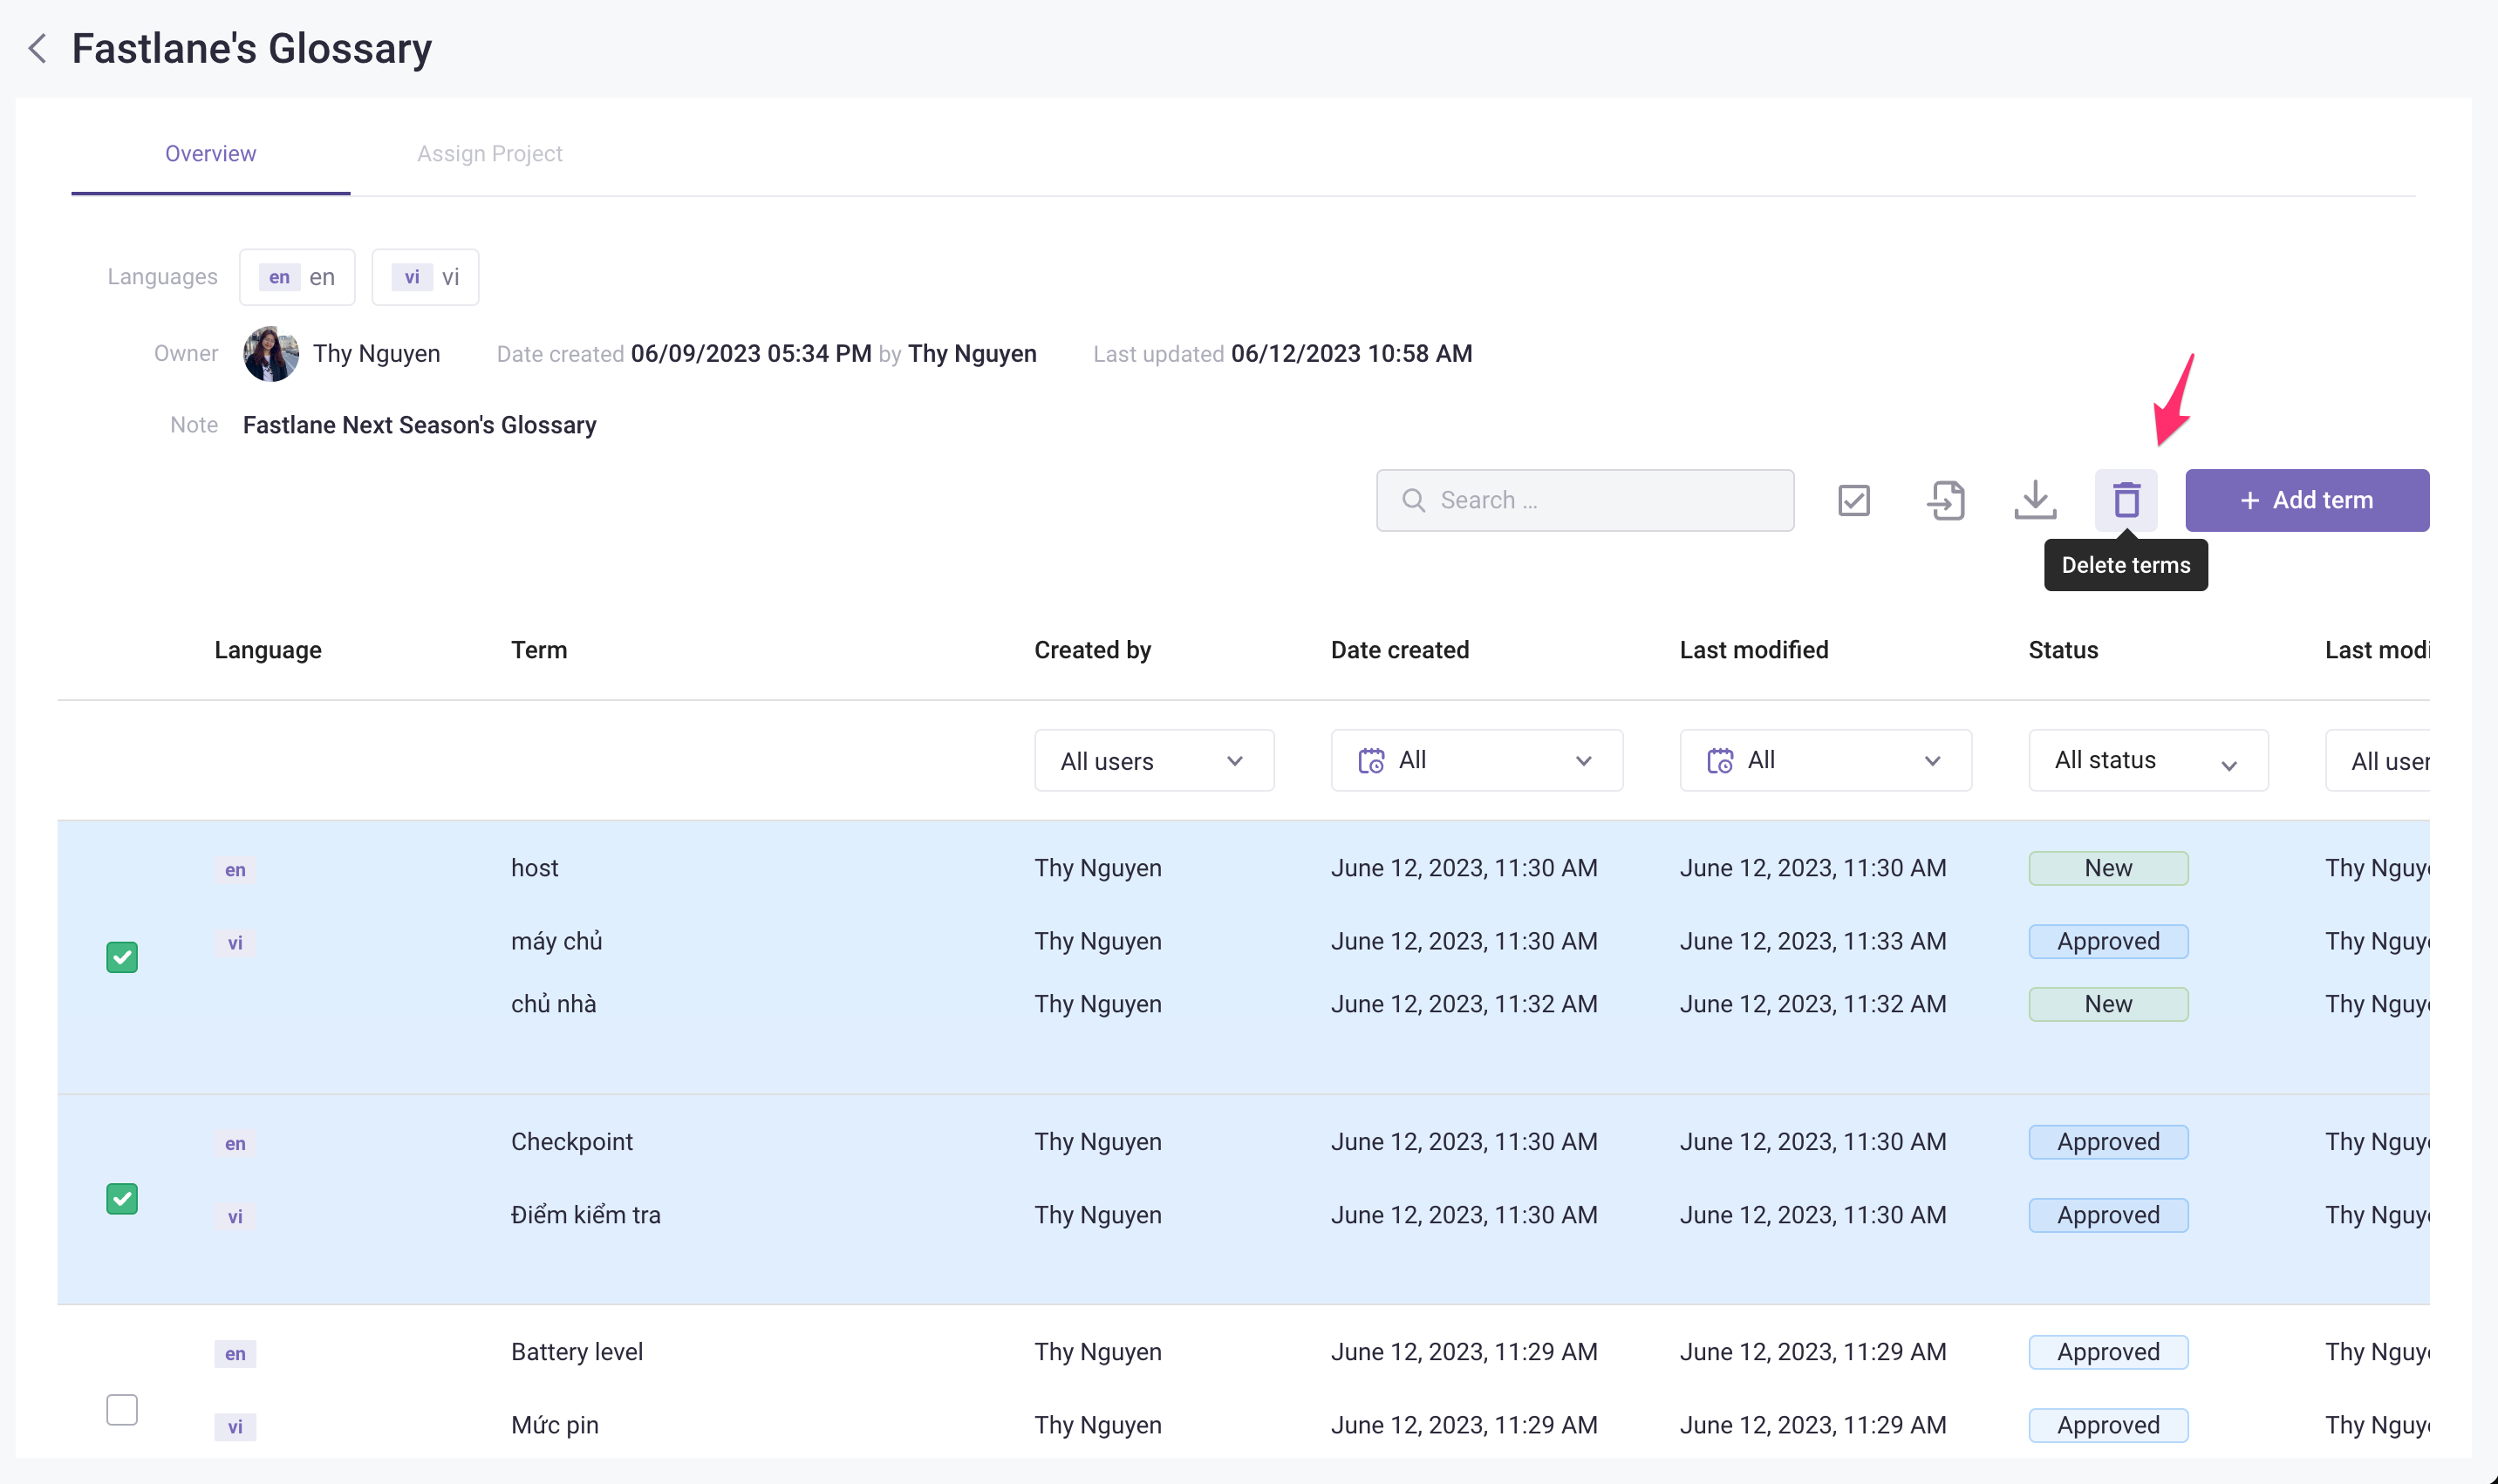
Delete terms
Delete terms by clicking the checkboxes to select the terms you want to remove, and then click ![]() .
.
Overwrite existing terms
When importing terms in bulk to a glossary, the ability to overwrite existing terms depends on the term ID associated with each entry. Here’s how it works:
-
Matching termID: If the term ID of the new term matches an existing termID in the glossary, any changes made to that term will be imported and overwrite the existing entry.
-
New termID: If the new term has a different term ID than any existing entries, it will be treated as a new entry and will not overwrite any existing terms.
Clear all terms
To remove all terms from a glossary at once, click the ![]() button in the toolbar.
button in the toolbar.
This action permanently deletes all terms in the glossary and cannot be undone. Make sure to export your terms before clearing if you need a backup.

Assigning glossaries
CMS module
Assigning Glossaries to a Database makes them available to all Grids within that Database.
- In a CMS Project, click
 next to the Database name.
 - Select Settings and switch to the Localization setting tab.
- Click on Glossaries and choose the Glossaries you want to assign from the dropdown menu.
- Click Save.

TMS module
Assigning Glossaries to a Category makes them available to all Jobs within that Category.
- In a TMS Project, clicknext to the Category name.
- Select Settings and click Localization setup.
- Click on Glossaries choose the Glossaries you want to assign from the dropdown menu.
- Click Save.

Along with Glossaries, using Translation Memory (TM) can also improve the translation quality and speed up the translation process. Click here to learn more: Translation Memory (TM).