
Table of contents:
The Send web request automation action enables you to automatically send HTTP requests (webhooks) to external systems whenever specific events occur in your Gridly Grid. This allows you to integrate Gridly with third-party services, trigger builds in deployment platforms, and create real-time synchronization between Gridly and your other tools.
With the Send web request action, you can instantly update content on websites, notify external systems about Grid changes, and build custom integrations that keep your workflows connected and automated.
If you are not familiar with creating an Automation, please view the following article: Creating an Automation.
Not the Automation action you need? Check out the full list of all Automation actions in Gridly.
You can configure webhooks for all available triggers, check out the full list of Automation triggers in Gridly.
Web requests have a 75-second timeout limit. If your endpoint doesn't respond within this timeframe, the automation will be marked as Failed in the Run history.
Setup
After creating the automation, you need to configure the trigger and action.
Add a trigger
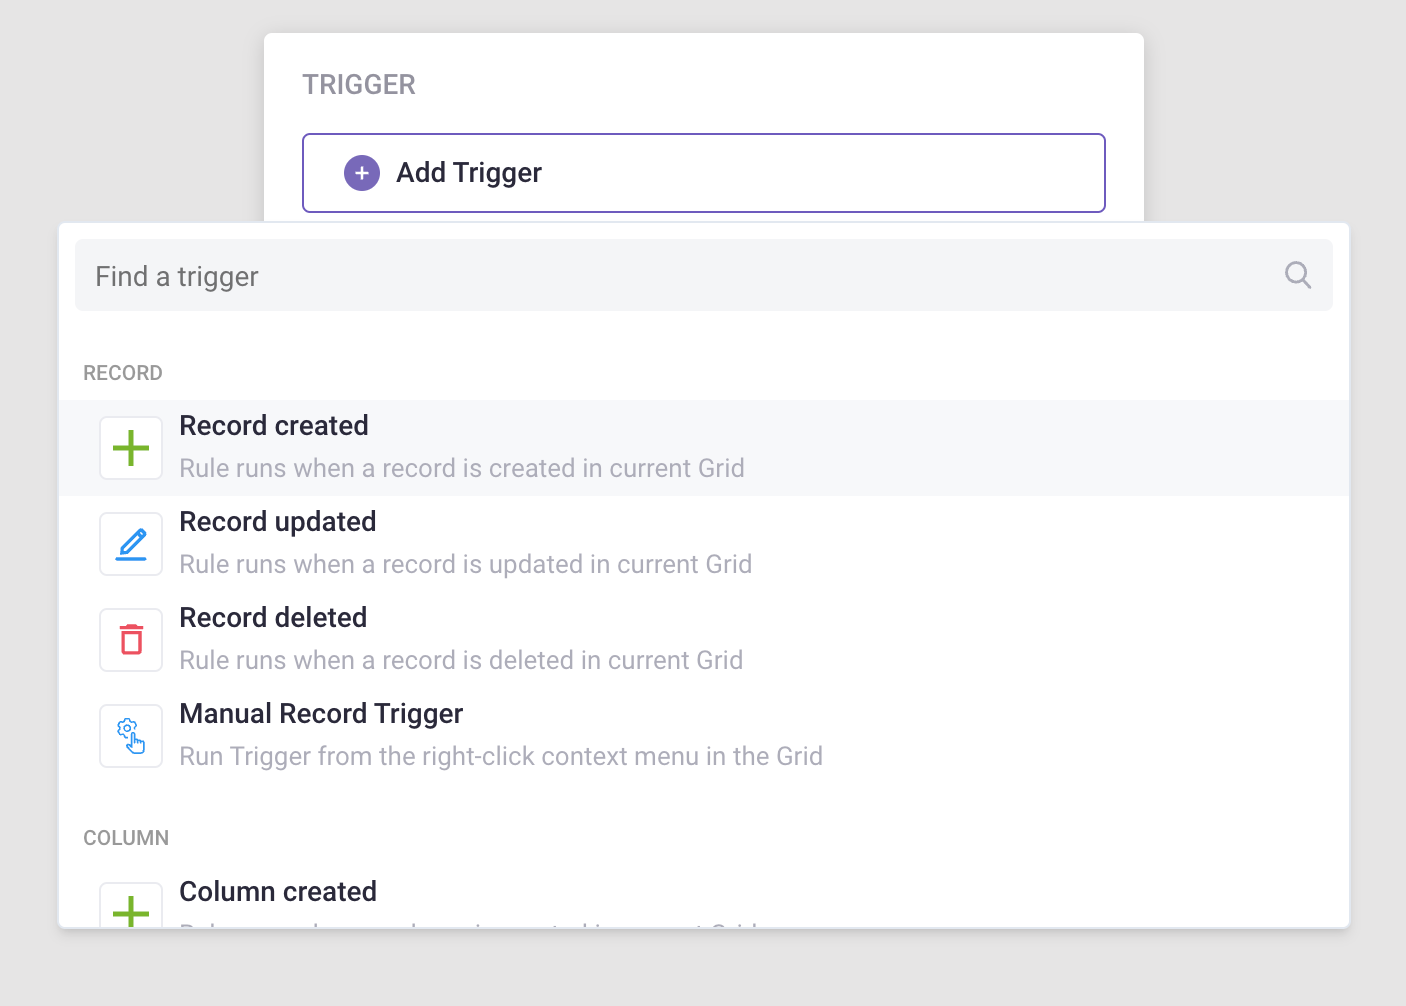
Click Add Trigger and select a trigger that fits your use case.
Add Send web request action
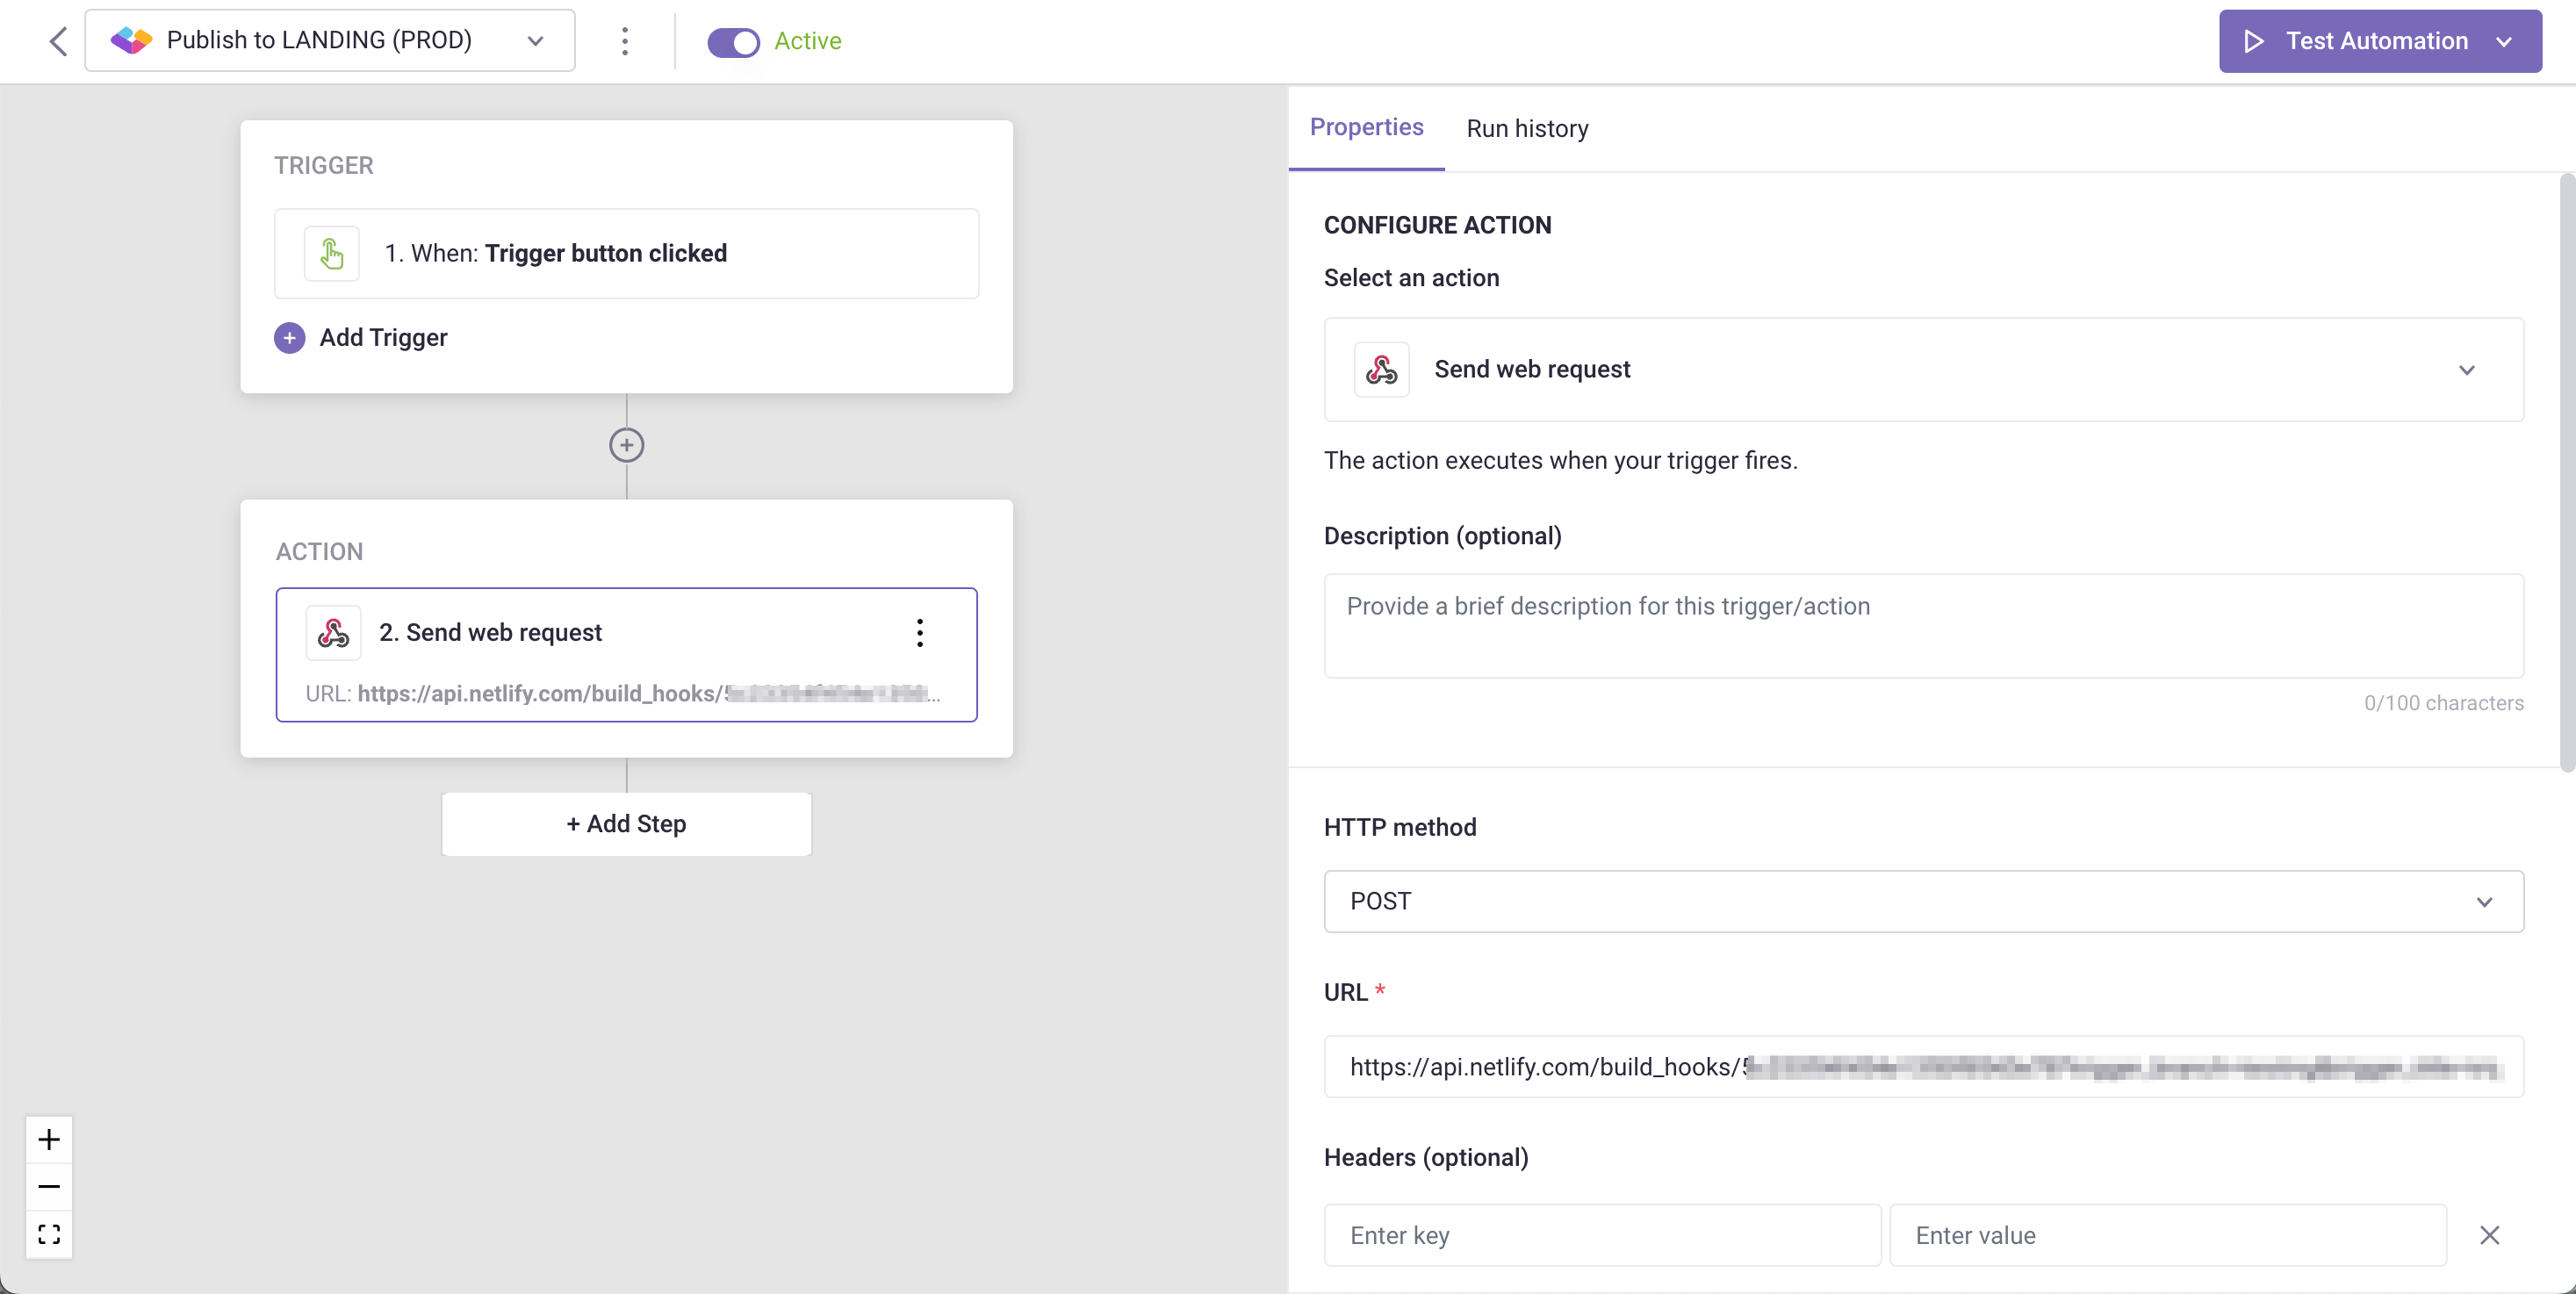
- Click Add Step and select Send web request in the list of actions.
- Select a HTTP method (POST, PUT, or DELETE).
- Use the POST or PUT methods if you’re sending files.
- Use DELETE if you want to delete a resource from the server.

Optionally, you can configure:
- Query string parameters: Add URL parameters with fixed values or dynamic values from Grid cells.
- Headers: Set custom headers for authentication, content type, or other request metadata.
- Payload: Customize the request body. Leave empty to send all Grid data (database, Grid, view, trigger event, user, cell's data, and variables) automatically, or enter '{}' for an empty payload.
- Output fields: Define variables to capture response data for use in subsequent automation steps.
- Postbacks: Map the web request's response to columns in your Grids.
If your webhook endpoint (URL) is behind a firewall/private network, you’ll need to whitelist Gridly's IP address: 18.192.141.172/32.
Test your Automation
- Turn on the Automation using the switch next to Automation name.
- Click Test Automation. If your Automation is not turned on, Gridly will require you to turn it on in a pop-up message.
Example: Update content to Netlify
This example will demonstrate how to connect Gridly with Netlify using the Send web request Automation action. The result will be an automation that triggers a build hook in Netlify whenever the Execute button is clicked.
Please note that this example focuses on showcasing how to send web requests between apps. All other necessary configurations have been completed in advance.
- Open the Grid used to store the website's content.
- On the right side panel, click
 to access the Automation tab, then select Create an Automation.
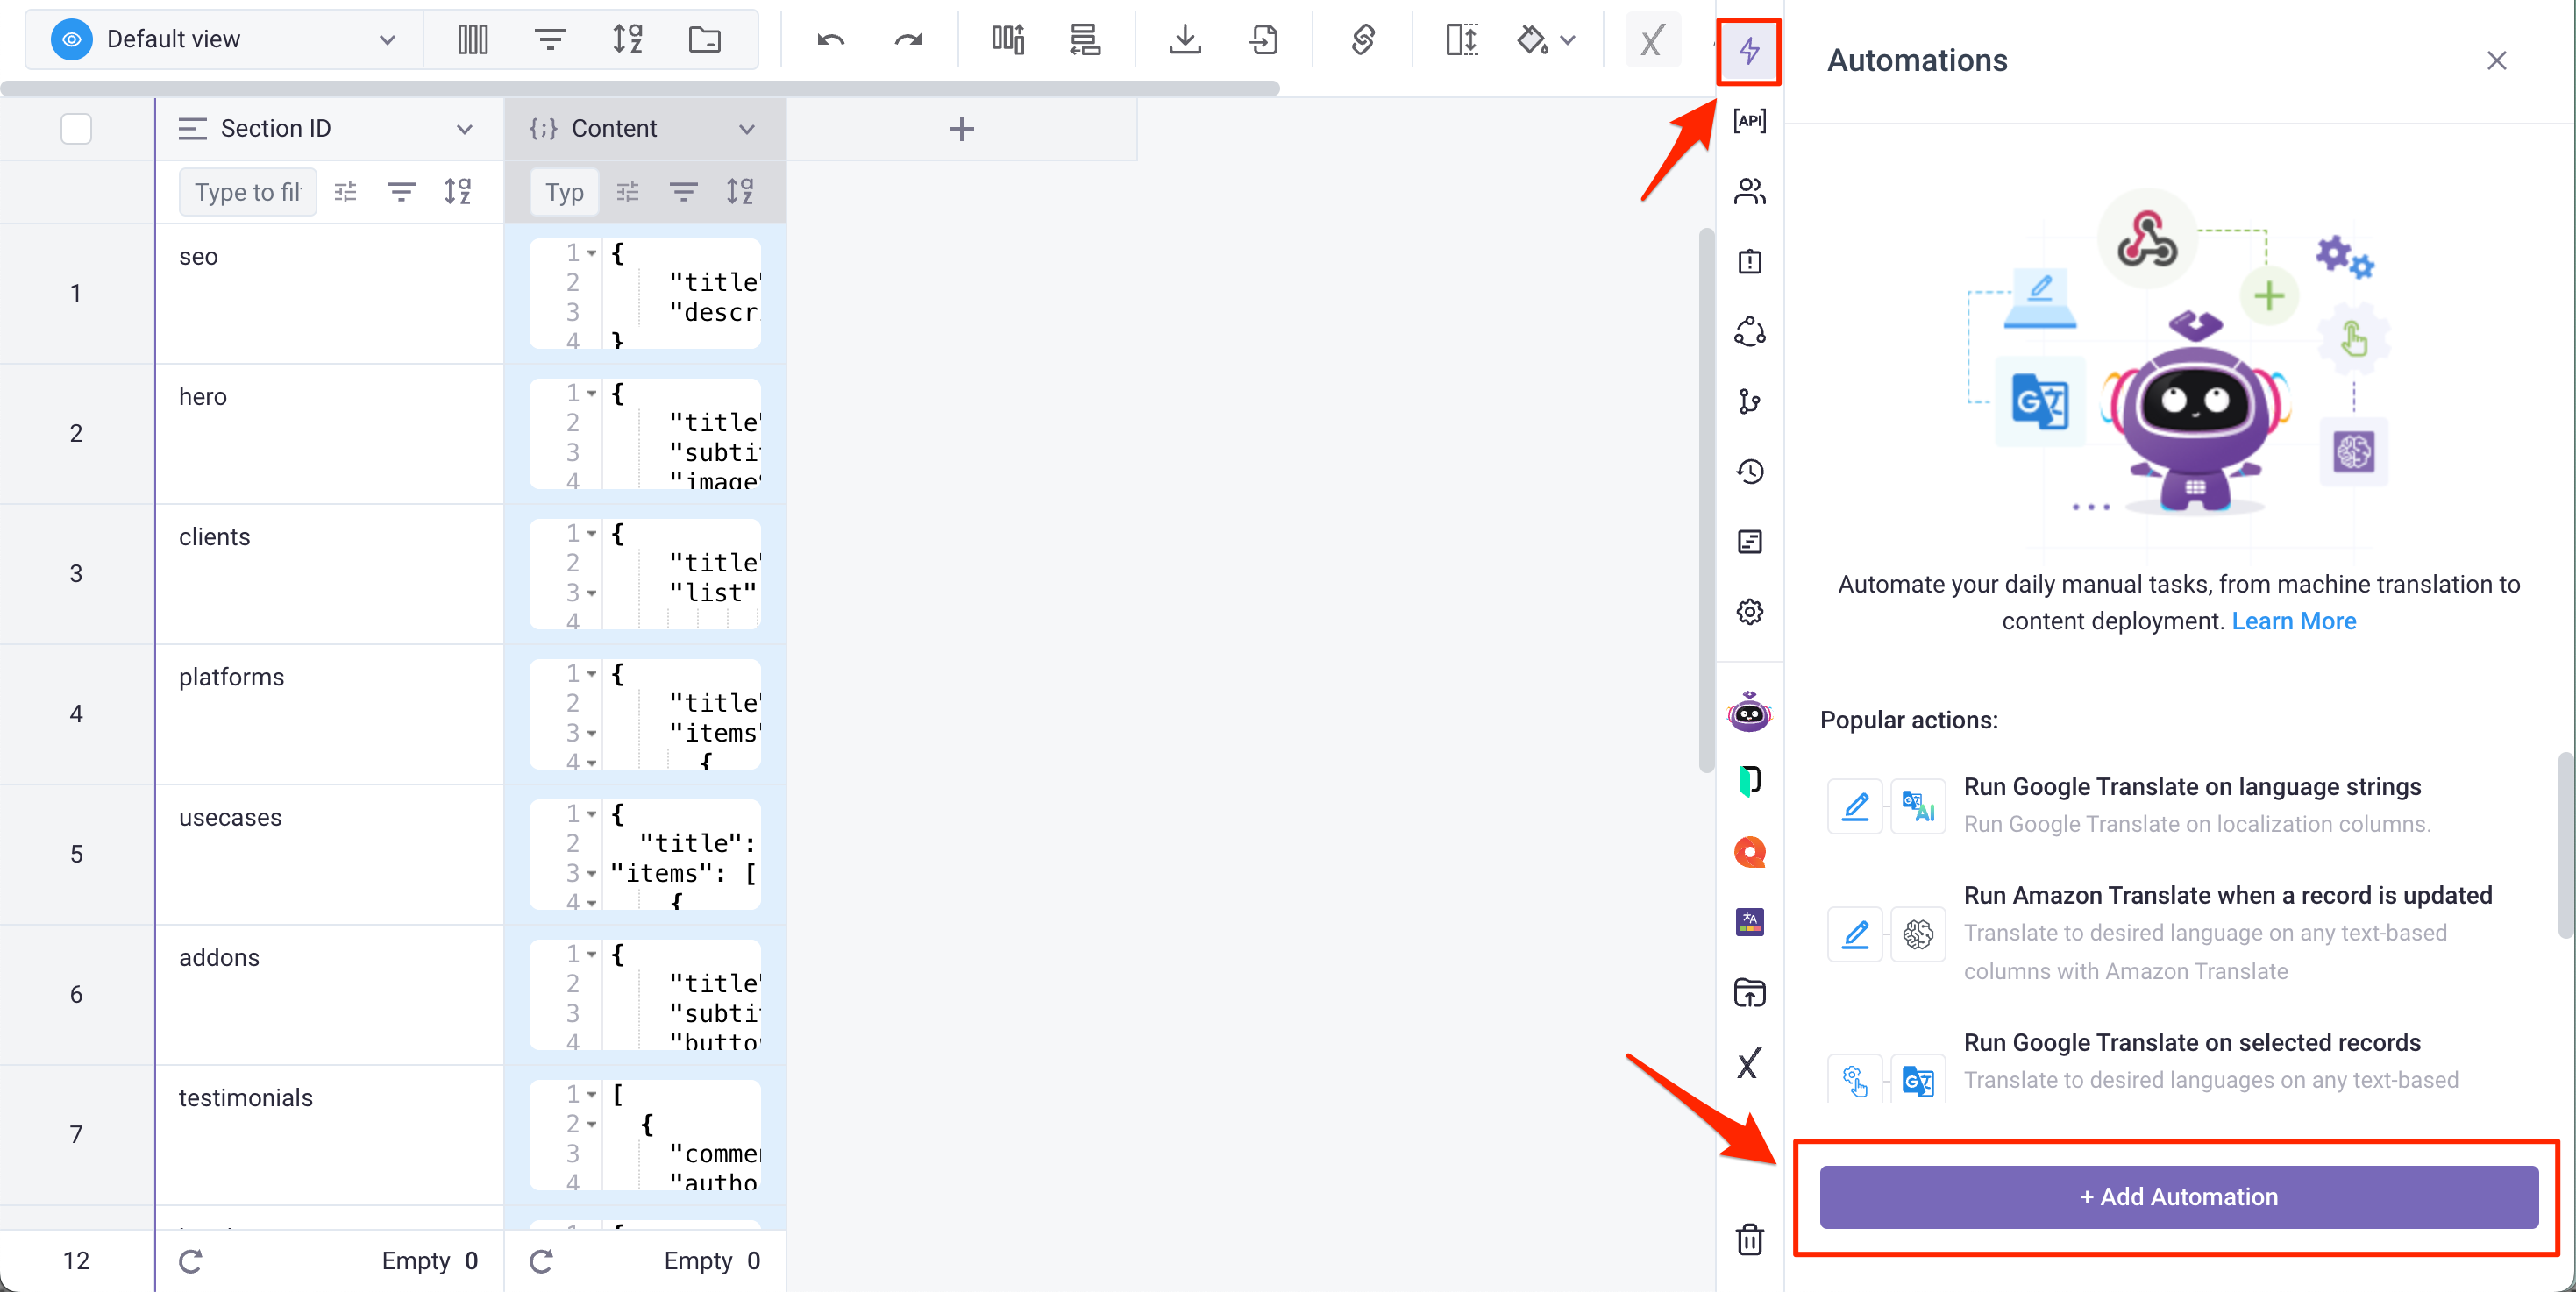
- Click Add Trigger, and choose Manual Record Trigger as the trigger.
- Next, click Add Step, and select the Send web request as the action.
- Enter the Netlify build hook endpoint in the URL field.
- Test the Automation.

- To run the Automation, click Execute in the Automation tab. This action will trigger a build process in Netlify.
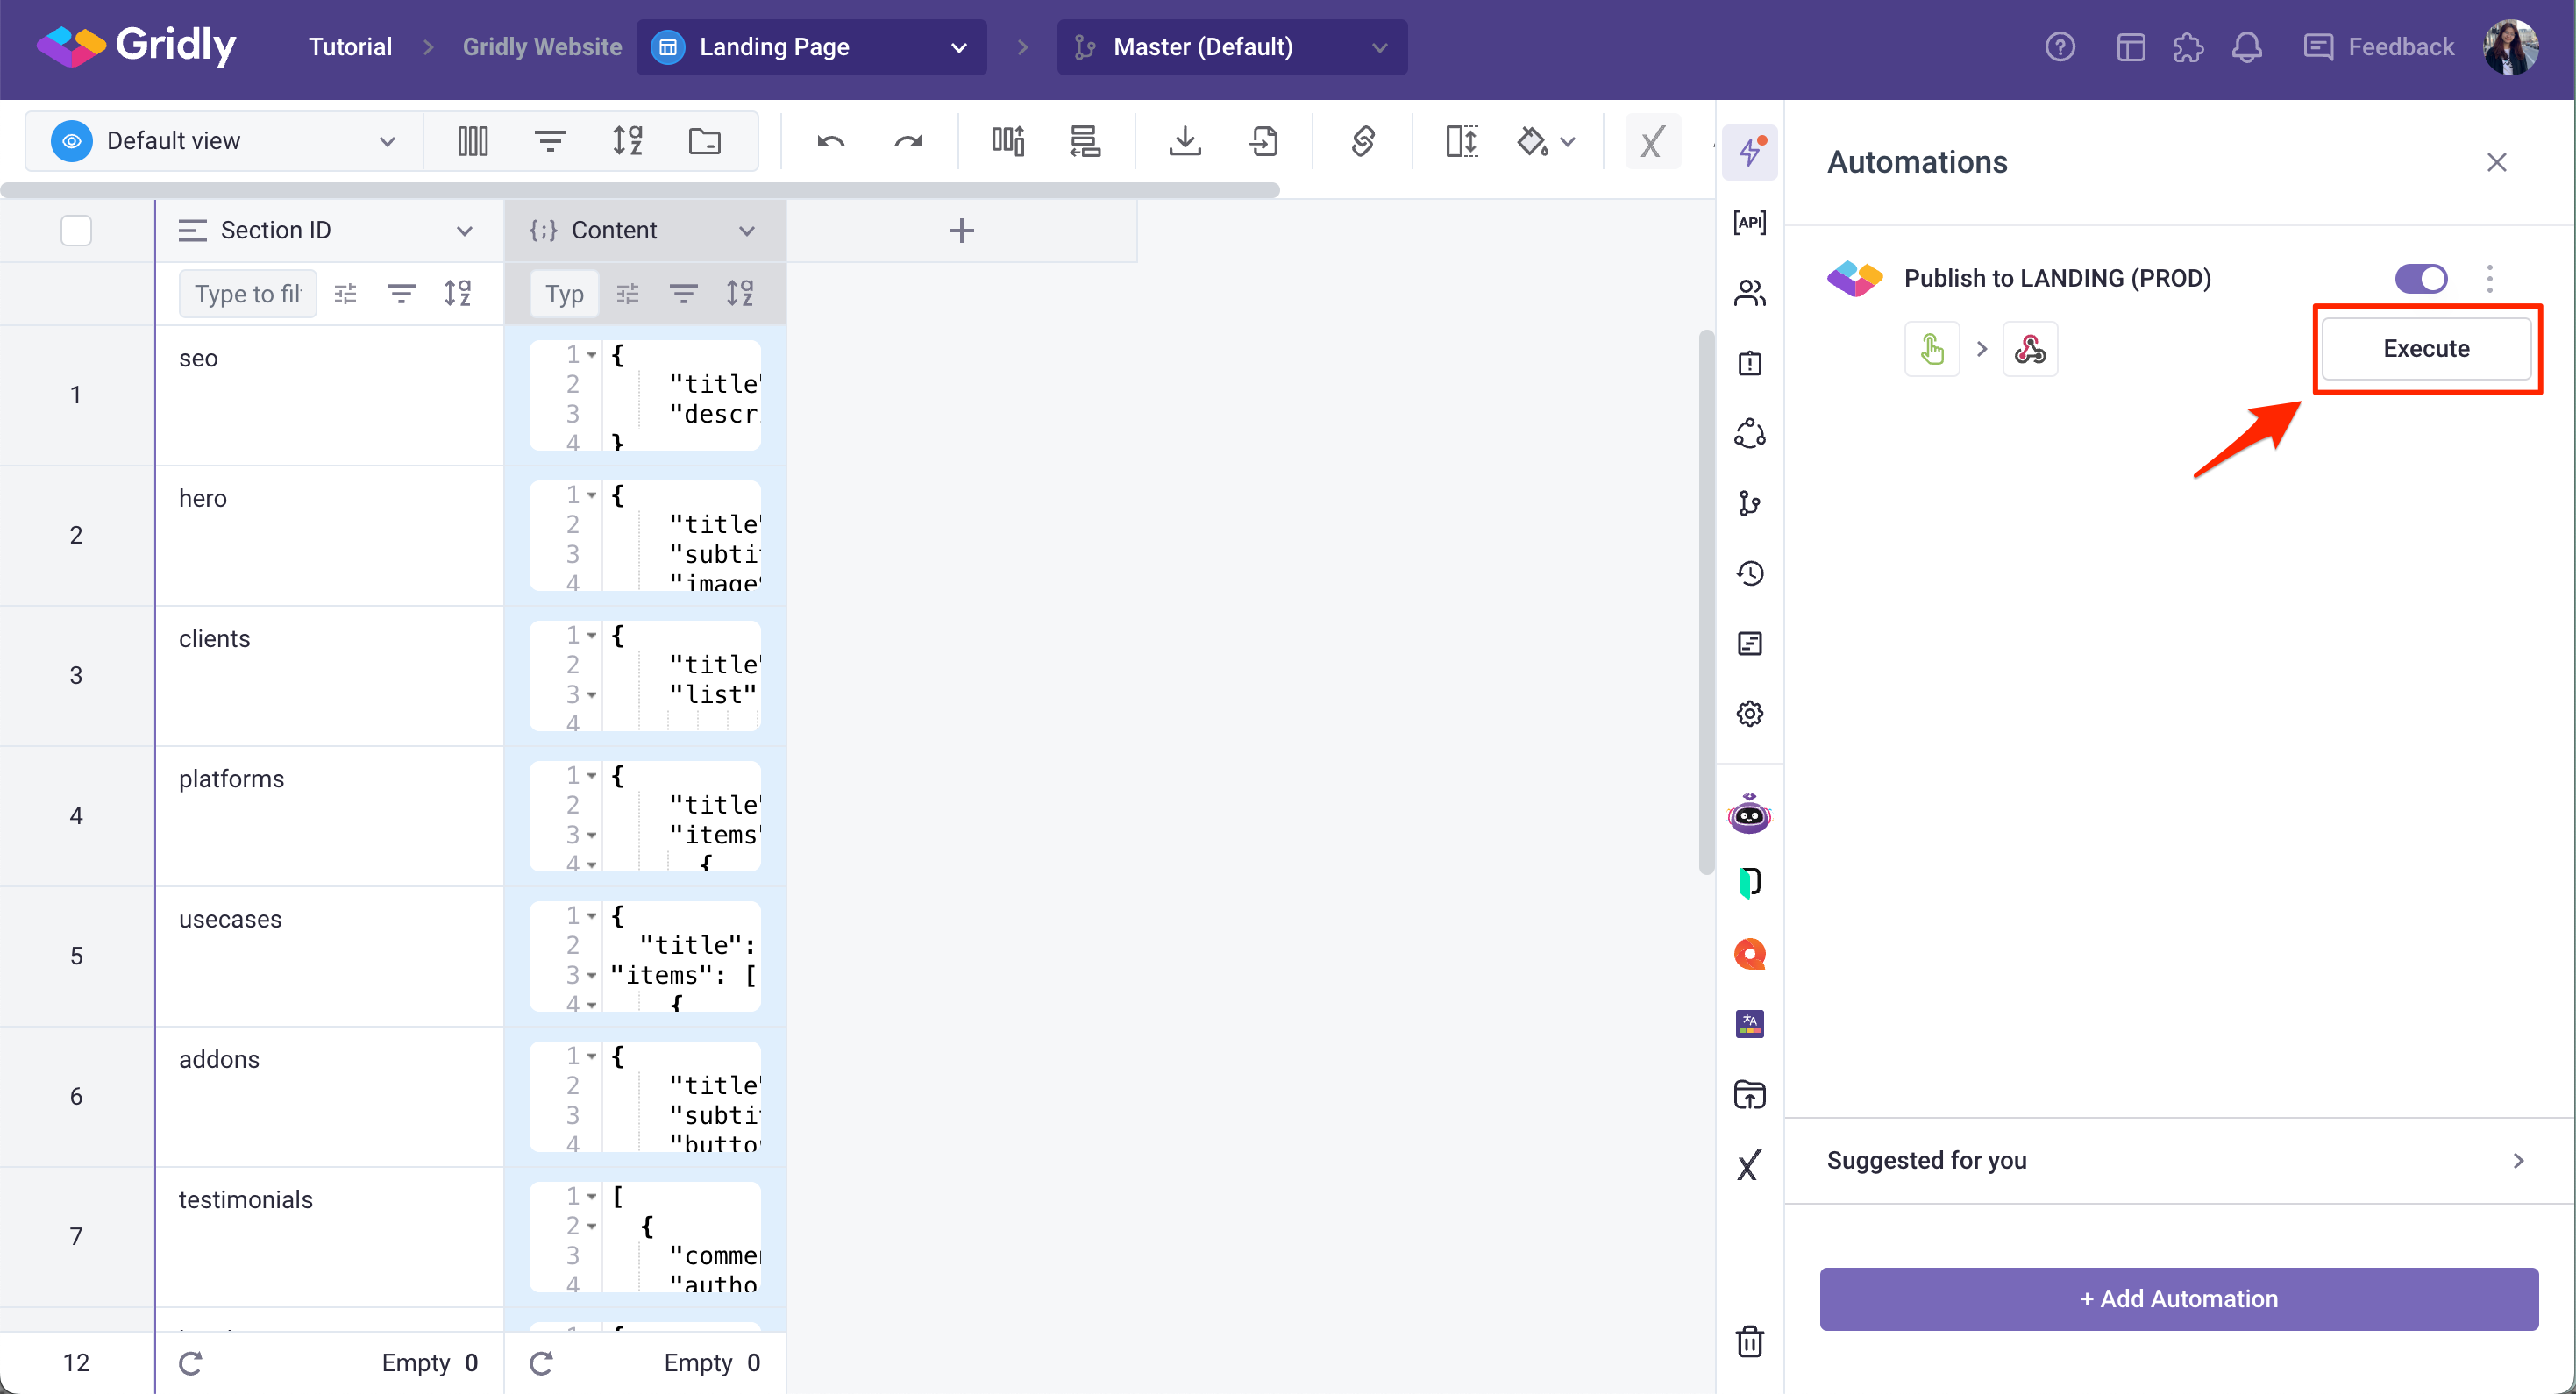
- Wait for a few seconds and your website will be updated with new content.
If you’re interested in updating your content in real-time easily - without latency, check out Gridly CDN.
Don't see what you need? Gridly can support custom development for solutions not available out of the box. Contact support@gridly.com to discuss your requirements.