With Gridly connector, you can connect MySQL with Gridly and easily sync your data.
If you are using Gridly connectors for the first time, click here to learn more: Gridly connector overview.
Open Gridly connectors
There are two ways to access Gridly connectors:
Open Integration settings
- On the project page, click
 next to the company name.
 - Select Integration settings from the dropdown.
- The Gridly connectors page will be displayed by default.
Open Integration popup
You can also open Gridly connectors anywhere in Gridly.
- Click
 in the header to open the Integration pop-up.
 - Select Gridly connectors from the side panel.
Create a new source in Gridly
- In Gridly connectors, switch to the Sources tab.
- In the top-right corner, click + New source.
- On the Set up the source page, enter a name for your source.
- From the Source type dropdown, select My SQL as the data source.
- Complete Database information
- Host: URL of the database
- Port: Port to use for connecting to the database
- Database: database name
-
Enter Database credentials
- Username
- Password
- JDBC URL Params (optional): Additional properties to pass to the jdbc url string when connecting to the database.
- Replication Method: the method used for extracting data from the database. STANDARD replication requires no setup on the DB side but will not be able to represent deletions incrementally. CDC uses the Binlog to detect inserts, updates, and deletes. This needs to be configured on the source database itself.
- Select SSH Tunnel method: select whether to initiate an SSH tunnel before connecting to the database, and if so, which kind of authentication to use. Learn more about Connection via SSH Tunnel below.
- Click Save & check connection.
Connection via SSH Tunnel
If it is not possible (or against security policy) to connect to the database directly (e.g. it does not have a public IP address), Gridly allows connecting to a MySQL instance via an SSH Tunnel.
When using an SSH tunnel, you are configuring Gridly to connect to an intermediate server (a.k.a. a bastion server) that does have direct access to the database. Gridly connects to the bastion and then asks the bastion to connect directly to the server
In the SSH Tunnel Method field, there are two options for you: No tunnel (a direct connection)
and SSH Key Authentication.
No tunnel is selected by default, if you want to use SSH Tunnel, select SSH Key. Authentication or Password Authentication.
- Choose Key Authentication if you will be using an RSA private key as your secret for establishing the SSH Tunnel.
- Choose Password Authentication if you will be using a password as your secret for establishing the SSH Tunnel.
SSH Key Authentication
Fill in all the information:
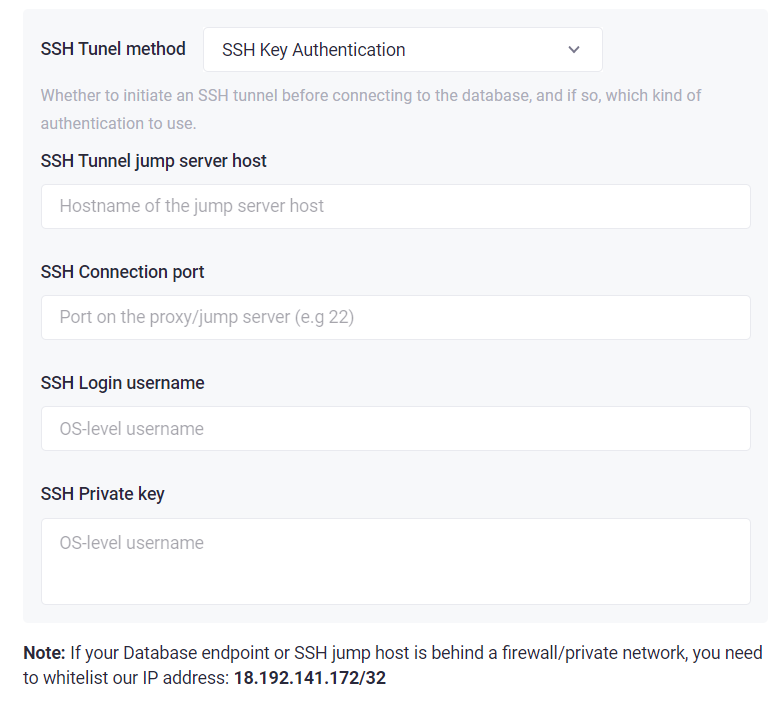
- SSH Tunnel jump server host: the intermediate (bastion) server that Airbyte will connect to. This should be a hostname or an IP Address.
- SSH Connection port: the port on the bastion server with which to make the SSH connection. The default port for SSH connections is 22, so unless you have explicitly changed something, go with the default.
- SSH Login username: the username that Gridly should use when connecting to the bastion server. This is NOT the MySQL username.
- SSH Private key: enter the RSA Private Key that you are using to create the SSH connection. This should be the full contents of the key file starting with -----BEGIN RSA PRIVATE KEY----- and ending with -----END RSA PRIVATE KEY-----.
Password Authentication
Fill in all the information:

- SSH Tunnel jump server host: the intermediate (bastion) server that Gridly will connect to. This should be a hostname or an IP Address.
- SSH Connection port: the port on the bastion server with which to make the SSH connection. The default port for SSH connections is 22, so unless you have explicitly changed something, go with the default.
- SSH Login username: the username that Gridly should use when connecting to the bastion server. This is NOT the MySQL username.
- Password: password for the OS-user
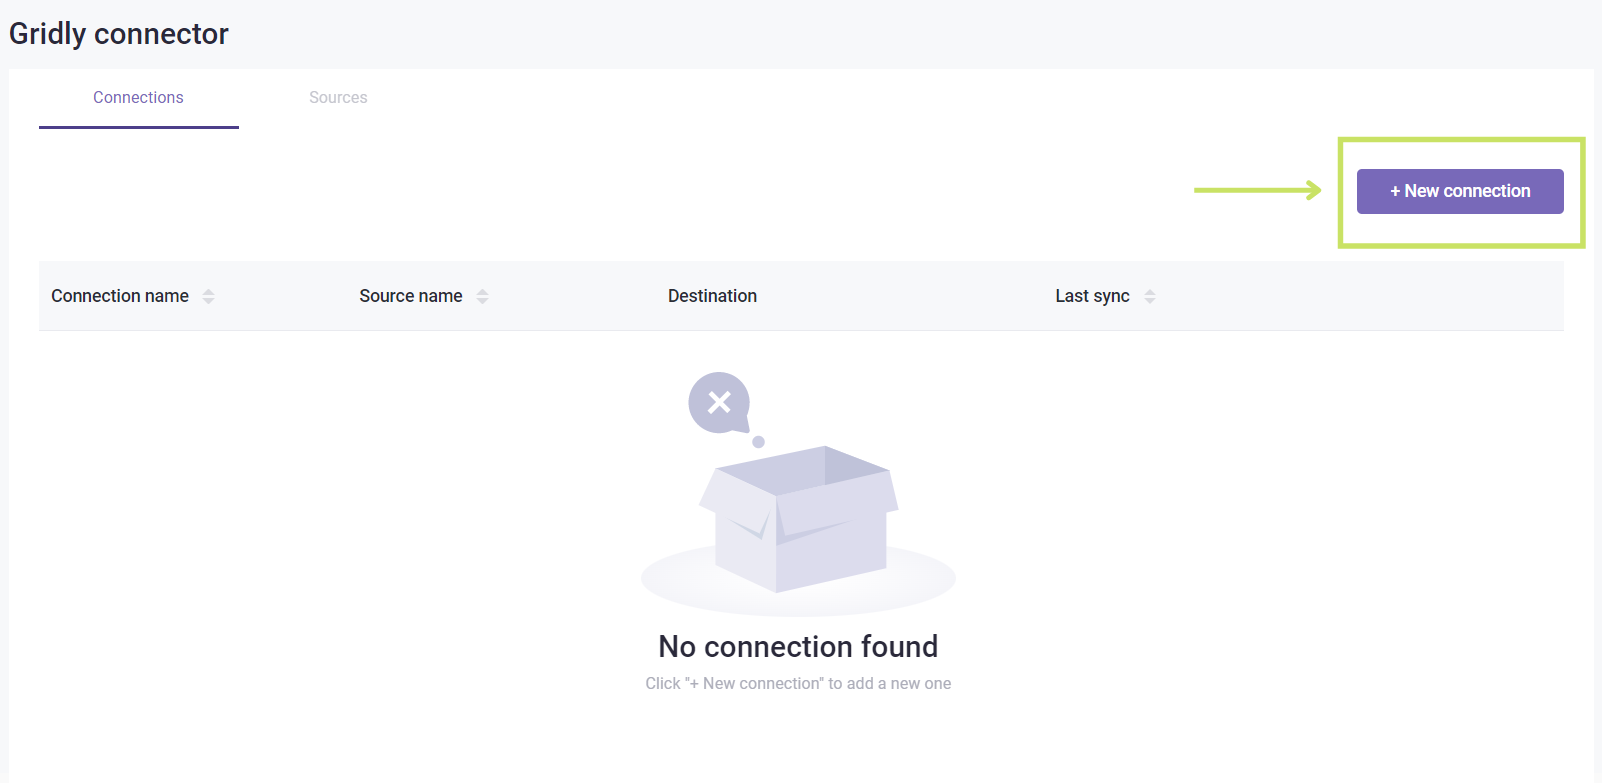
Set up a connection
- On the Gridly Connectors page, open Connections tab.
- Click + New connection.
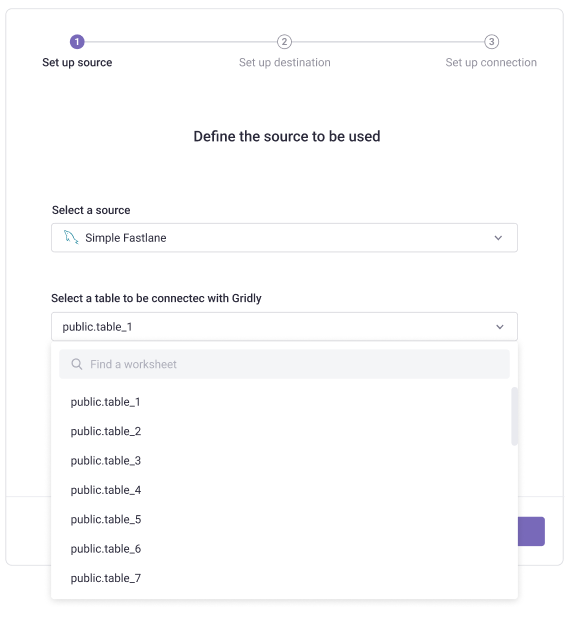
Set up source
- Select the MySQL source from the Source type dropdown.
- Select a source and a table to connect with Gridly and click Next.
Set up a destination Grid
- Select the Grid from a Database in a Project to which you want to transfer your data.
- Click Next.
Set up connection
- Map the columns of the table in MySQL with columns of your selected Grid.
- Click Sync now.

Sync data
- Open Gridly connectors, then open the Connections tab.
- Click on
 in a connection to sync data.
Note
Whenever the source is updated, you have to sync data in order to update the destination Grid.
Learn how to edit, rename, delete sources or connections in Gridly connectors: Manage Gridly connector.